Tutorial on Using Multiple ControlNets in ComfyUI
 In ControlNet, multiple ControlNets can be combined to achieve more precise control. For example, when generating characters, if there is a misalignment in the limbs, you can overlay depth to ensure the correct front-back relationship of the limbs.
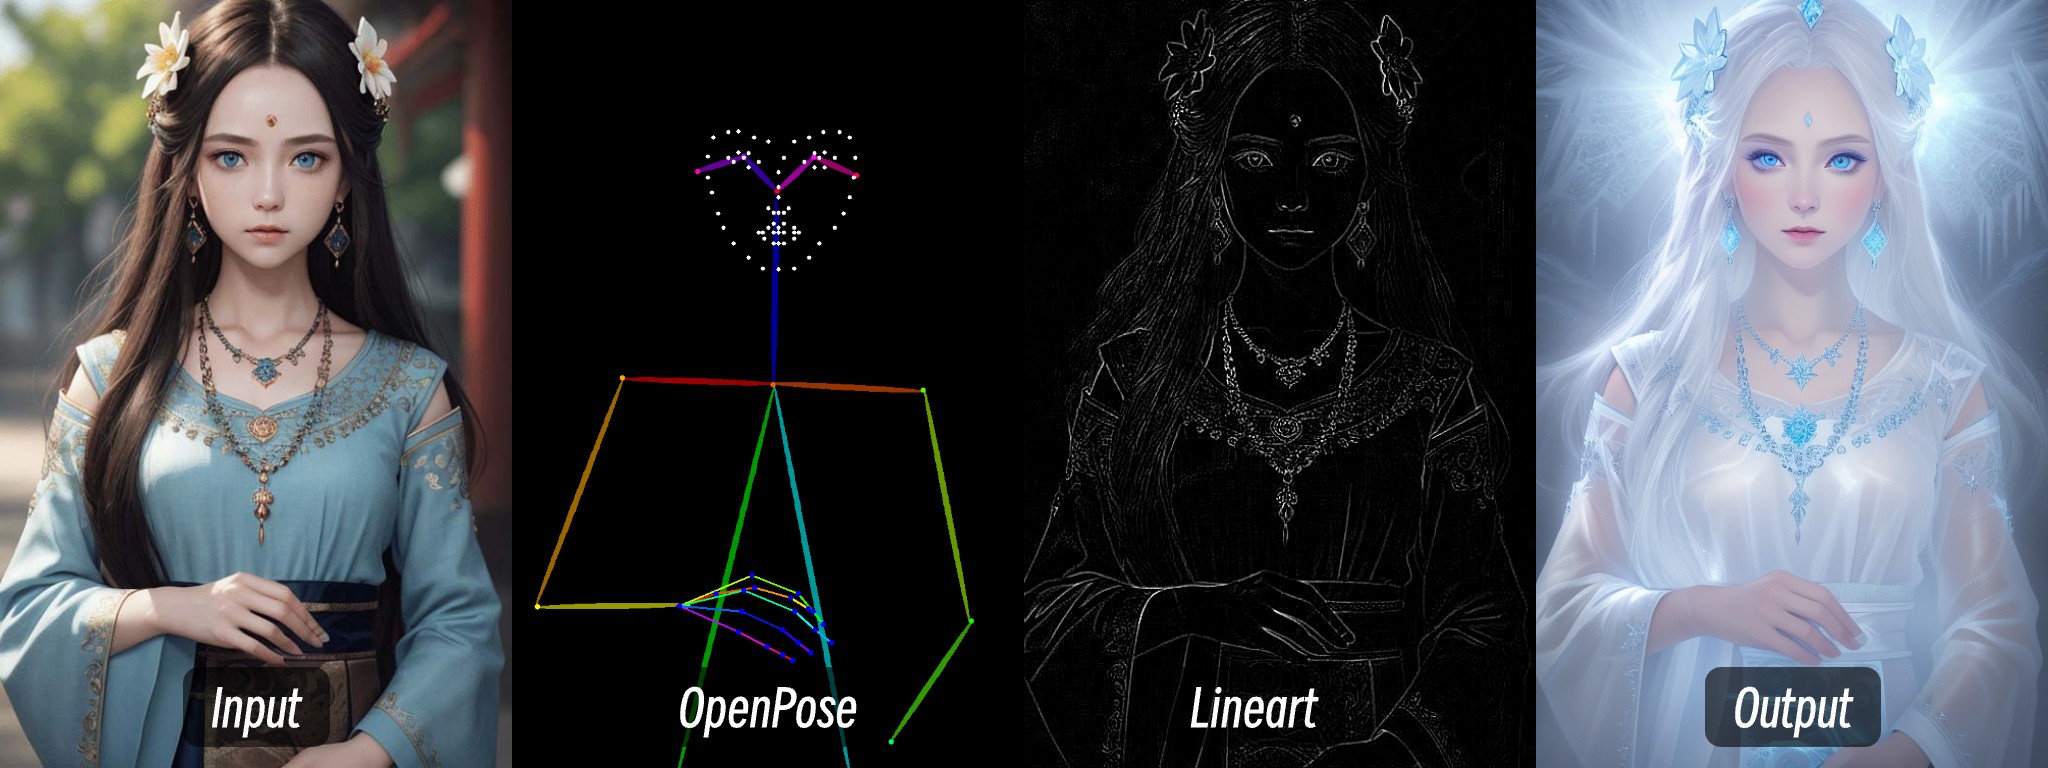
In this article, I will use OpenPose and Lineart to achieve a transformation in the visual style.
- OpenPose is used to control the character’s posture.
- Lineart is used to maintain consistency in the character’s clothing and facial features.
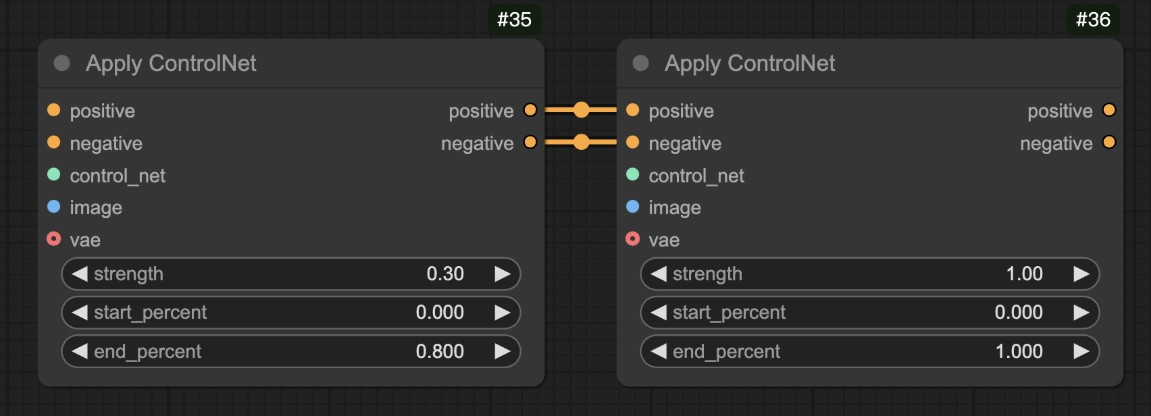
The key is to chain the conditions of the Apply ControlNet nodes when using multiple ControlNets.
 For more information on the stage control of ControlNet, you can refer to the Apply ControlNet Node Usage Instructions.
Steps to Use Multiple ControlNets in ComfyUI
1. Install Necessary Plugins
If you have learned from other tutorials on ComfyUI Wiki, you should have already installed the corresponding plugins, so you can skip this step.
Since ComfyUI Core does not come with a corresponding Depth image preprocessor, you need to download the corresponding preprocessor plugin in advance. This tutorial requires the use of the ComfyUI ControlNet Auxiliary Preprocessors plugin to generate depth maps.
It is recommended to use ComfyUI Manager for installation. You can refer to the ComfyUI Plugin Installation Tutorial for detailed instructions on plugin installation.
The latest version of ComfyUI Desktop has already pre-installed the ComfyUI Manager plugin.
2. Download Models
First, you need to download the following models:
| Model Type | Model File | Download Link |
|---|---|---|
| SD1.5 Base Model | dreamshaper_8.safetensors (optional) | Civitai |
| OpenPose ControlNet Model | control_v11f1p_sd15_openpose.pth (required) | Hugging Face |
| Lineart | control_v11p_sd15_lineart.pth (required) | Hugging Face |
The SD1.5 version of the model can use the models on your own computer; however, in this tutorial, I am using the dreamshaper_8 model as an example.
Please place the model files according to the following structure:
📁ComfyUI
├── 📁models
│   ├── 📁checkpoints
│   │   └── 📁SD1.5
│   │       └── dreamshaper_8.safetensors
│   ├── 📁controlnet
│   │   └── 📁SD1.5
│   │       └── control_v11f1p_sd15_openpose.pth
│   │       └── control_v11p_sd15_lineart.pth
3. Workflow File and Input Image
Download the workflow file and image file below

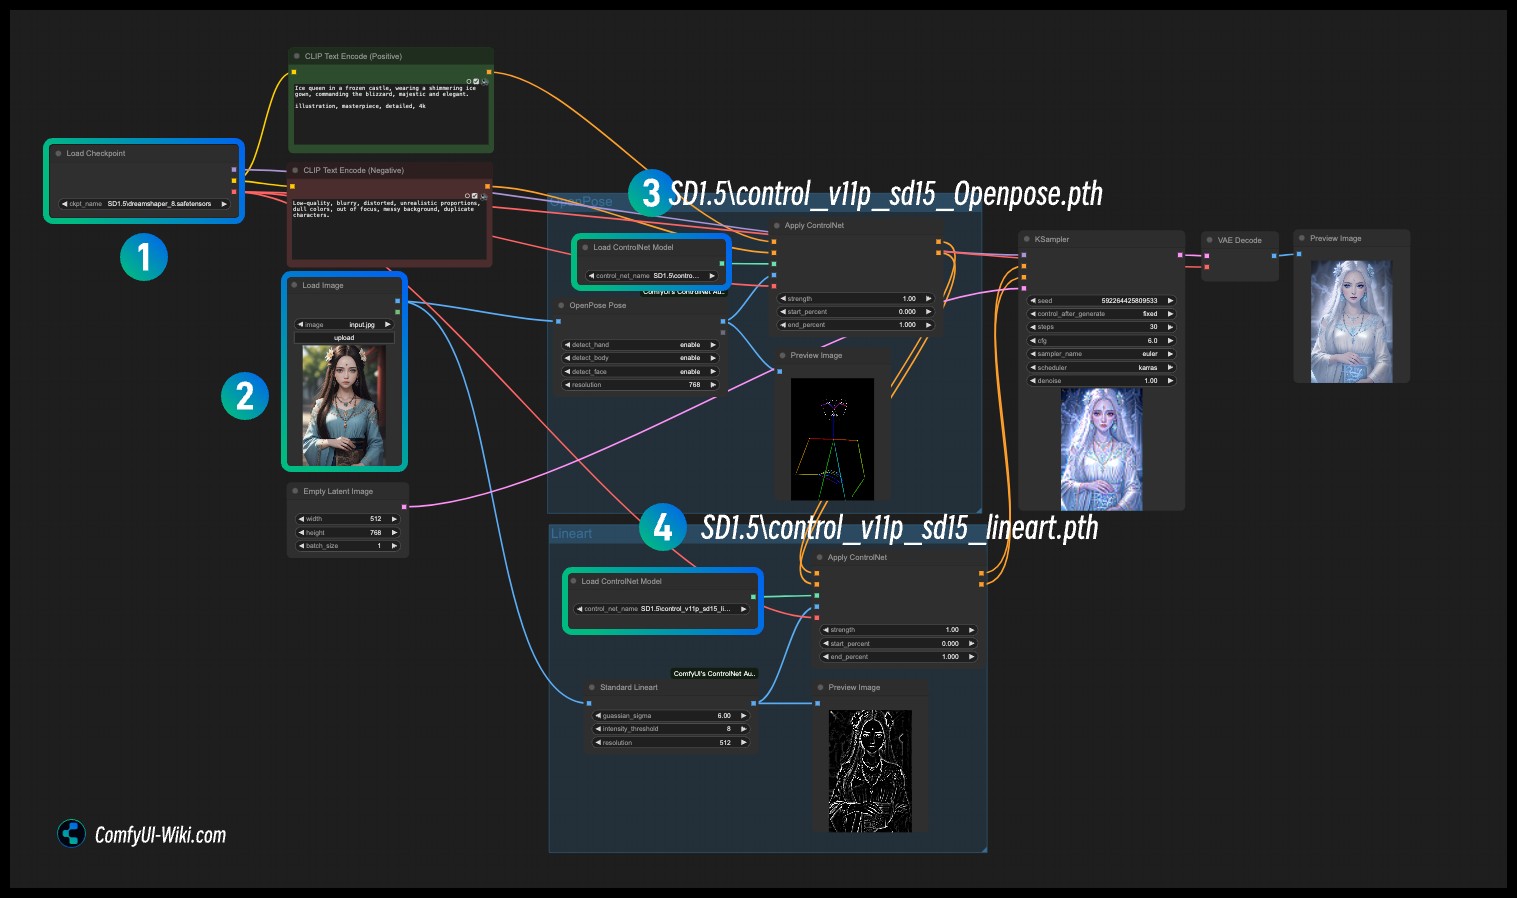
4. Import Workflow in ComfyUI to Load Image for Generation

- Load the corresponding SD1.5 Checkpoint model at step
1 - Load the input image at step
2 - Load the OpenPose ControlNet model at step
3 - Load the Lineart ControlNet model at step
4 - Use Queue or the shortcut
Ctrl+Enterto run the workflow for image generation
Scenarios for Combining ControlNets
1. Architectural Visualization Design
ControlNet Combination
Canny Edge + Depth Map + MLSD Line Detection
Parameter Configuration Plan
| ControlNet Type | Main Function | Recommended Weight | Preprocessing Parameter Suggestions | Phase |
|---|---|---|---|---|
| Canny | Ensure precise architectural outlines | 0.9-1.0 | Low threshold: 50, high threshold: 150 | Phase One |
| Depth | Build three-dimensional spatial perspective | 0.7-0.8 | MiDaS model, Boost contrast enhancement enabled | Phase Two |
| MLSD | Correct line deformation to maintain geometric accuracy | 0.4-0.6 | Minimum line length: 15, maximum line distance: 20 | Phase Three |
2. Dynamic Character Generation
ControlNet Combination
OpenPose Pose + Lineart Sketch + Scribble Color Blocks
Parameter Configuration Plan
| ControlNet Type | Main Function | Recommended Weight | Resolution Adaptation Suggestions | Collaboration Strategy |
|---|---|---|---|---|
| OpenPose | Control overall character posture and actions | 1.0 | Keep consistent with output size | Main control network |
| Lineart | Refine facial features and equipment details | 0.6-0.7 | Enable Anime mode | Mid to late intervention |
| Scribble | Define clothing colors and texture distribution | 0.4-0.5 | Use SoftEdge preprocessing | Only affects color layer |
3. Product Concept Design
ControlNet Combination
HED Soft Edge + Depth Depth of Field + Normal Normal Map
Parameter Configuration Plan
| ControlNet Type | Main Function | Weight Range | Key Preprocessing Settings | Effect |
|---|---|---|---|---|
| HED | Capture soft edges and surface transitions of products | 0.8 | Gaussian blur: σ=1.5 | Control contour softness |
| Depth | Simulate real light and shadow with background blur | 0.6 | Near field enhancement mode | Build spatial layers |
| Normal | Enhance surface details and reflective properties of materials | 0.5 | Generation size: 768x768 | Enhance material details |
4. Scene Atmosphere Rendering
ControlNet Combination
Segmentation Partition + Shuffle Color Tone + Depth Layers
Layer Control Strategy
| Control Layer | Main Function | Weight | Effect Area | Intervention Timing |
|---|---|---|---|---|
| Seg | Divide scene element areas (sky/building) | 0.9 | Global composition | Full control |
| Shuffle | Control overall color tone and style transfer | 0.4 | Color distribution | Mid to late intervention |
| Depth | Create depth effect and spatial layers | 0.7 | Background blur area | Early intervention |