Install ComfyUI on Windows: Portable, Desktop and Manual Setup
Complete guide to installing ComfyUI on Windows. Covers the official portable version, ComfyUI Desktop app, manual git install, and third-party launchers for Windows 10/11.
ℹ️ Note about updates: For the most up-to-date Desktop installation info, check the official docs.
If you prefer maximum control or already have a ComfyUI setup, this guide covers:
- Official portable version (recommended for most users)
- Manual installation (via Git)
- Third-party launcher (Aaaki ComfyUI Launcher)
System Requirements for Windows
| Component | Minimum Requirement |
|---|---|
| GPU | NVIDIA GPU with CUDA support, 4GB+ VRAM (RTX 3060 or higher recommended). GPUs with less than 3GB can use the --lowvram option. |
| CPU | Any modern x86-64 processor; CPU-only mode available via --cpu |
| RAM | 8 GB minimum, 16 GB recommended |
| Storage | SSD strongly recommended, at least 20 GB free space (bare minimum for the app — models for common workflows quickly exceed 50–100GB) |
| Python | 3.12 or 3.13 (the portable version includes Python 3.13 and PyTorch CUDA 13.0) |
| Browser | Google Chrome 143+ recommended for best UI performance |
| Software | Microsoft Visual C++ Redistributable (for manual install) |
| Driver | Latest NVIDIA drivers |
Method 1: Official Portable Version (Recommended)
The official portable version is the quickest way to get ComfyUI running on Windows. It comes with a bundled Python 3.13 environment and PyTorch with CUDA 13.0 support.
Step 1: Download
Download the portable version that matches your GPU:
| GPU Type | Download | Notes |
|---|---|---|
| NVIDIA (20 series+) | ComfyUI_windows_portable_nvidia.7z | Recommended for most users |
| NVIDIA (10 series & older) | ComfyUI_windows_portable_nvidia_cu126.7z | Uses PyTorch CUDA 12.6 + Python 3.12 |
| AMD GPUs | ComfyUI_windows_portable_amd.7z | Experimental support (RDNA 3/3.5/4) |
| Intel GPUs | ComfyUI_windows_portable_intel.7z | Arc series with native torch.xpu |
All downloads are available on the official releases page.
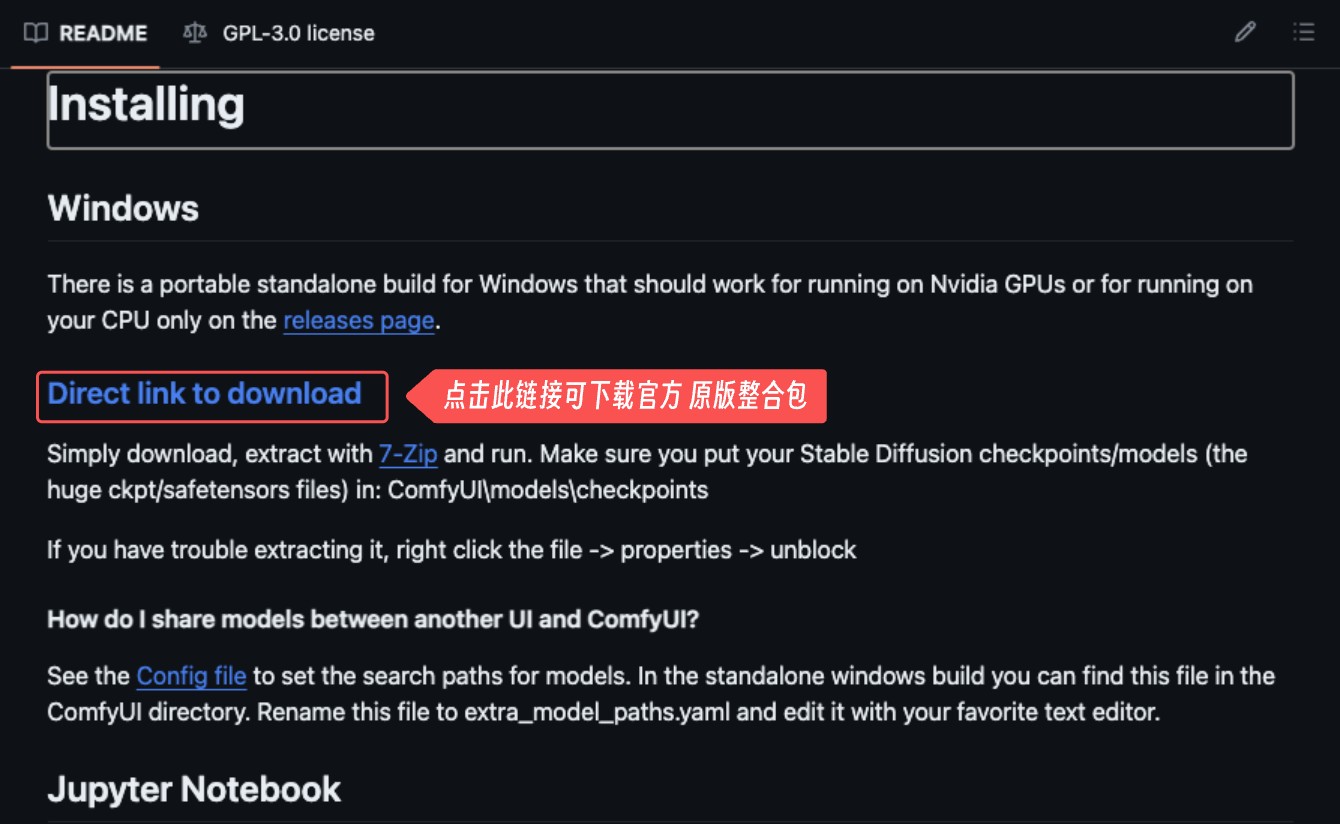
Step 2: Extract
Extract the downloaded .7z archive using 7-Zip (or Windows Explorer on recent Windows versions).
Trouble extracting? Right-click the file → Properties → Unblock, then try again.
After extraction, the folder structure should look like this:
ComfyUI_windows_portable
├── ComfyUI
│   ├── models
│   │   ├── checkpoints     ← Place checkpoint models here
│   │   ├── loras
│   │   ├── vae
│   │   ├── controlnet
│   │   └── ...
│   ├── custom_nodes
│   ├── user
│   └── ...
├── python_embeded          ← Bundled Python 3.13 environment
├── run_cpu.bat             ← For CPU or AMD GPUs
└── run_nvidia_gpu.bat      ← For NVIDIA GPUs
Step 3: Install a Model
ComfyUI needs at least one checkpoint model to generate images. Download a model like Anything V5 or choose from the Model Recommendations section, then place it in the models/checkpoints folder.
If you already have models from another UI (A1111 WebUI, etc.), see How to Share Models or edit extra_model_paths.yaml in the ComfyUI directory.
Step 4: Run ComfyUI
Double-click the appropriate batch file:
run_nvidia_gpu.bat— if you have an NVIDIA GPUrun_cpu.bat— if you have an AMD GPU or only a CPU
When the console shows:
Starting server
To see the GUI go to: http://127.0.0.1:8188
ComfyUI is running. Open your browser and navigate to http://127.0.0.1:8188.
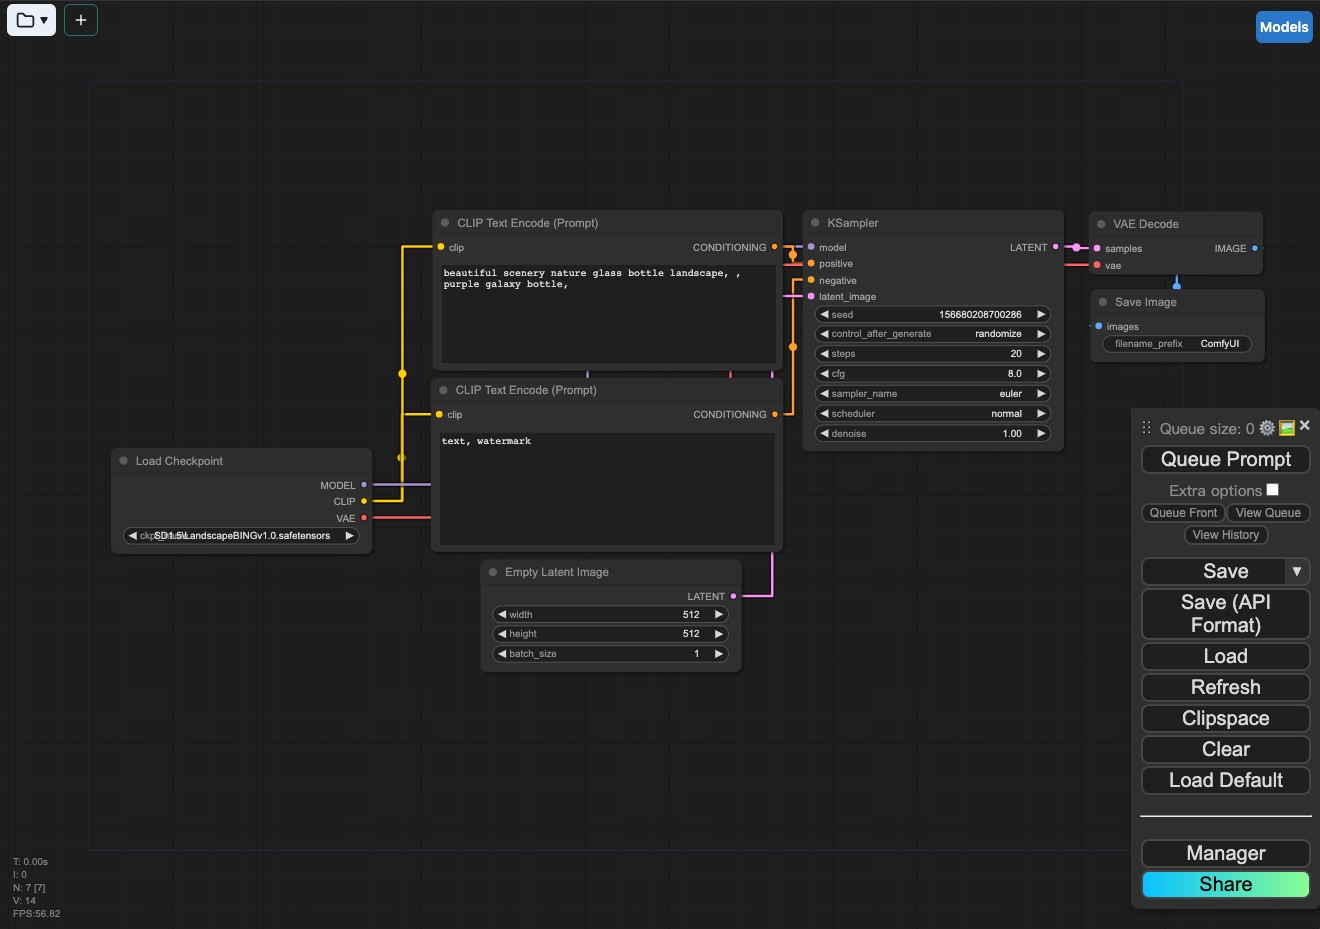
Step 5: Generate Your First Image
- Confirm that a checkpoint model is loaded in the Load Checkpoint node
- Click Queue Prompt
- Wait for the image to generate. If successful, congratulations — ComfyUI is installed and working!
If you see the page title but no GUI elements, your browser may not be compatible. Use the latest Chrome Browser.
Update your NVIDIA drivers if the portable version doesn't start.
Method 2: Manual Installation (Git + Venv)
For users who want full control, clone the repository and manage dependencies yourself.
Prerequisites
- Git installed
- Python 3.12 or 3.13 installed
- Microsoft Visual C++ Redistributable installed
Steps
# 1. Clone the repository
git clone https://github.com/comfyanonymous/ComfyUI.git
cd ComfyUI

# 2. Create a virtual environment
python -m venv .venv

# 3. Activate the environment
.venv\Scripts\activate

# 4. Install PyTorch with CUDA support
pip install torch torchvision torchaudio --extra-index-url https://download.pytorch.org/whl/cu130

# 5. Install ComfyUI dependencies
pip install -r requirements.txt

# 6. Start ComfyUI
python main.py
The official repository has detailed manual installation instructions in the README.
Community Distribution: The Aaaki ComfyUI Launcher is a third-party launcher created by the community — not an official ComfyUI product. It's popular among Chinese-speaking users and supports Simplified Chinese, Traditional Chinese, English, and Japanese.
Other Resources
- If you already use A1111 WebUI, see How to Share Models Between A1111 WebUI and ComfyUI
- ComflowySpace — another third-party integration package
Comments
Sign in with GitHub to join the discussion.