Complete Guide to Hunyuan3D 2.0, Including ComfyUI Native Support and ComfyUI-Hunyuan3DWrapper


Hunyuan3D-2 is an open-source 3D generation model series launched by Tencent. As of March 2025, the latest version is 2.0, supporting the generation of high-fidelity 3D models with high-resolution texture maps through text, image, or sketch inputs.
Technical Highlights
The system adopts a separated process of geometry generation + texture synthesis:
- Geometry Generation (Hunyuan3D-DiT): Based on a flow diffusion model that generates untextured 3D geometric models, with 2.6B parameters, capable of precisely extracting geometric information from input images or text.
- Texture Synthesis (Hunyuan3D-Paint): Adds high-resolution (4K) textures to geometric models, with 1.3B parameters, supporting multi-view diffusion generation technology to ensure realistic textures and consistent lighting.
By decoupling shape and texture generation, it effectively reduces complexity and improves generation quality.
Performance and Efficiency Optimization
- Fast Generation: Completes model generation in as fast as 30 seconds, with the accelerated version (Hunyuan3D-DiT-v2-0-Fast) shortening inference time by 50% through guidance distillation techniques.
- Multi-modal Input: Supports various input methods including text descriptions, images, and sketches, compatible with Blender plugins and Gradio applications, lowering the usage threshold.
Open Source Model Ecosystem The project has open-sourced 6 models (some simplified versions), covering different scenario needs:
- Hunyuan3D-2mv: Multi-view shape generation model, suitable for complex scene modeling.
- Hunyuan3D-Delight-v2-0: Image delighting model, generating lighting-invariant textures. Other models include lightweight versions (2mini), high-fidelity geometry generation (DiT-v2-0), etc.
Below are some online platforms or implementations that don’t rely on ComfyUI to experience Hunyuan3D 2.0:
- Hunyuan3D-2mv Online Experience
- Hunyuan3D-2 Online Experience
- Hunyuan3D Homepage
- Hunyuan3D-2-WinPortable
Now we’ll introduce the approaches to implement Hunyuan3D 2.0 model generation in ComfyUI.
ComfyUI Implementation Approaches for Hunyuan3D 2.0 Model Generation
Below are the main approaches that will be covered in this guide. I’ll provide complete workflows and step-by-step tutorials for each.
ComfyUI-Hunyuan3DWrapper
Developed by Kijai, this currently offers the most complete support and performance in ComfyUI, capable of implementing complete rendering output from model to texture. However, the texture generation part requires compiling a separate component, requiring some basic knowledge of Python virtual environments and pip commands.
ComfyUI Native Support

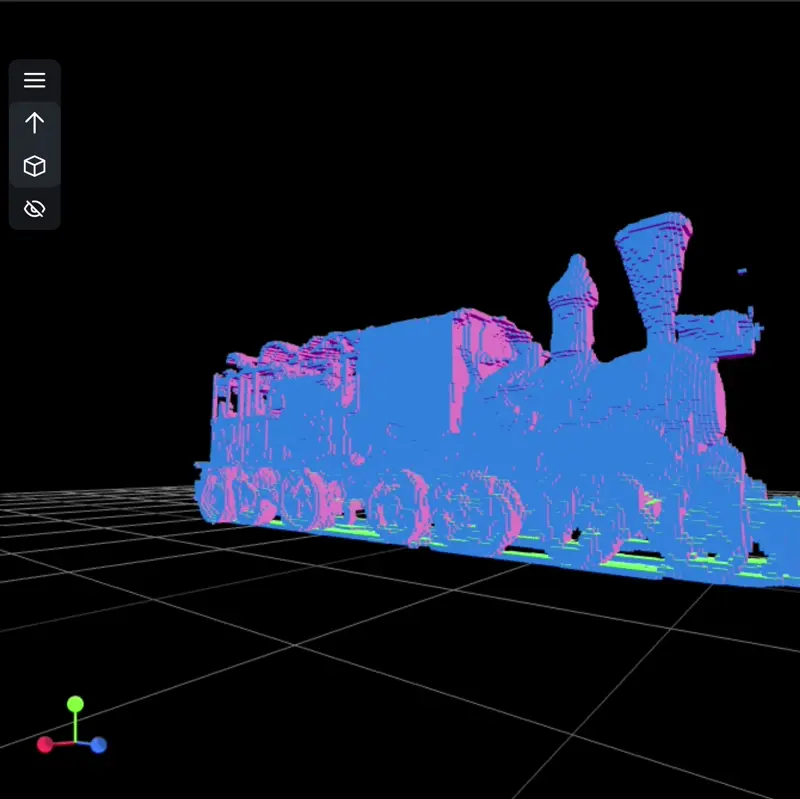
ComfyUI now officially supports Hunyuan3D 2.0 and 2mv series models, capable of rendering models. However, it doesn’t yet support texture rendering, outputting voxel models which still have their own aesthetic appeal. You only need to update to the latest version of ComfyUI to use this, making it simple to use and experience.
ComfyUI 3D Pack
This plugin’s main issue is that its dependency environment differs from the latest ComfyUI dependency environment, making installation very difficult. I tried many times without success, so I can only provide an introduction to the relevant parts in this article and related resources.
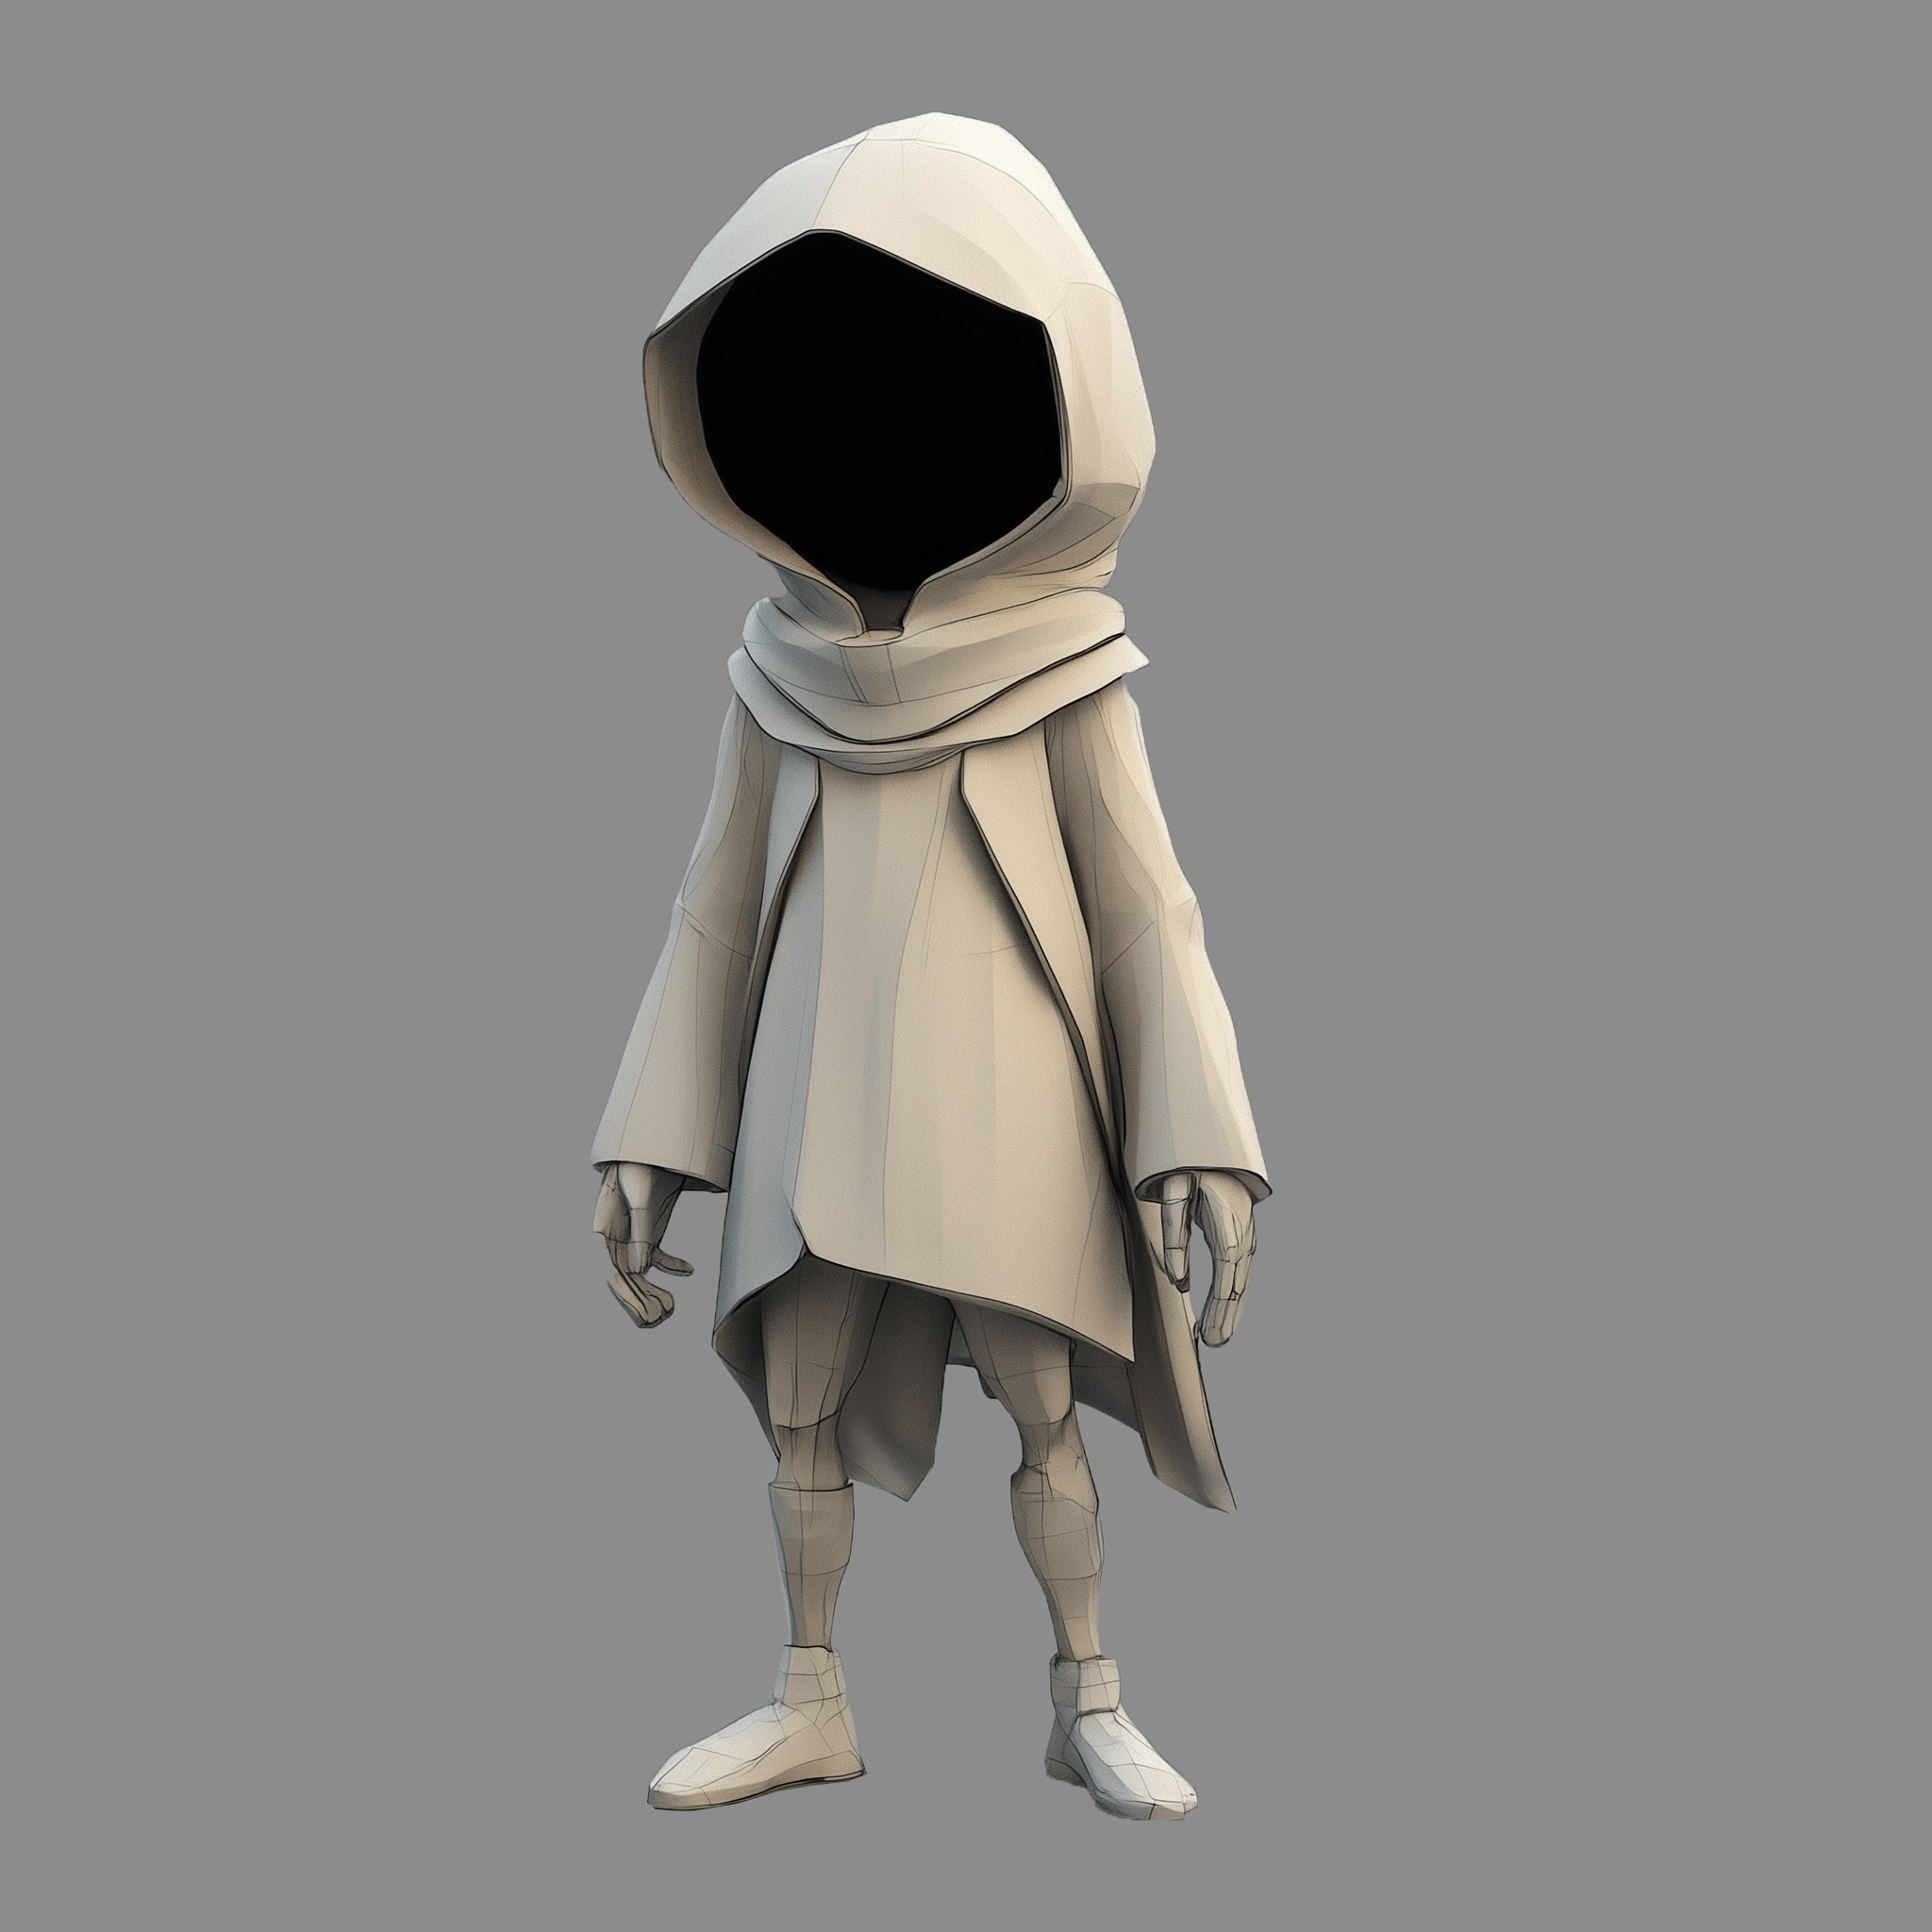
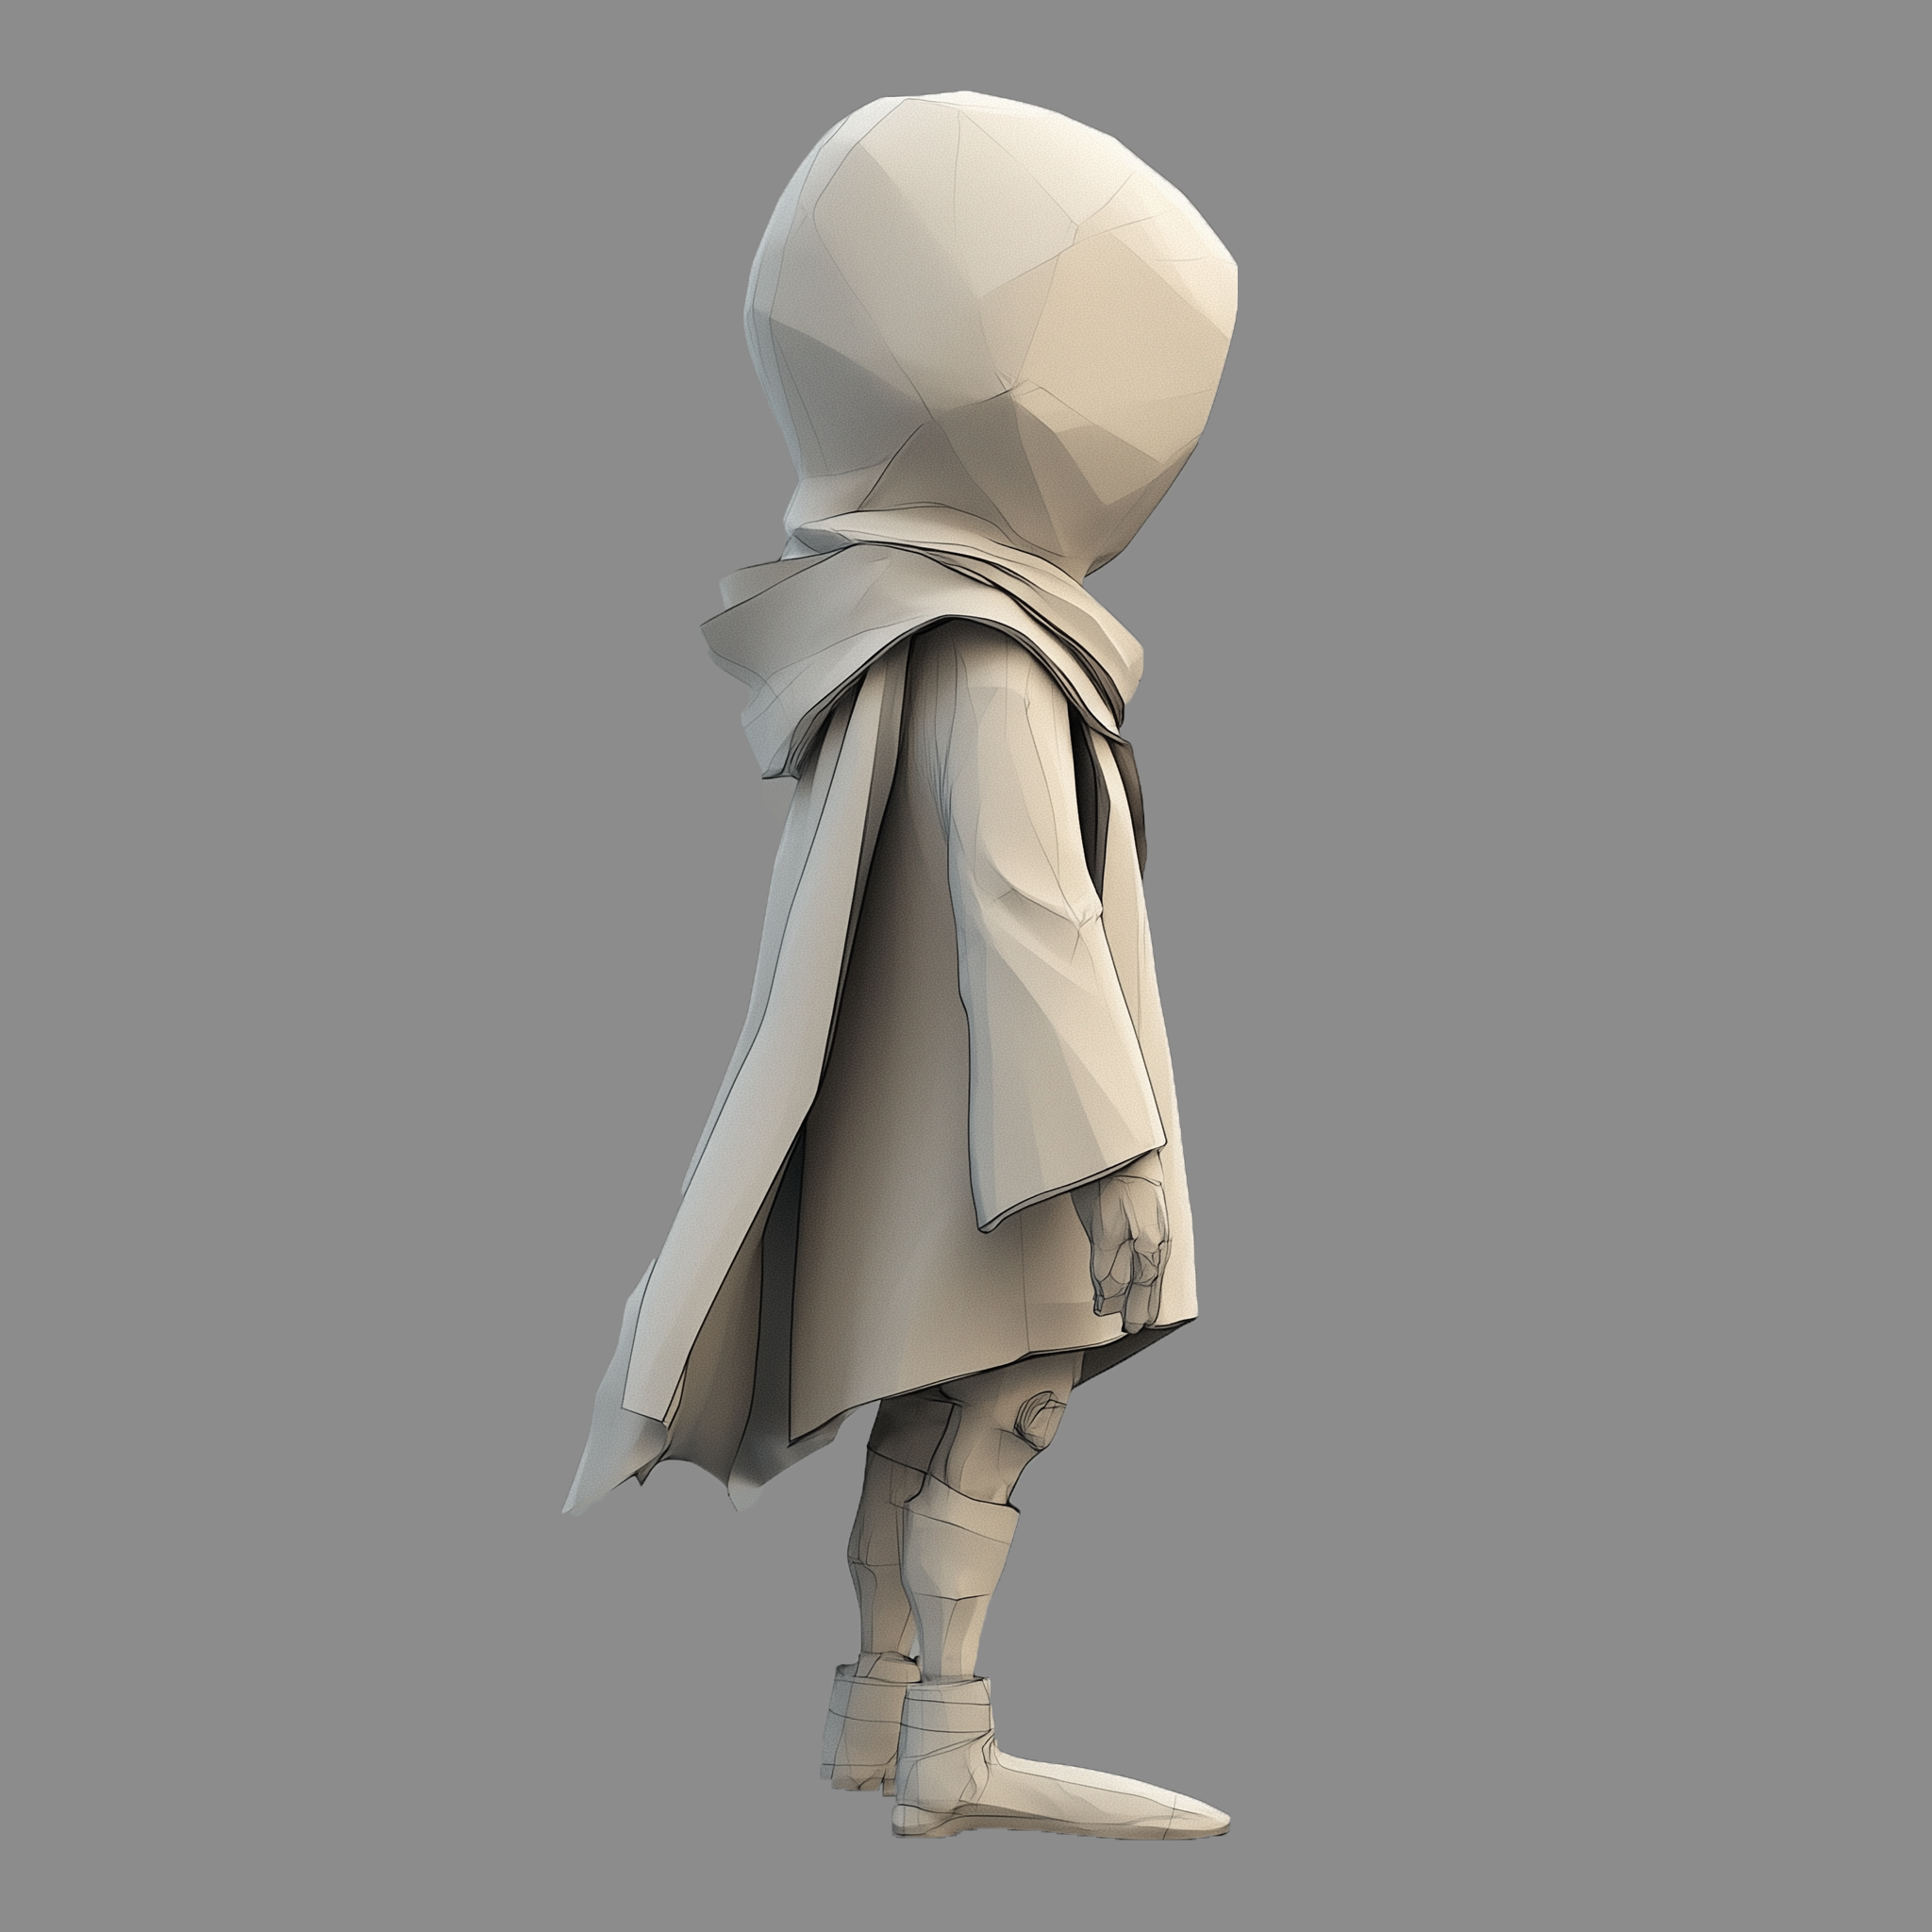
Input Images
Since multiple workflows are involved in this example, we provide corresponding input images. These materials all come from the sample images used in the ComfyUI official documentation, but you can also use your own images.
Since the ComfyUI-Hunyuan3DWrapper plugin uses ComfyUI-essentials plugin nodes to complete automatic background removal, while the ComfyUI native support workflow doesn’t provide this functionality, the images provided here have already been processed. If you need to use your own images, you can refer to the background removal part of the ComfyUI-Hunyuan3DWrapper plugin.

ComfyUI-Hunyuan3DWrapper Hunyuan3D 2.0 Workflow
In this section, we’ll use the ComfyUI-Hunyuan3DWrapper plugin to implement Hunyuan3D 2.0 model generation. I’ve reorganized the corresponding workflows and added model download links to the workflow files.
1. Related Plugin Installation
Kijai’s workflow depends on the following two plugins:
You can install these plugins through ComfyUI Manager.
1.1 Basic Plugin Dependencies Installation
This part should be familiar to readers who are accustomed to ComfyUI plugin installation. If you installed the plugins through ComfyUI Manager, the dependencies should be installed automatically.
If you installed manually or via git, you’ll need to execute the dependency installation commands in the corresponding ComfyUI virtual environment.
Please refer to the dependency installation section at the end of the ComfyUI Plugin Installation Guide to complete this.
1.2 Texture Generation Component Installation
After installing the basic dependencies for ComfyUI-Hunyuan3DWrapper, the components required for texture generation need to be compiled and installed. The author has provided pre-compiled wheel files for specific environments.
The author has provided these files in the corresponding directory and explained how to use them in the plugin’s Readme. Considering that ComfyUI Wiki readers are multilingual users, I’ve translated and organized this part of the content.
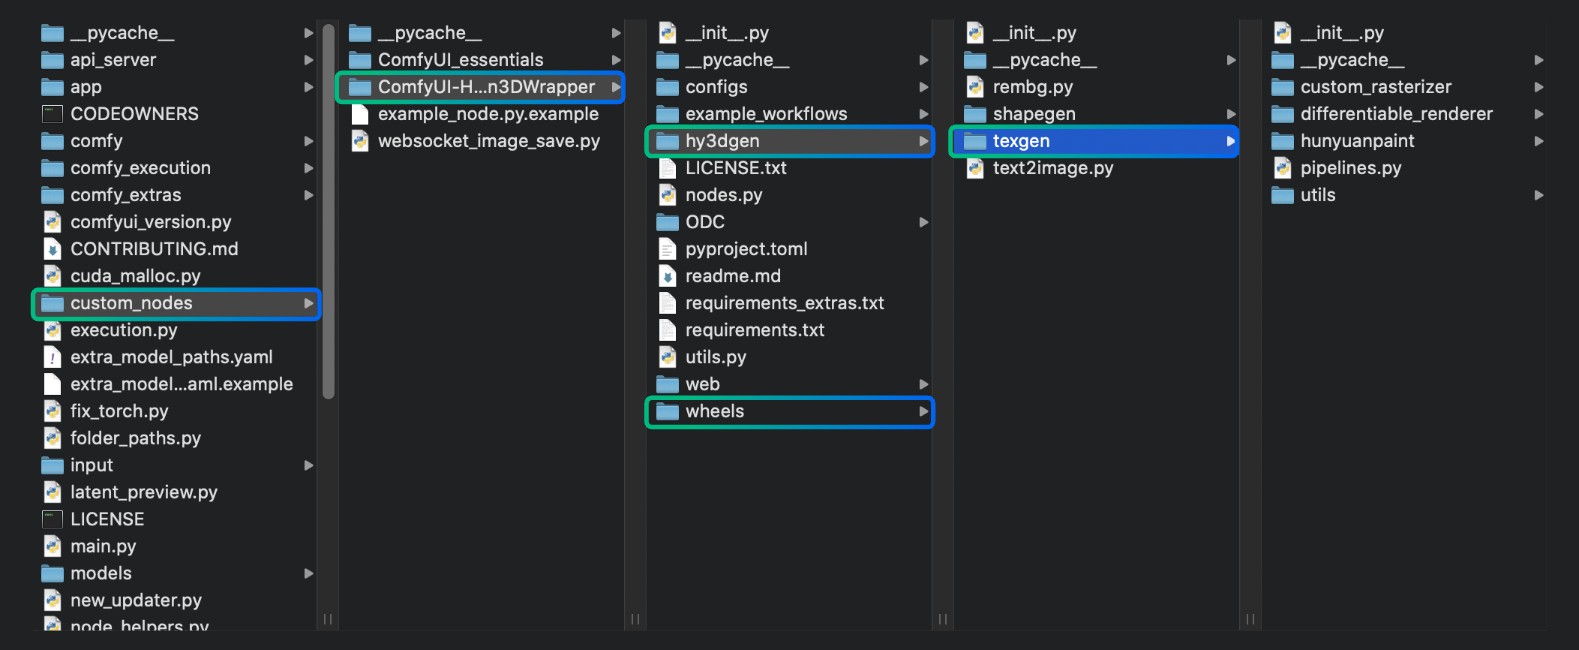
1.2.1 Pre-compiled Wheel File Installation
Below are instructions for installing pre-compiled wheel files for different environments. If there’s no version that matches your environment, please refer to the self-compilation installation section.
For Windows 11 Python 3.12 CUDA 12.6 environment:
pip install wheels\custom_rasterizer-0.1-cp312-cp312-win_amd64.whlFor ComfyUI Desktop version, you can follow these steps to complete the installation in the corresponding environment:
After launching the Desktop version, you need to open the terminal as shown in the image below. The Python environment is already activated, so you can directly run the installation commands in this terminal.
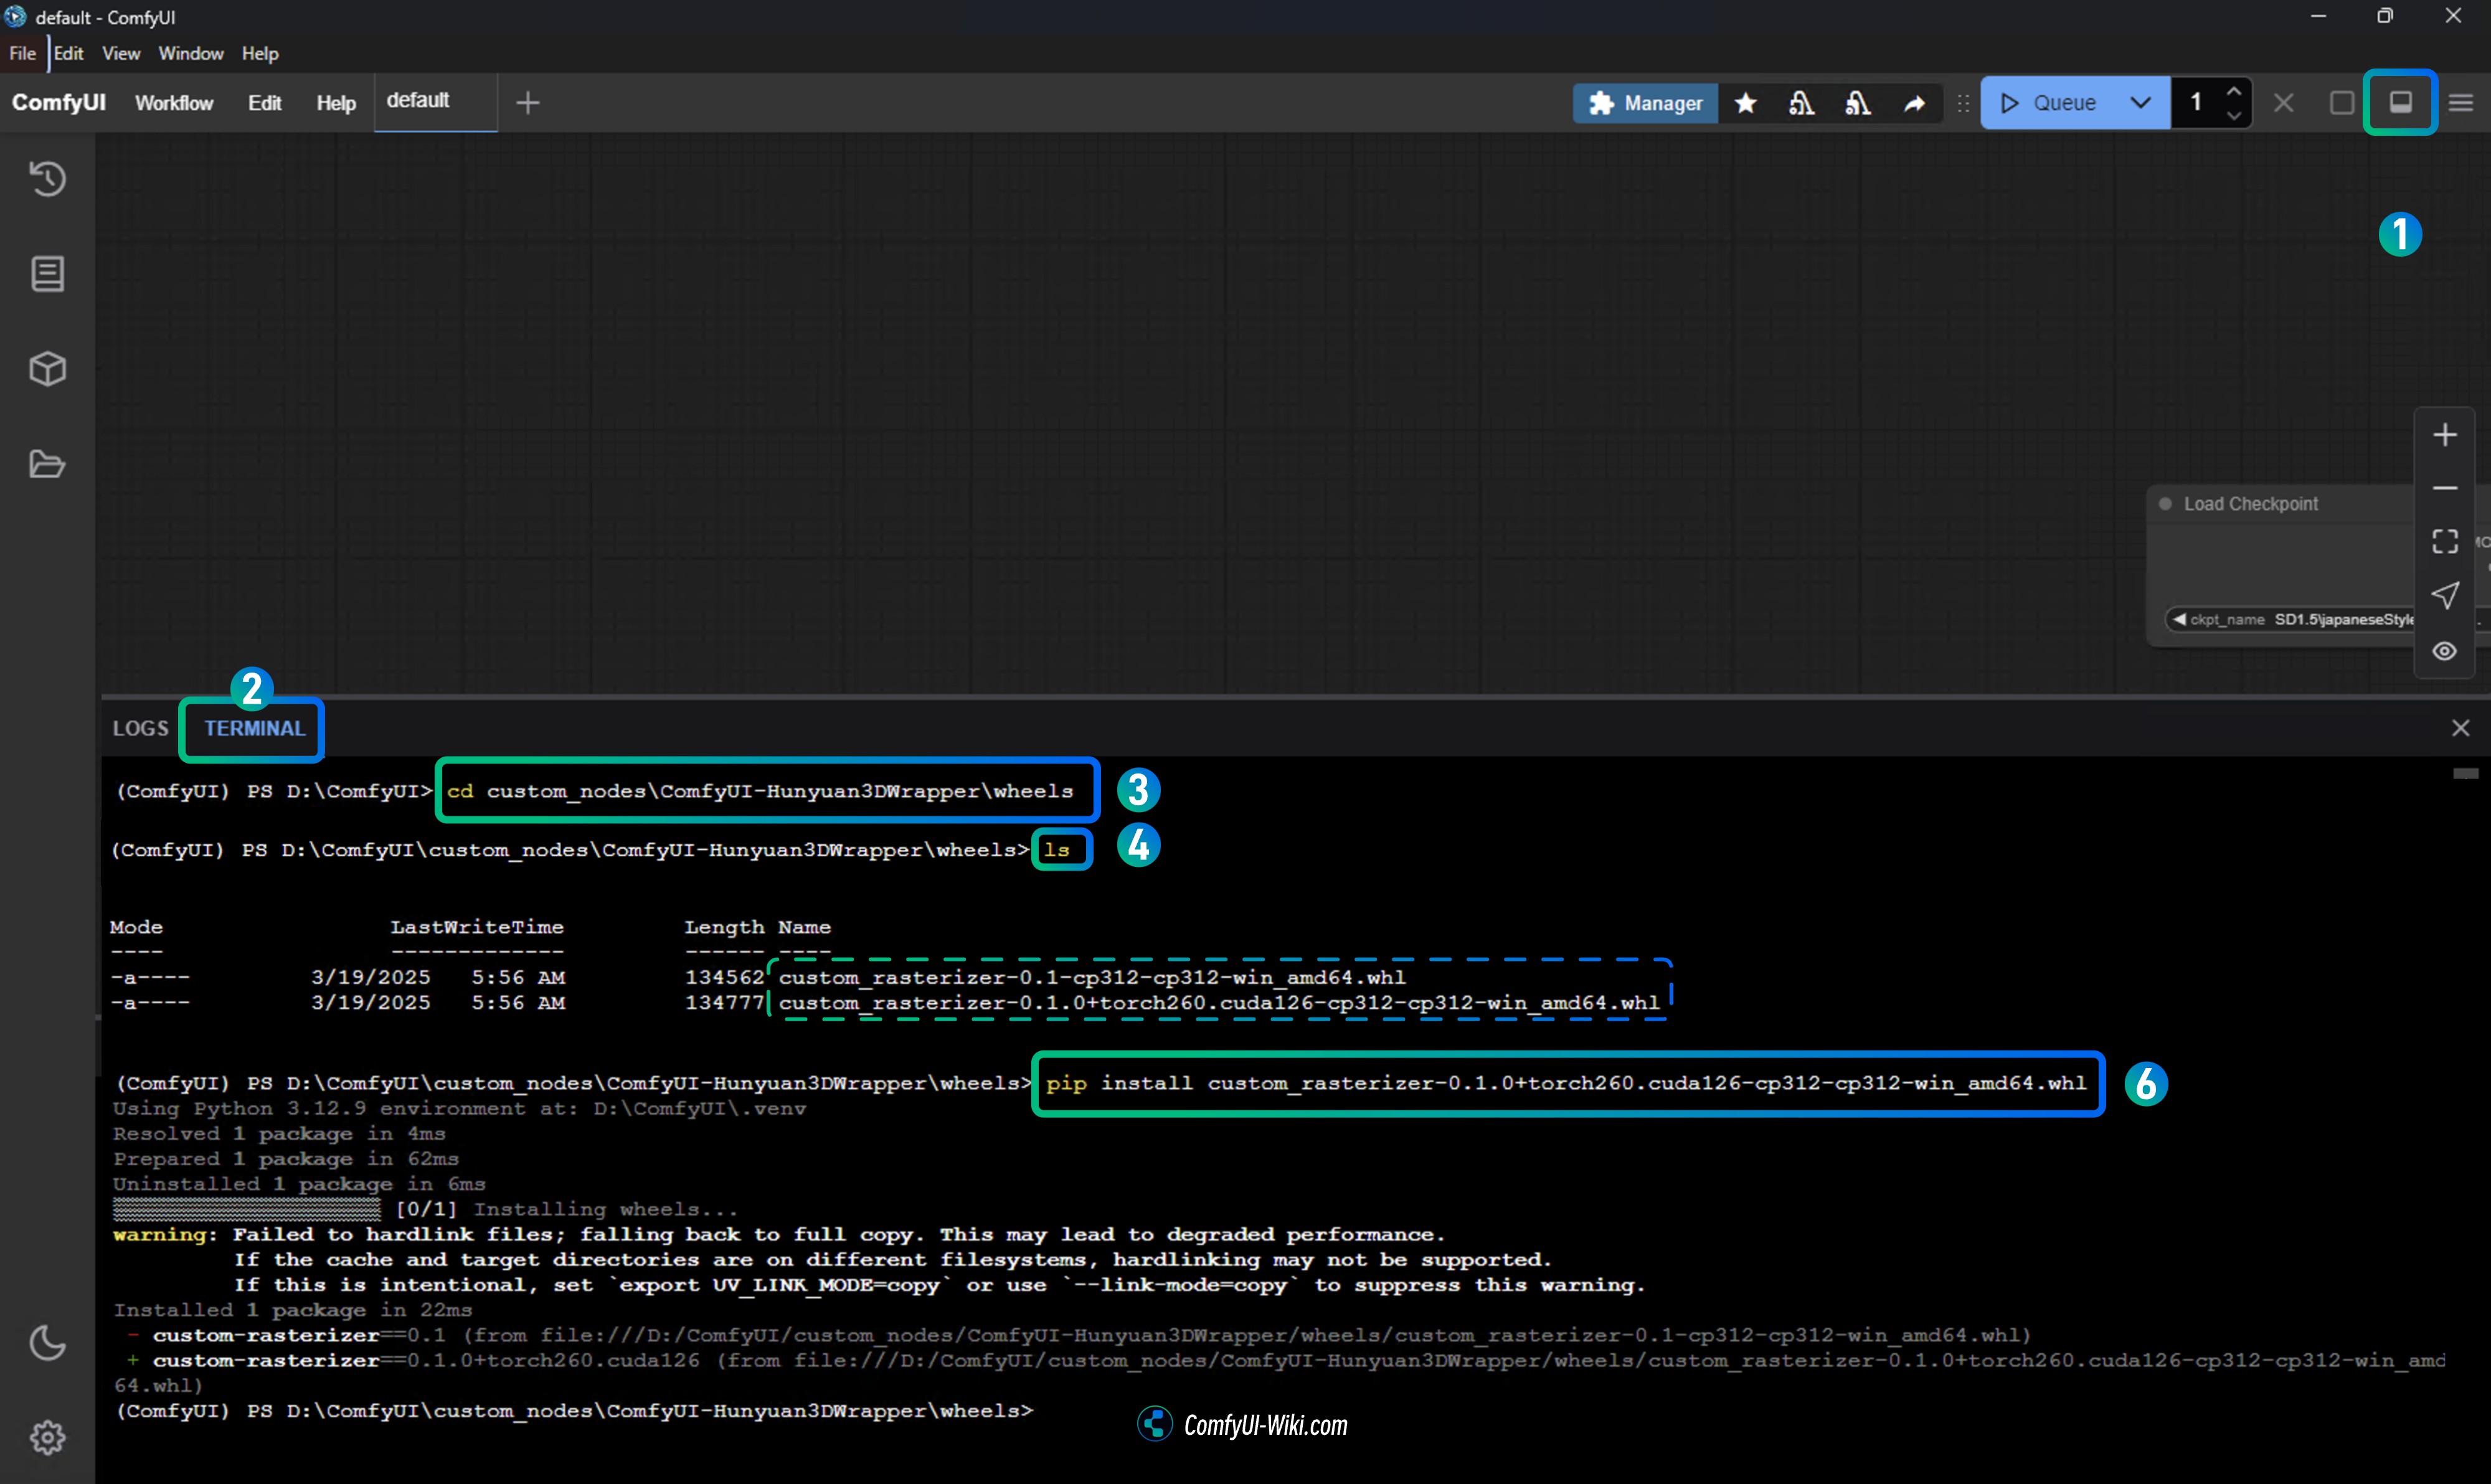
- After launching the Desktop version, click the toggle button in the upper right corner to open the log panel at the bottom
- Select the
terminaltab in the bottom panel to open the terminal - Run the installation command in the terminal:
pip install ComfyUI\custom_nodes\ComfyUI-Hunyuan3DWrapper\wheels\custom_rasterizer-0.1-cp312-cp312-win_amd64.whlSome users have reported issues finding the file with this method, so you can also use the cd command to navigate to the appropriate folder:
cd custom_nodes\ComfyUI-Hunyuan3DWrapper\wheels- Use
lsto list the files in the wheels folder - Use
pip installto install the appropriate wheel file, such as:
pip install custom_rasterizer-0.1-cp312-cp312-win_amd64.whlChoose the specific version based on your system.
1.2.2 Self-compilation Installation (if pre-compiled files don’t work for your system)
If the pre-compiled wheel files don’t work for your system, you’ll need to compile them yourself:
Compile and Install Rasterizer:
Please refer to section 1.2.1 to access the Desktop version terminal, then use the cd command to navigate to the appropriate folder and execute the installation:
cd custom_nodes/ComfyUI-Hunyuan3DWrapper/hy3dgen/texgen/custom_rasterizer
python setup.py installAfter successful installation, you should see custom_rasterizer_kernel*.pyd files and a custom_rasterizer folder in the site-packages folder of your Python environment.
Compile mesh_processor extension:
Please refer to section 1.2.1 to access the Desktop version terminal, then use the cd command to navigate to the appropriate folder and execute the installation:
cd custom_nodes/ComfyUI-Hunyuan3DWrapper/hy3dgen/texgen/differentiable_renderer
python setup.py build_ext --inplaceThis file should exist in that folder. It’s only used for vertex fixing; if this file doesn’t exist, a fallback will run on the CPU, which will be much slower. Vertex fixing is on a separate node, so in the worst case, it can be bypassed, with the downside of poorer texture filling.
1.3 Optional Installation: BPT (Boundary Preserving Transform)
This component is completely optional but has high installation requirements:
Please refer to section 1.2.1 to access the Desktop version terminal, then use the cd command to navigate to the appropriate folder and execute the installation:
cd custom_nodes/ComfyUI-Hunyuan3DWrapper/hy3dgen/shapegen/bpt
pip install -r requirements.txtDownload the weights file: bpt-8-16-500m.pt
Copy bpt-8-16-500m.pt to the ComfyUI-Hunyuan3DWrapper-main\hy3dgen\shapegen\bpt directory.
1.4 Xatlas Upgrade to Fix UV Mapping for High-Polygon Models
To fix UV mapping issues for high-polygon models, you can upgrade Xatlas:
First uninstall the current version:
python_embeded\python.exe -m pip uninstall xatlasIn the portable root directory (ComfyUI_windows_portable):
git clone --recursive https://github.com/mworchel/xatlas-python.git
cd .\xatlas-python\extern
Delete the xatlas folder, then clone the new version:
git clone --recursive https://github.com/jpcy/xatlasIn xatlas-python\extern\xatlas\source\xatlas, modify the xatlas.cpp file:
- Change line 6774 from
#if 0to//#if 0 - Change line 6778 from
#endifto//#endif
Finally, return to the portable root directory (ComfyUI_windows_portable) and execute:
.\python_embeded\python.exe -m pip install .\xatlas-python\2. Hunyuan3D 2.0 Single-View Workflow
Hunyuan3D 2.0 models are not multi-view models, so when using ComfyUI-Hunyuan3DWrapper, you need to use the Hunyuan3D-DiT-v2-0 series models rather than the Hunyuan3D-DiT-v2-mv series. This plugin not only supports model geometry generation but also texture generation, allowing the creation of complete 3D models.
2.1 Workflow File
Download the workflow file below and drag it into ComfyUI, which will automatically prompt to complete the relevant model downloads.
2.2 Manual Model Installation
When Hunyuan3D 2.0 was initially released, it didn’t provide models in safetensors format, so Kijai provided converted versions. However, Hunyuan3D 2.0 now offers models in safetensors format. You can download any of the models below and save them to the ComfyUI/models/diffusion_models/ directory.
- Kijai: hunyuan3d-dit-v2-0-fp16.safetensors
- Tencent: hunyuan3d-dit-v2-0/model.fp16.safetensors Download and rename to
hunyuan3d-dit-v2-0.safetensors
2.3 Running the Workflow with Images
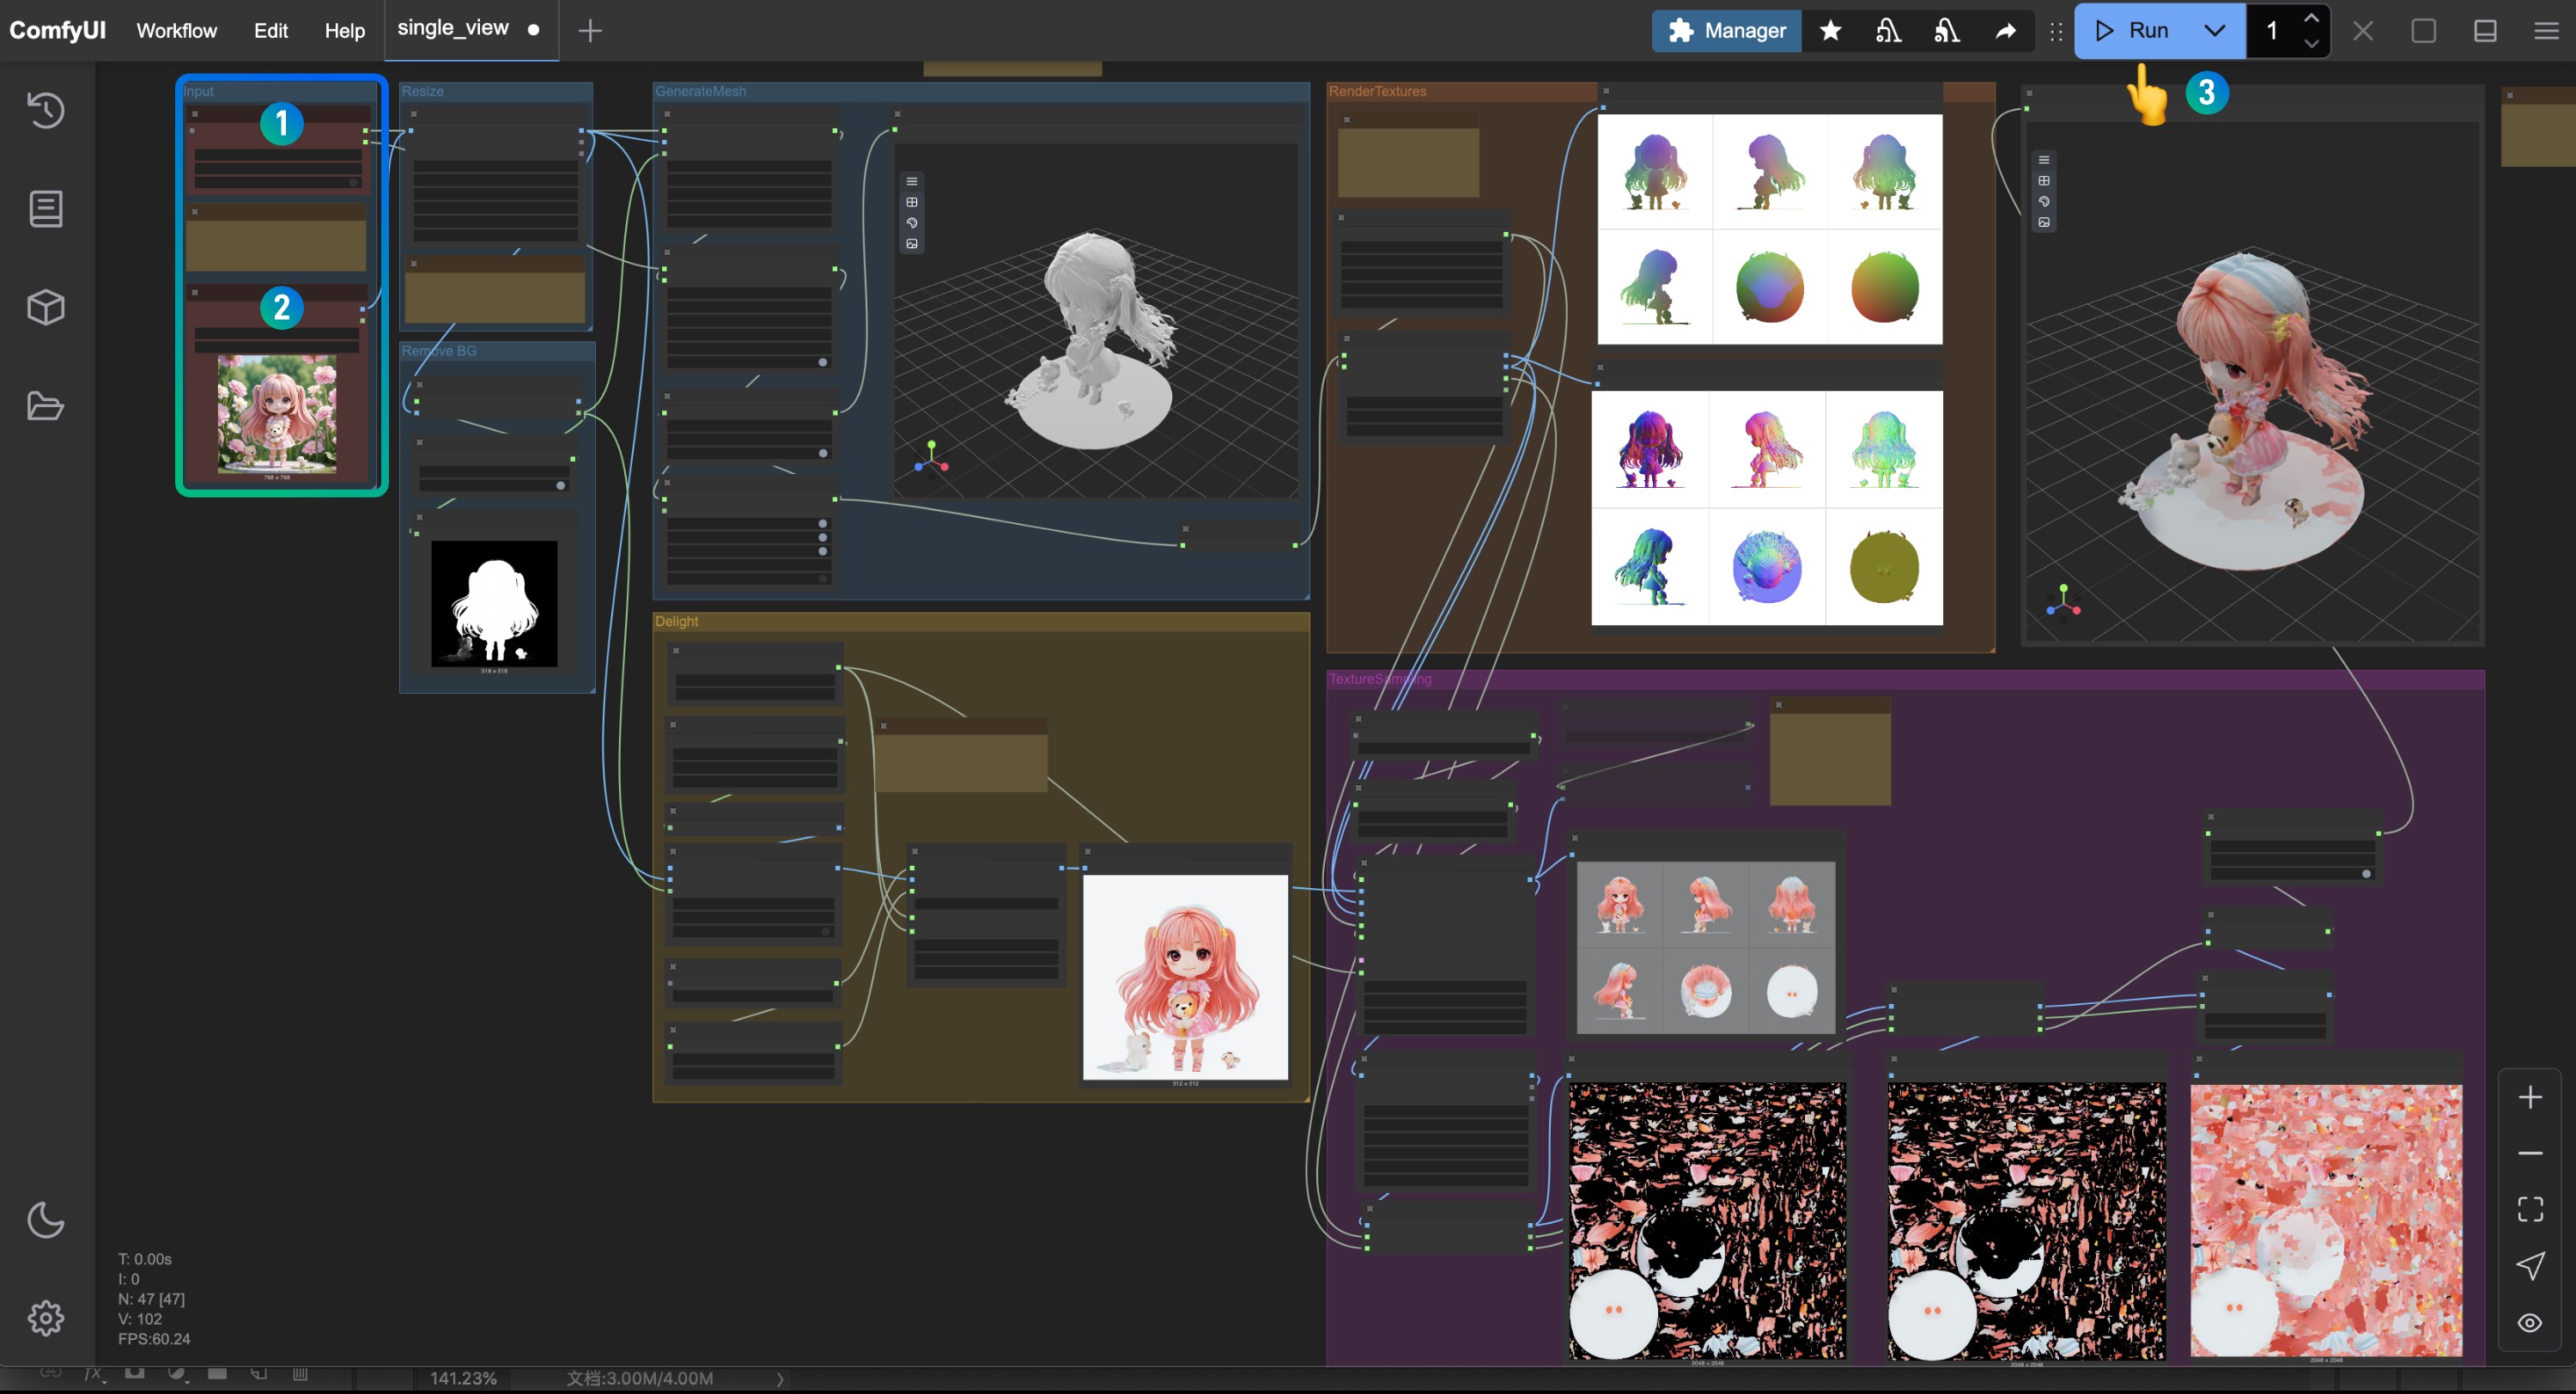
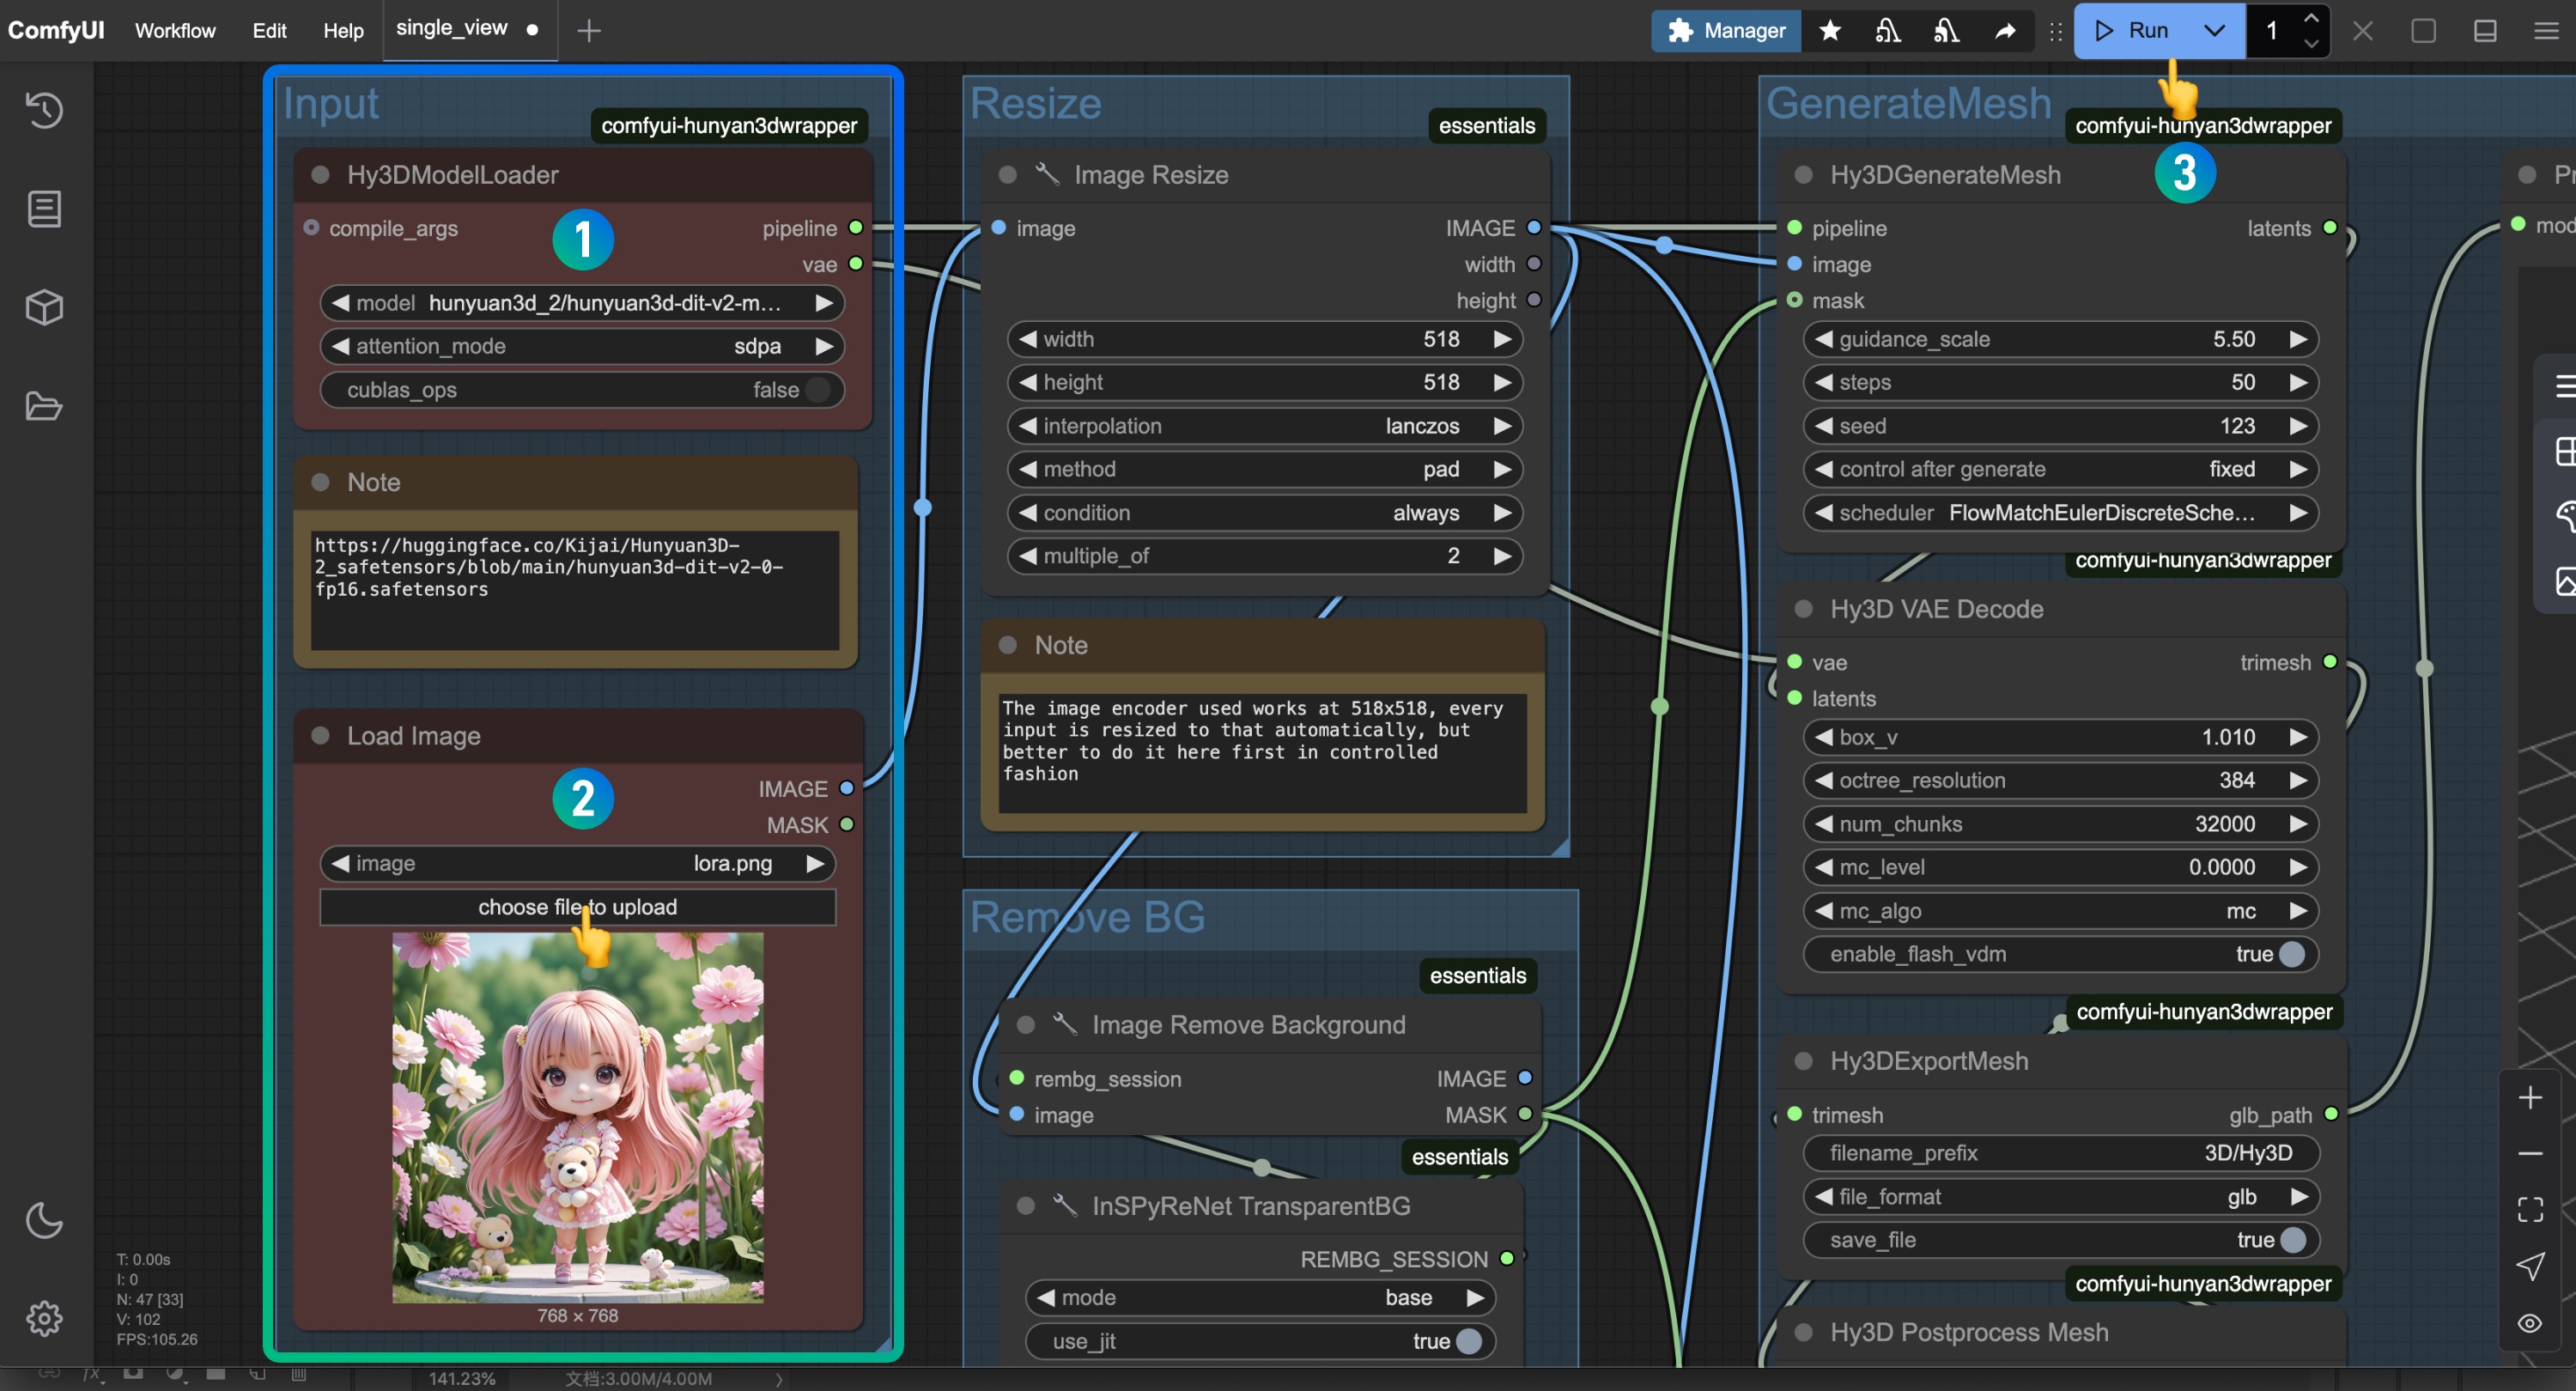
- Make sure
hunyuan3d-dit-v2-0.safetensorsis loaded at theHy3DModelLoadernode - Load the corresponding input image at the
Load Imagenode for model generation - Click the
Runbutton or use the shortcutCtrl(cmd) + Enterto run the workflow
If you encounter errors about custom_rasterizer, please refer to the plugin installation section for solutions to install or compile the dependent components.
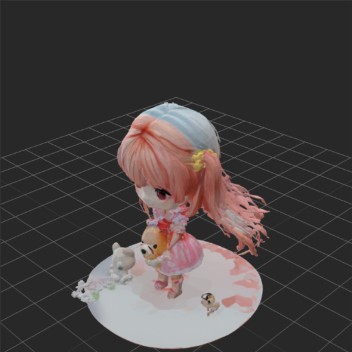
The output model will be saved to the ComfyUI/output/3D folder, as set in the Hy3DExportMesh node.
3. Hunyuan3D 2.0 Multi-View Workflow
3.1 Workflow File
Download the workflow file below and drag it into ComfyUI, which will automatically prompt to complete the relevant model downloads.
3.2 Manual Model Installation
The Hunyuan3D 2mv multi-view model is similar to the previous one. Kijai also provided early converted versions, and later Tencent provided safetensors versions. You can download any of the models below and save them to the ComfyUI/models/diffusion_models/ directory.
- Kijai: hunyuan3d-dit-v2-0-fp16.safetensors
- Tencent: hunyuan3d-dit-v2-mv/model.fp16.safetensors Download and rename to
hunyuan3d-dit-v2-mv-fp16.safetensors
If generation runs too slowly, you can try using:
3.3 Running the Workflow with Images
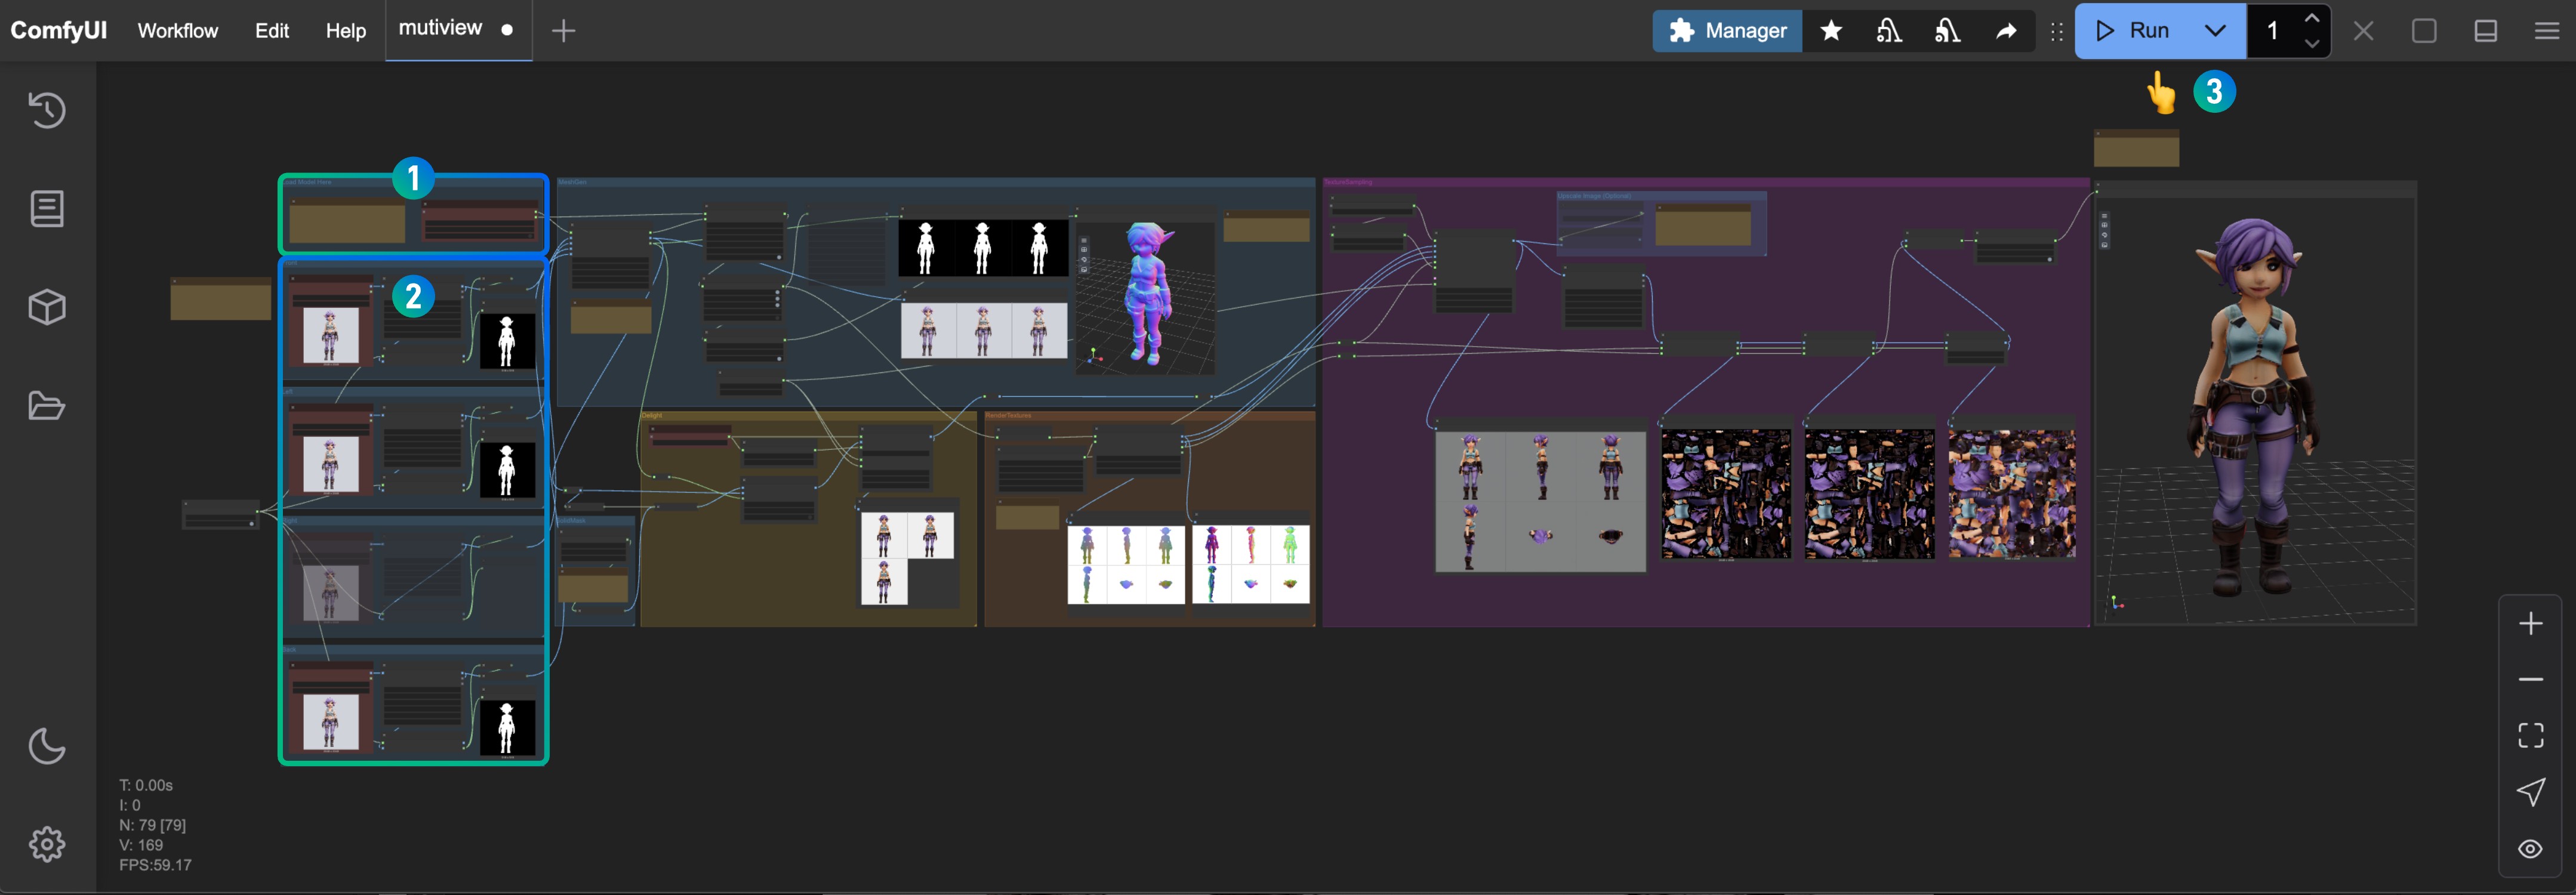
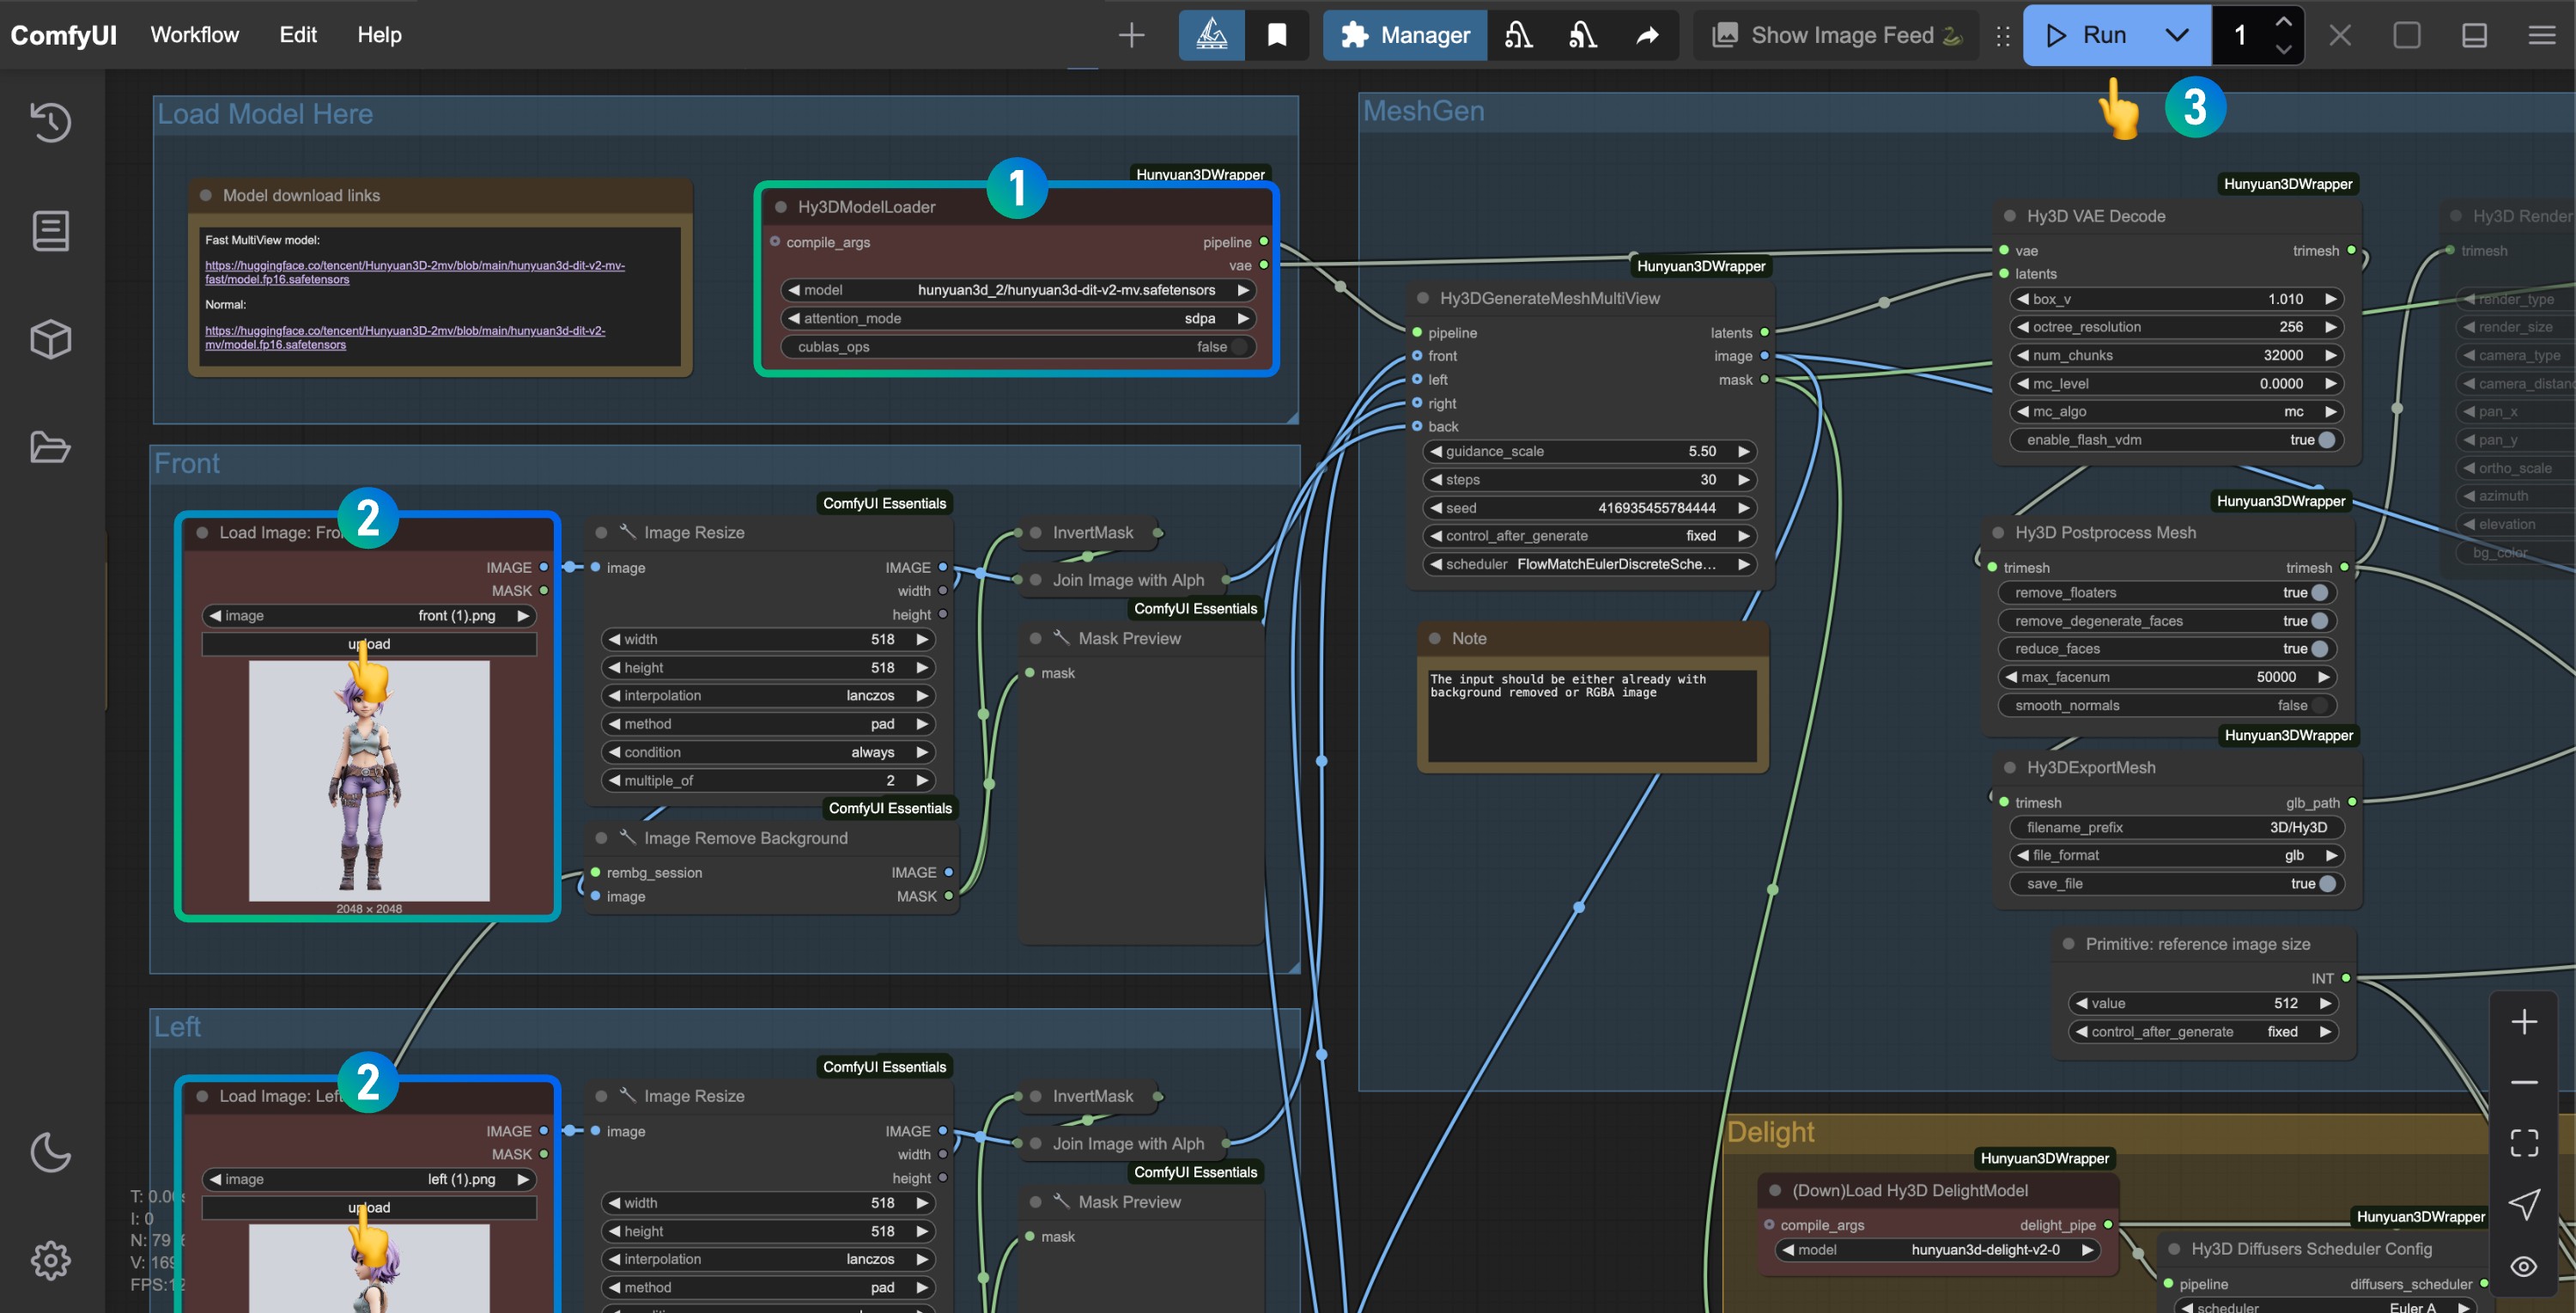
- Make sure
hunyuan3d-dit-v2-mv-fp16.safetensorsis loaded at theHy3DModelLoadernode - Upload input images of different angles at the
Load Imagenodes. If you don’t have images for certain angles, right-click the corresponding node and set its mode toNever - Click the
Runbutton or use the shortcutCtrl(cmd) + Enterto run the workflow
ComfyUI Native Hunyuan3D 2.0 Workflow
ComfyUI now natively supports Hunyuan3D-2mv series models, allowing direct generation of 3D geometric models (currently without texture materials). You just need to upgrade ComfyUI to the latest version to experience it. Since ComfyUI Wiki has begun collaborating with Comfy officials to maintain the Comfy Official Documentation, this part of the content has been detailed in the Comfy Official Documentation. However, the official documentation currently only supports Chinese and English. For the convenience of ComfyUI Wiki readers, ComfyUI Wiki has reorganized and edited the content originally published on docs.comfy.org on our site.
ComfyUI currently offers three native workflows, mainly supporting Hunyuan3D 2.0 and Hunyuan3D-2mv series models:
- Hunyuan3D-2mv multi-view workflow
- Hunyuan3D-2mv-turbo accelerated multi-view workflow
- Hunyuan3D-2 single-view workflow
These workflows have been added to the latest version of ComfyUI workflow templates. You can find them in the menu bar workflow -> workflow templates -> 3d.
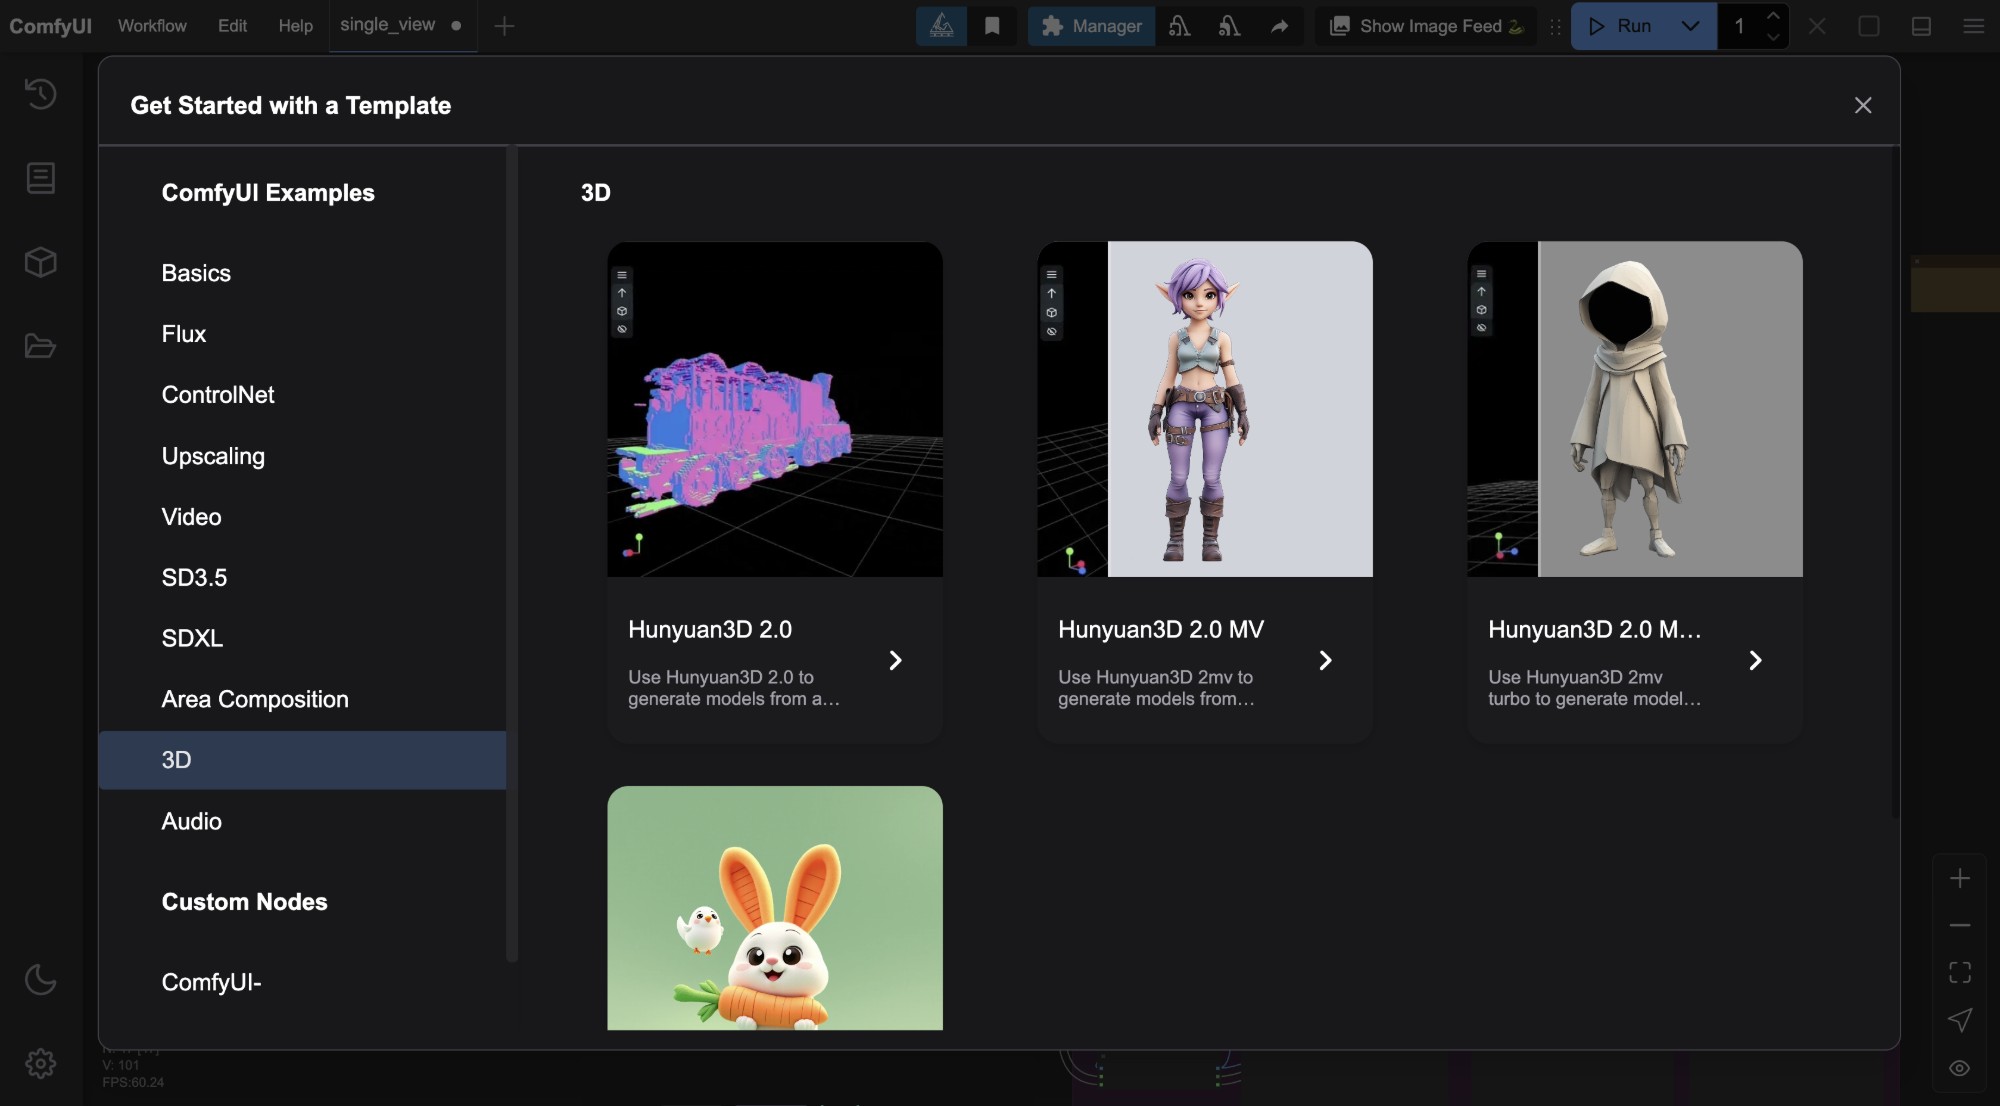
Before starting this section, make sure you’ve upgraded to the latest version of ComfyUI. You can refer to the ComfyUI Update Guide to update ComfyUI.
- Compared to ComfyUI-Hunyuan3DWrapper, the native workflow saves the corresponding models in the
ComfyUI/models/checkpoints/directory. The models are the same, so if you previously used the ComfyUI-Hunyuan3DWrapper plugin workflow, be sure to adjust the model save directory accordingly. - The output location for
.glbfiles is in theComfyUI/output/meshdirectory, as set in theSaveGLBnode.
1. Using the Hunyuan3D-2mv Multi-View Workflow
1.1 Workflow Example
Download the image below and drag it into ComfyUI, which will automatically prompt to complete the relevant model downloads.
1.2 Manual Model Installation
Download hunyuan3d-dit-v2-mv.safetensors and save it to the ComfyUI/models/checkpoints/ directory, renaming it to hunyuan3d-dit-v2-mv.safetensors.
1.3 Step-by-Step Workflow Execution
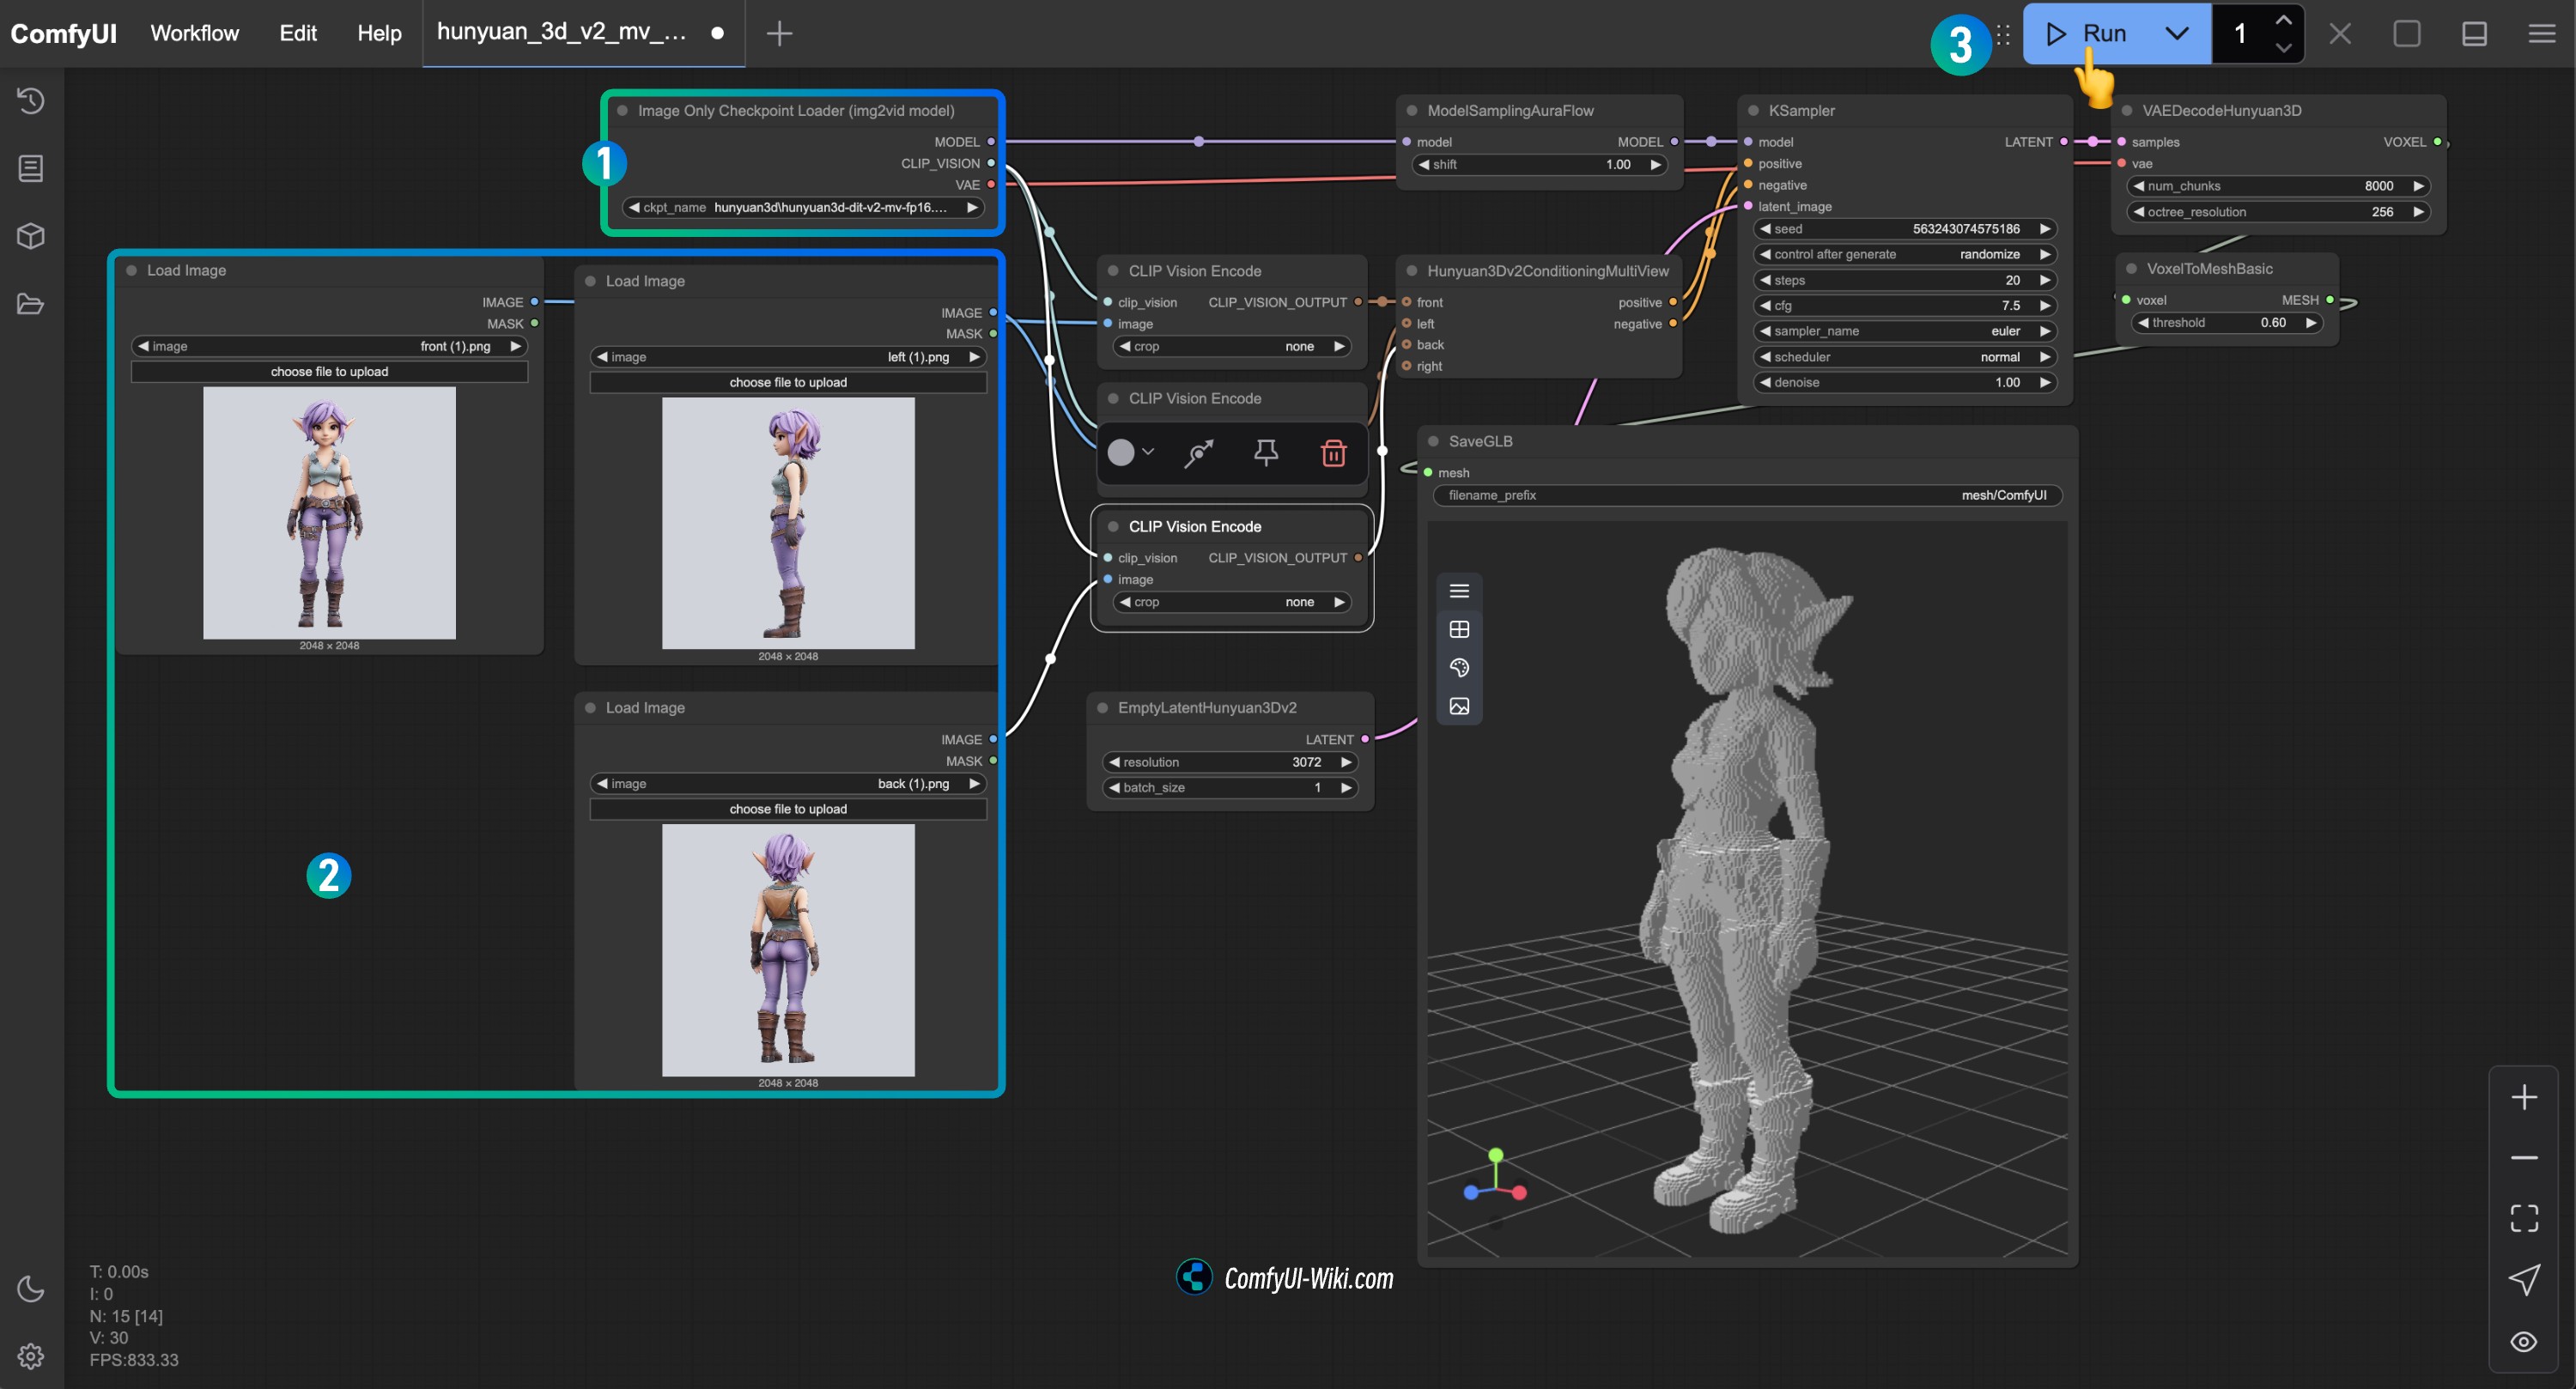
- Make sure the
Image Only Checkpoint Loader(img2vid model)node has loaded the hunyuan3d-dit-v2-mv.safetensors model - Load images of the corresponding angles in each
Load Imagenode - Run the workflow to generate the 3D model
2. Using the Hunyuan3D-2mv-turbo Accelerated Workflow
Hunyuan3D-2mv-turbo is a distilled version of Hunyuan3D-2mv, offering faster execution.
2.1 Workflow Example
Download the image below and drag it into ComfyUI, which will automatically prompt to complete the relevant model downloads.
2.2 Manual Model Installation
Download hunyuan3d-dit-v2-mv-turbo.safetensors, rename it to hunyuan3d-dit-v2-mv-turbo.safetensors, and save it to the ComfyUI/models/checkpoints/ directory.
2.3 Step-by-Step Workflow Execution
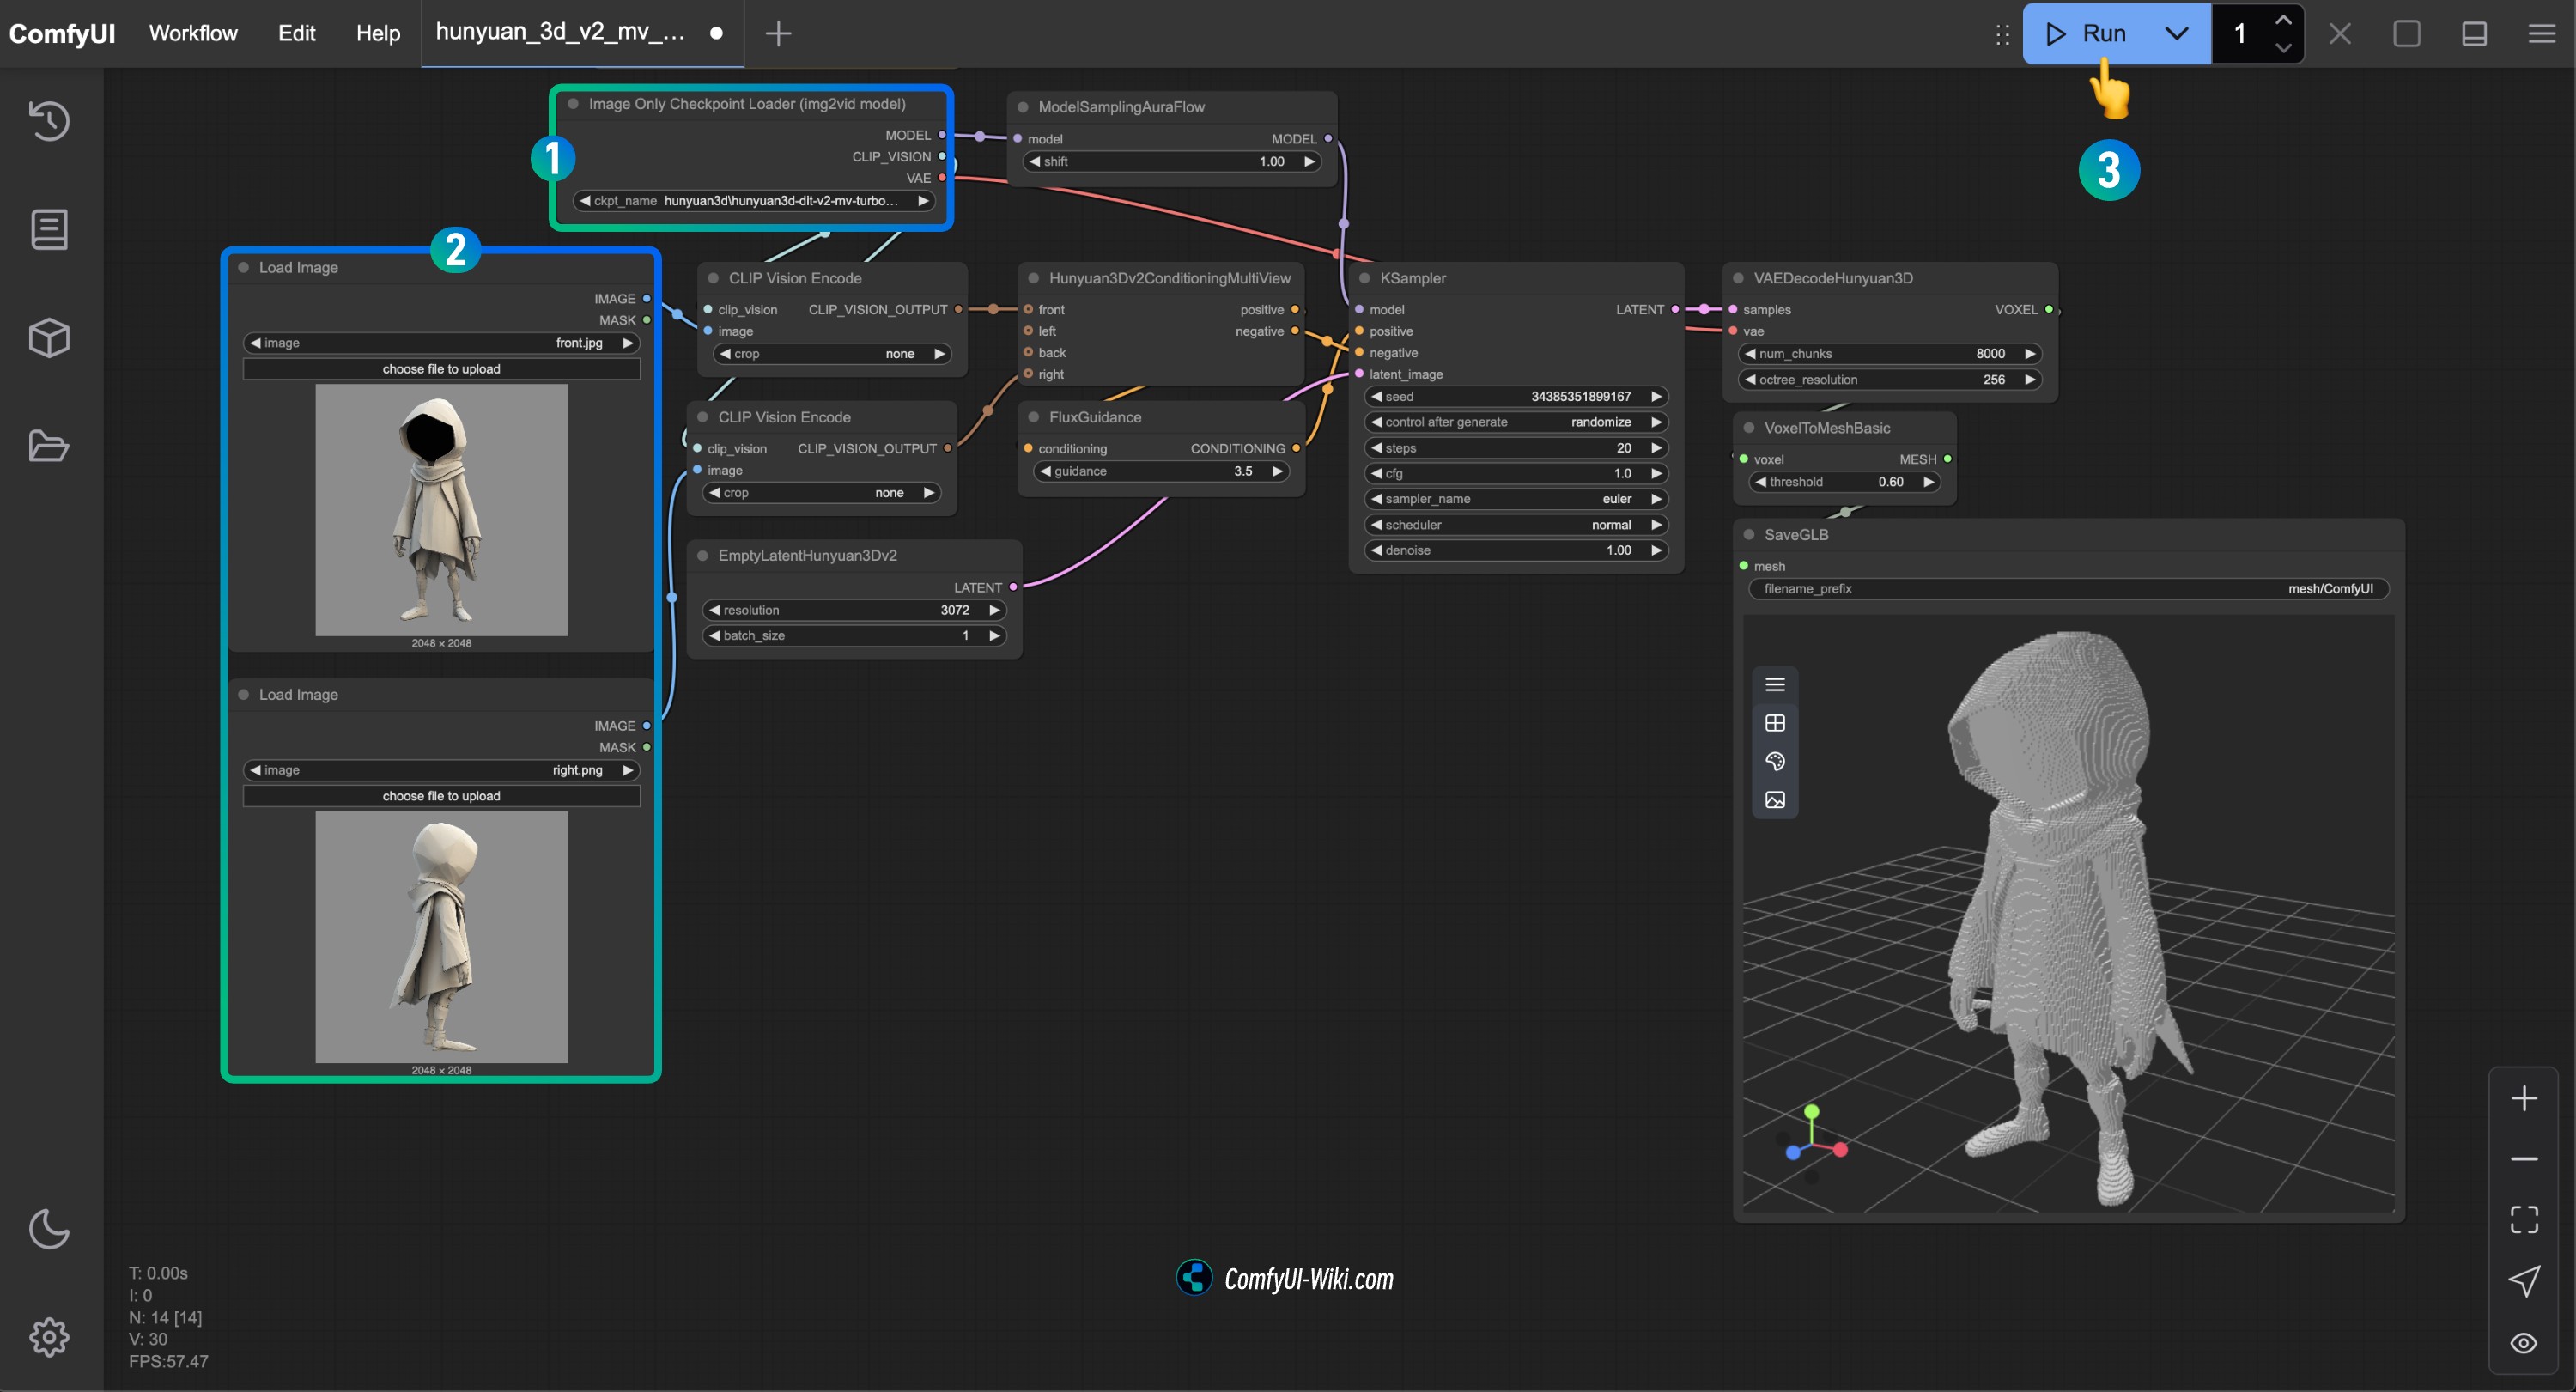
- Make sure the
Image Only Checkpoint Loader(img2vid model)node has loaded the hunyuan3d-dit-v2-mv-turbo.safetensors model - Load images of the corresponding angles in each
Load Imagenode - In this workflow, note that cfg is set to 1.0, and a
flux guidancenode has been added to control distillation cfg generation - Run the workflow to generate the 3D model
3. Using the Hunyuan3D-2 Single-View Workflow
The Hunyuan3D-2 model supports generating 3D models from single-view inputs.
3.1 Workflow Example
Download the image below and drag it into ComfyUI, which will automatically prompt to complete the relevant model downloads.
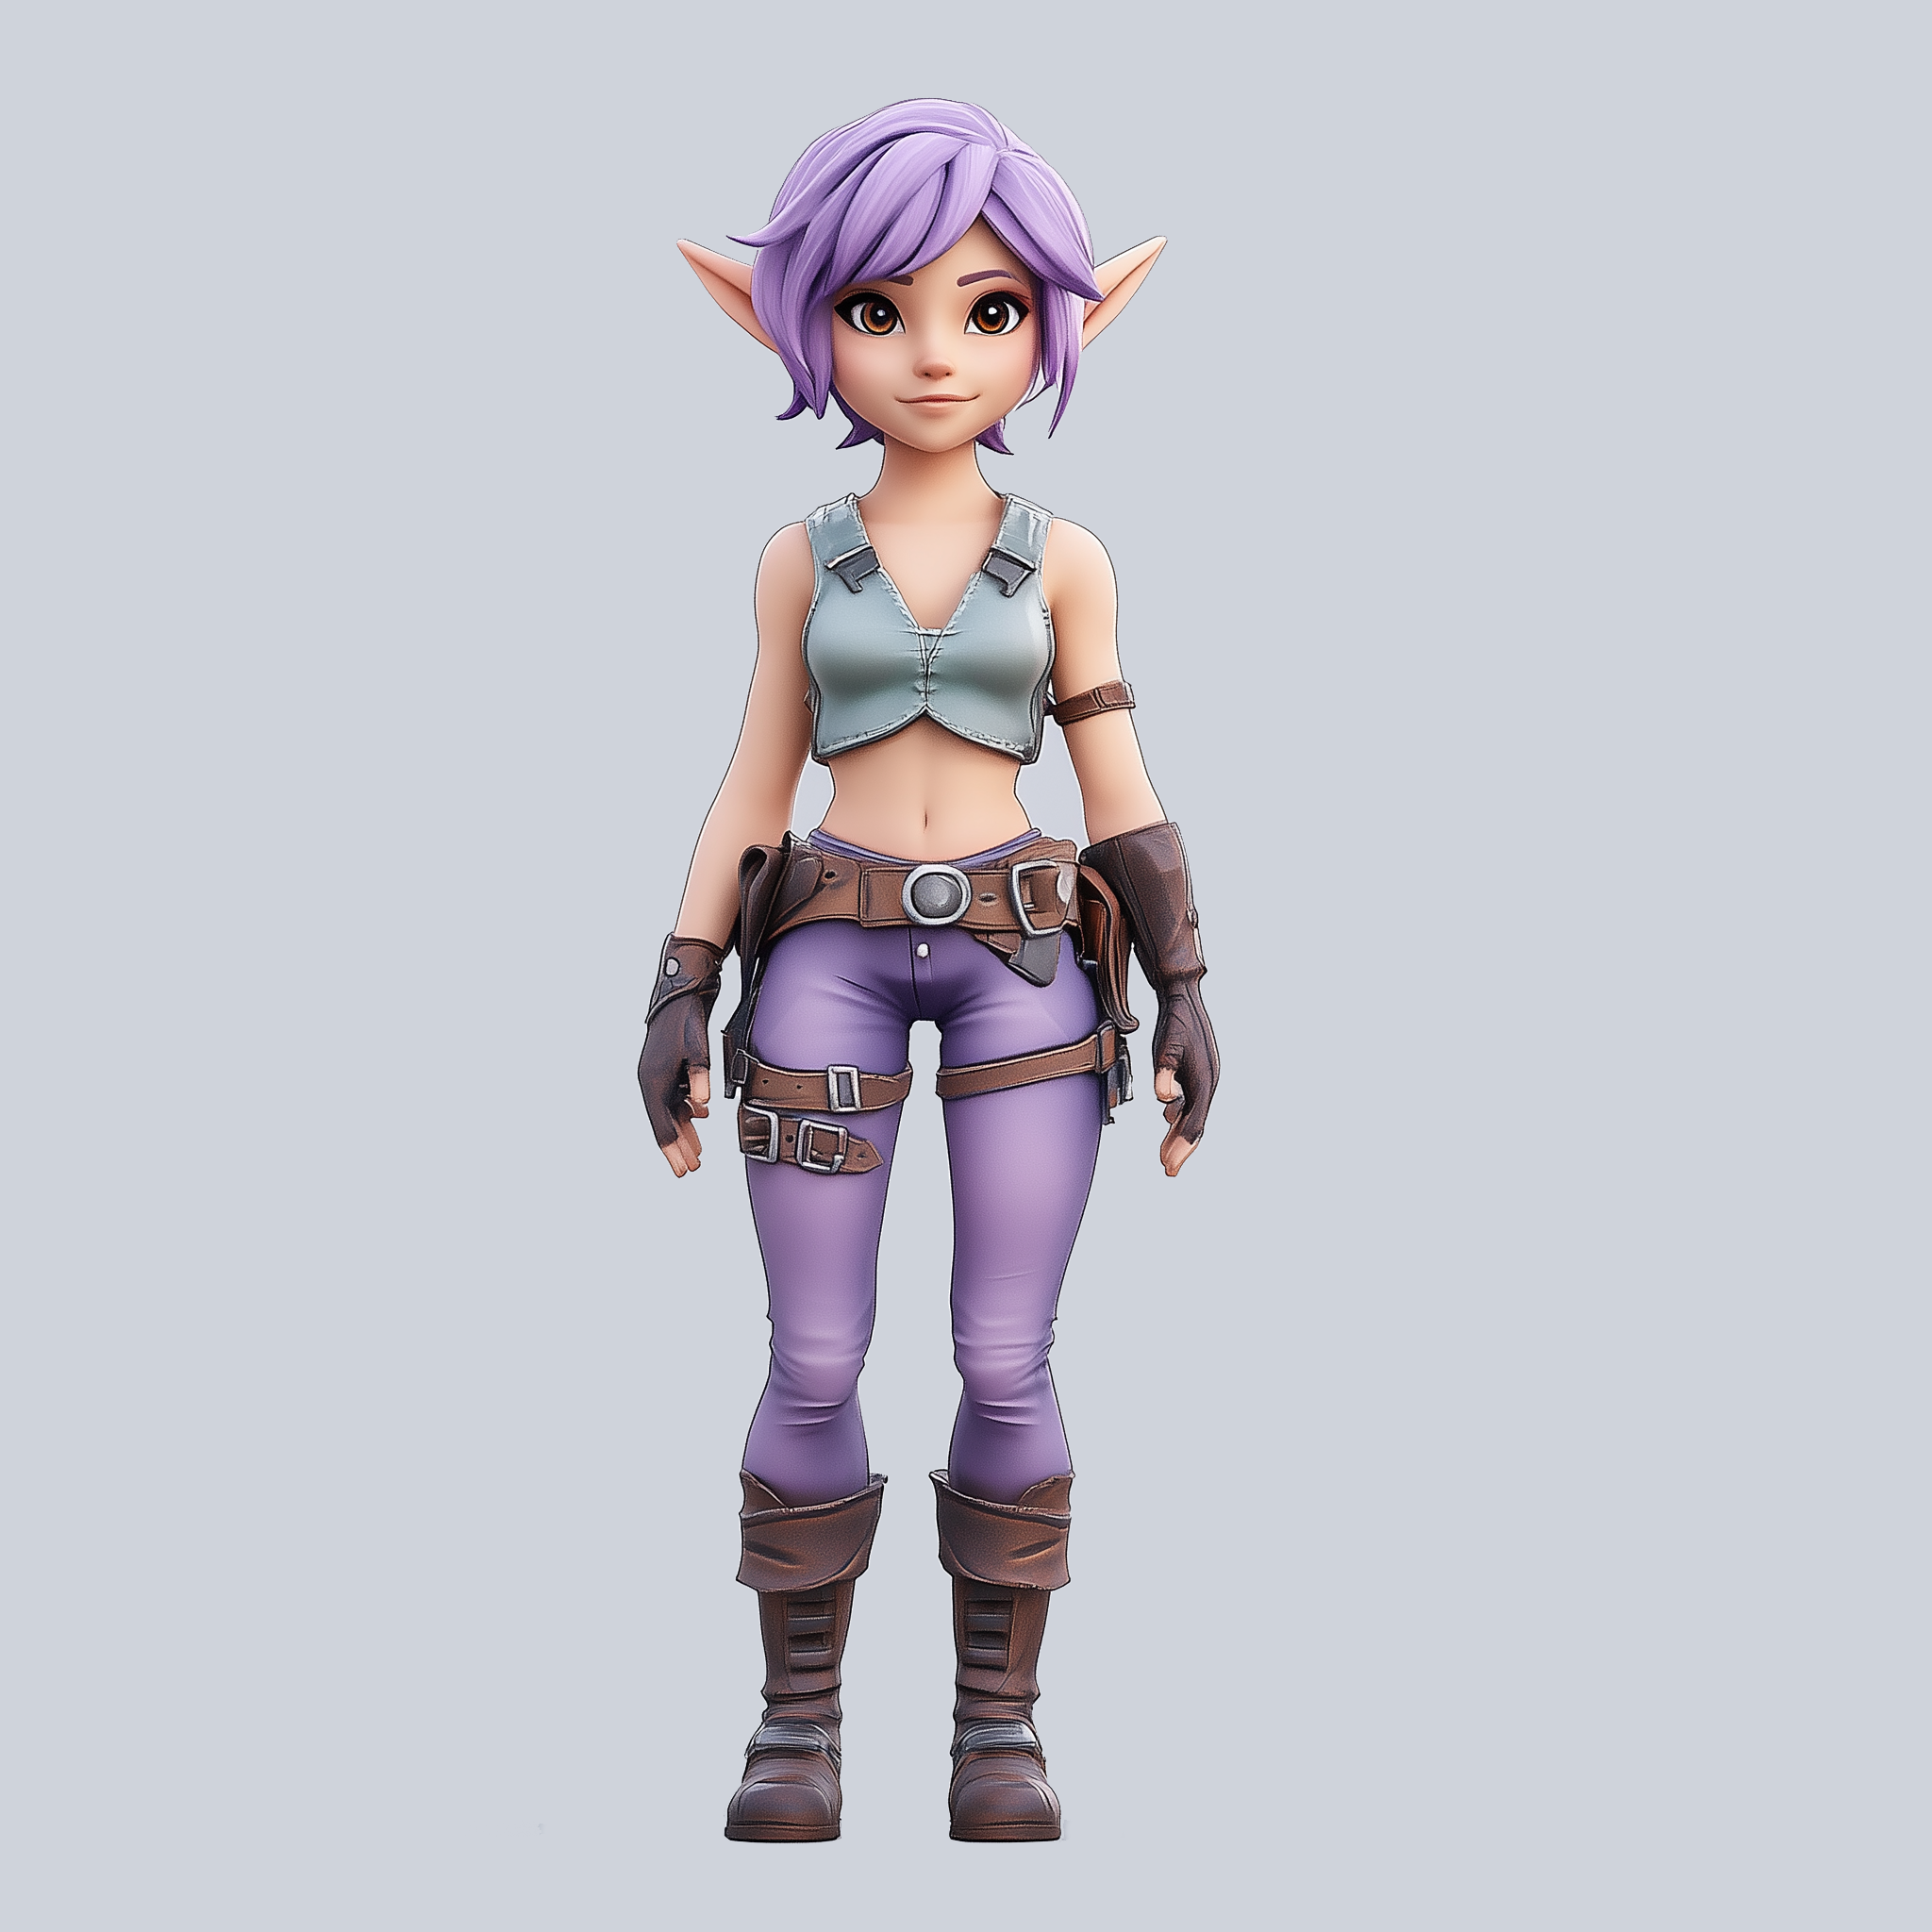
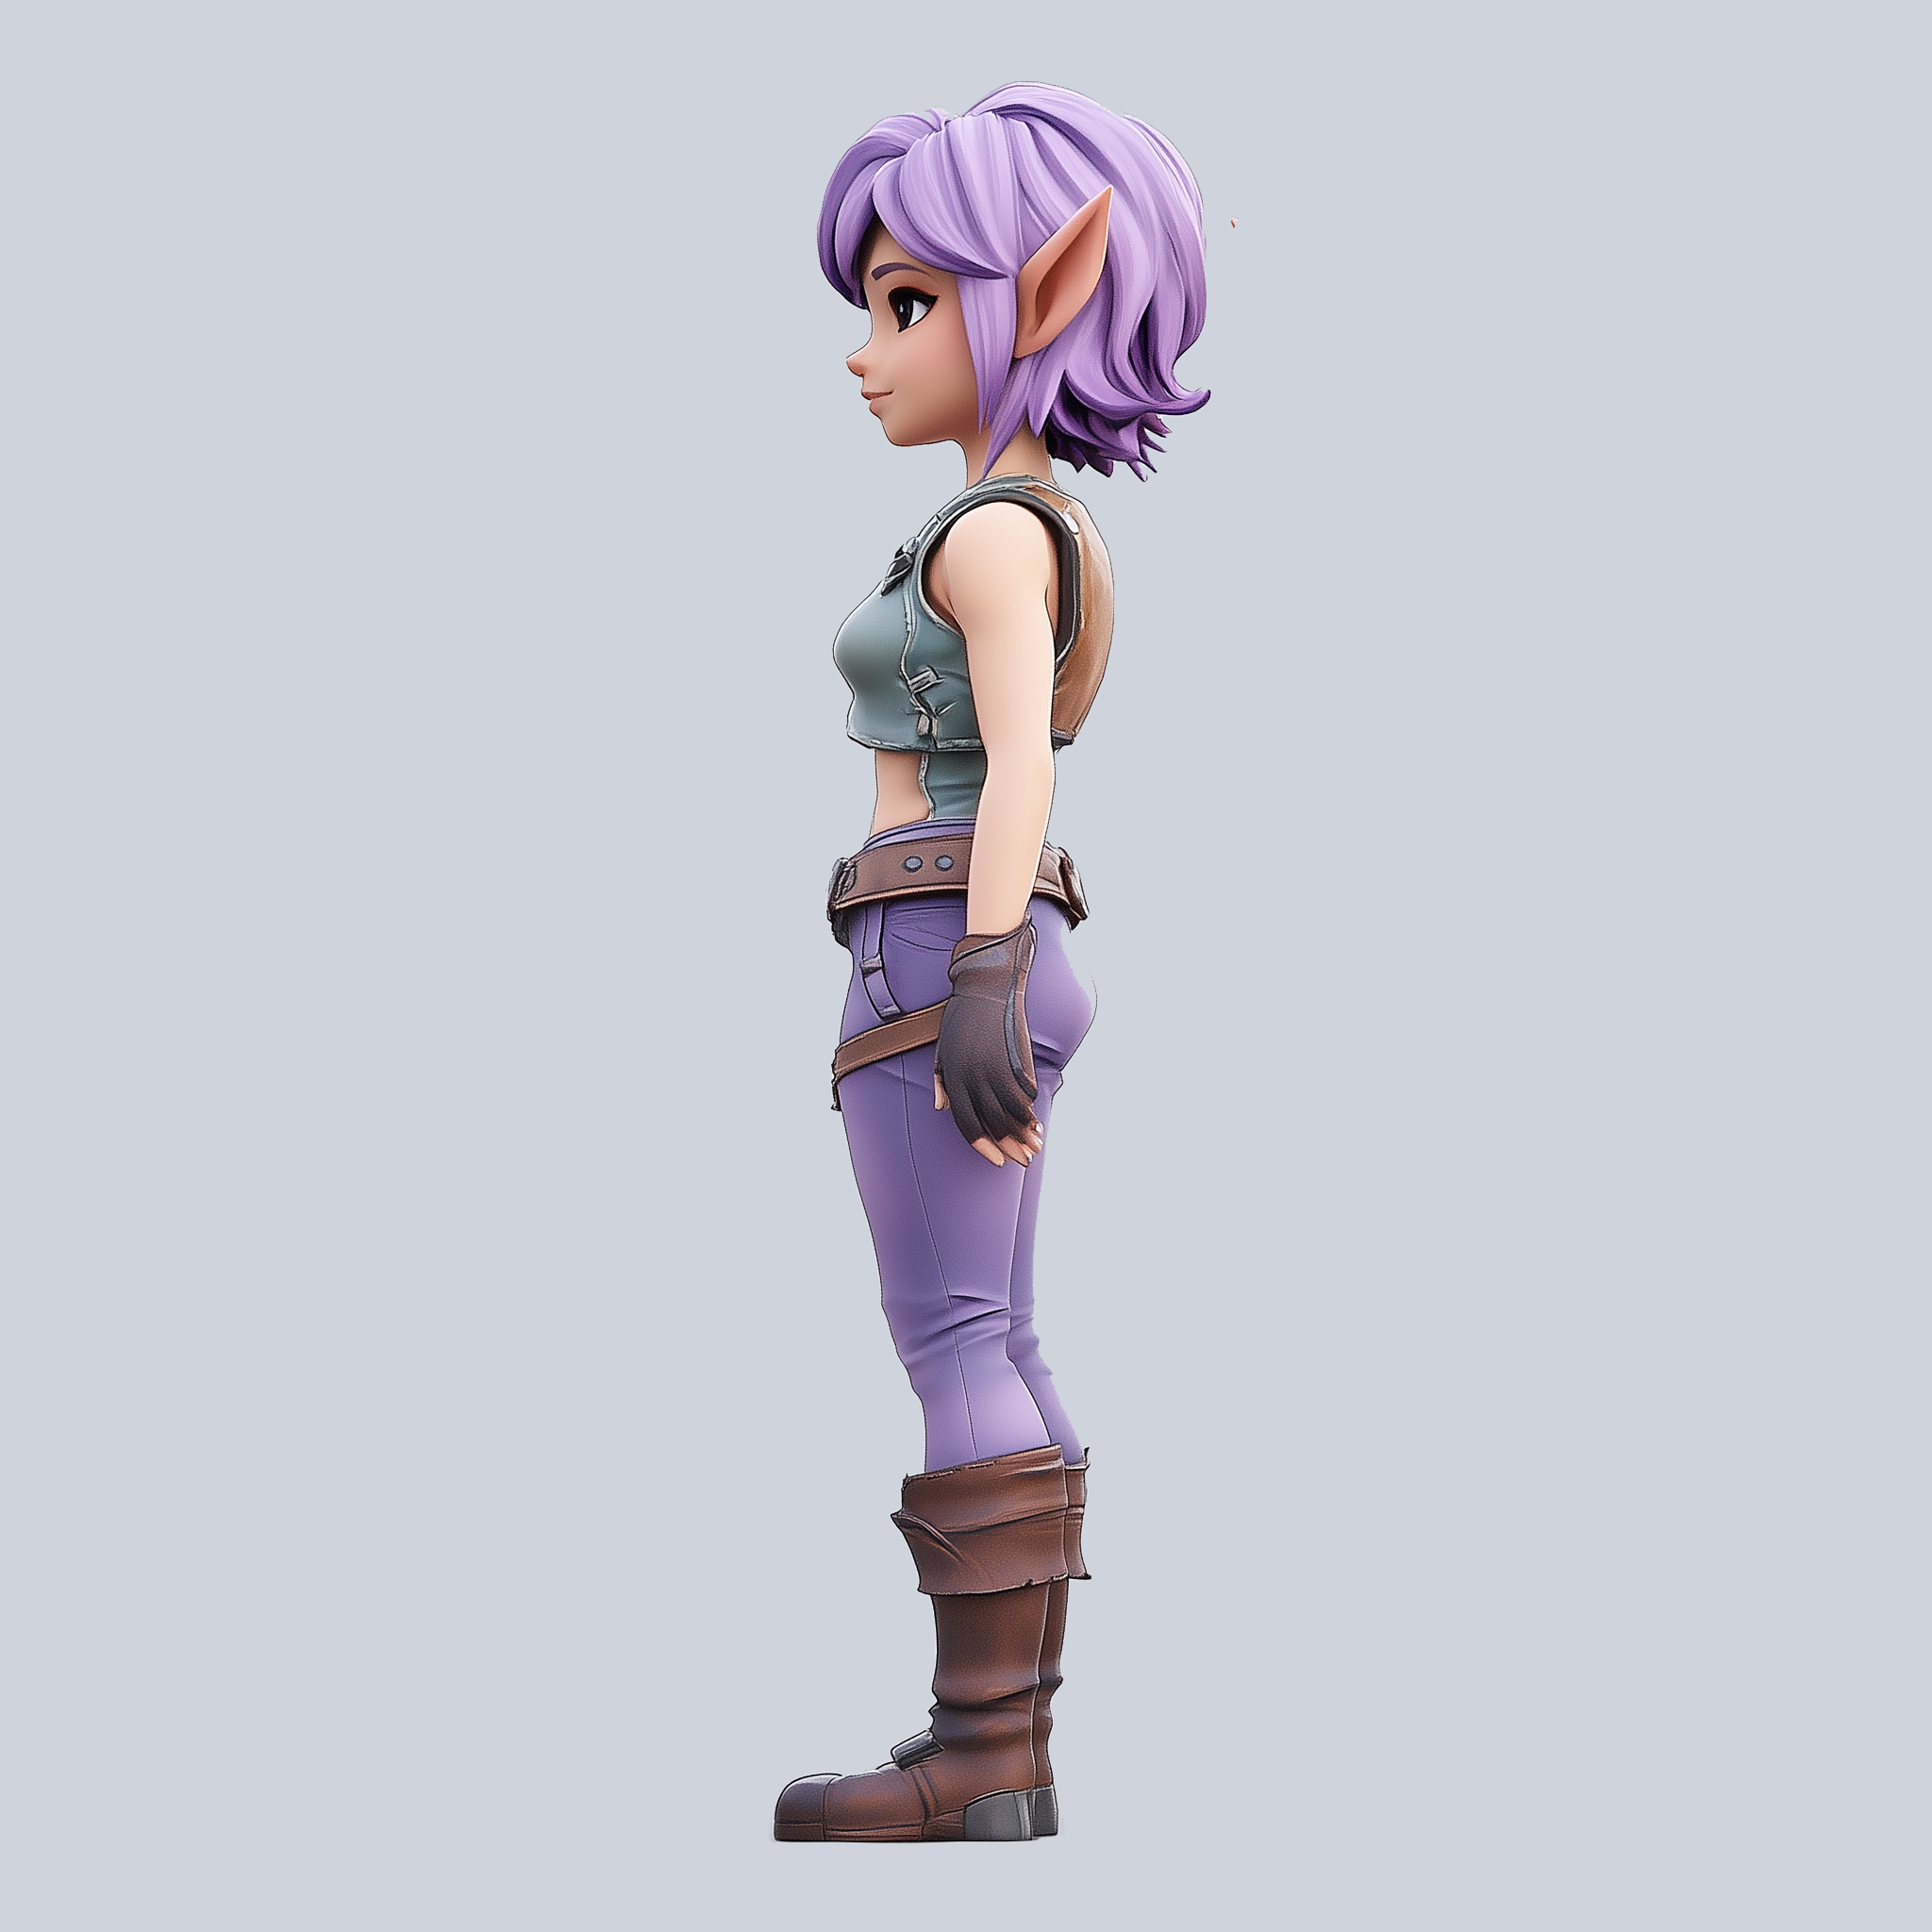
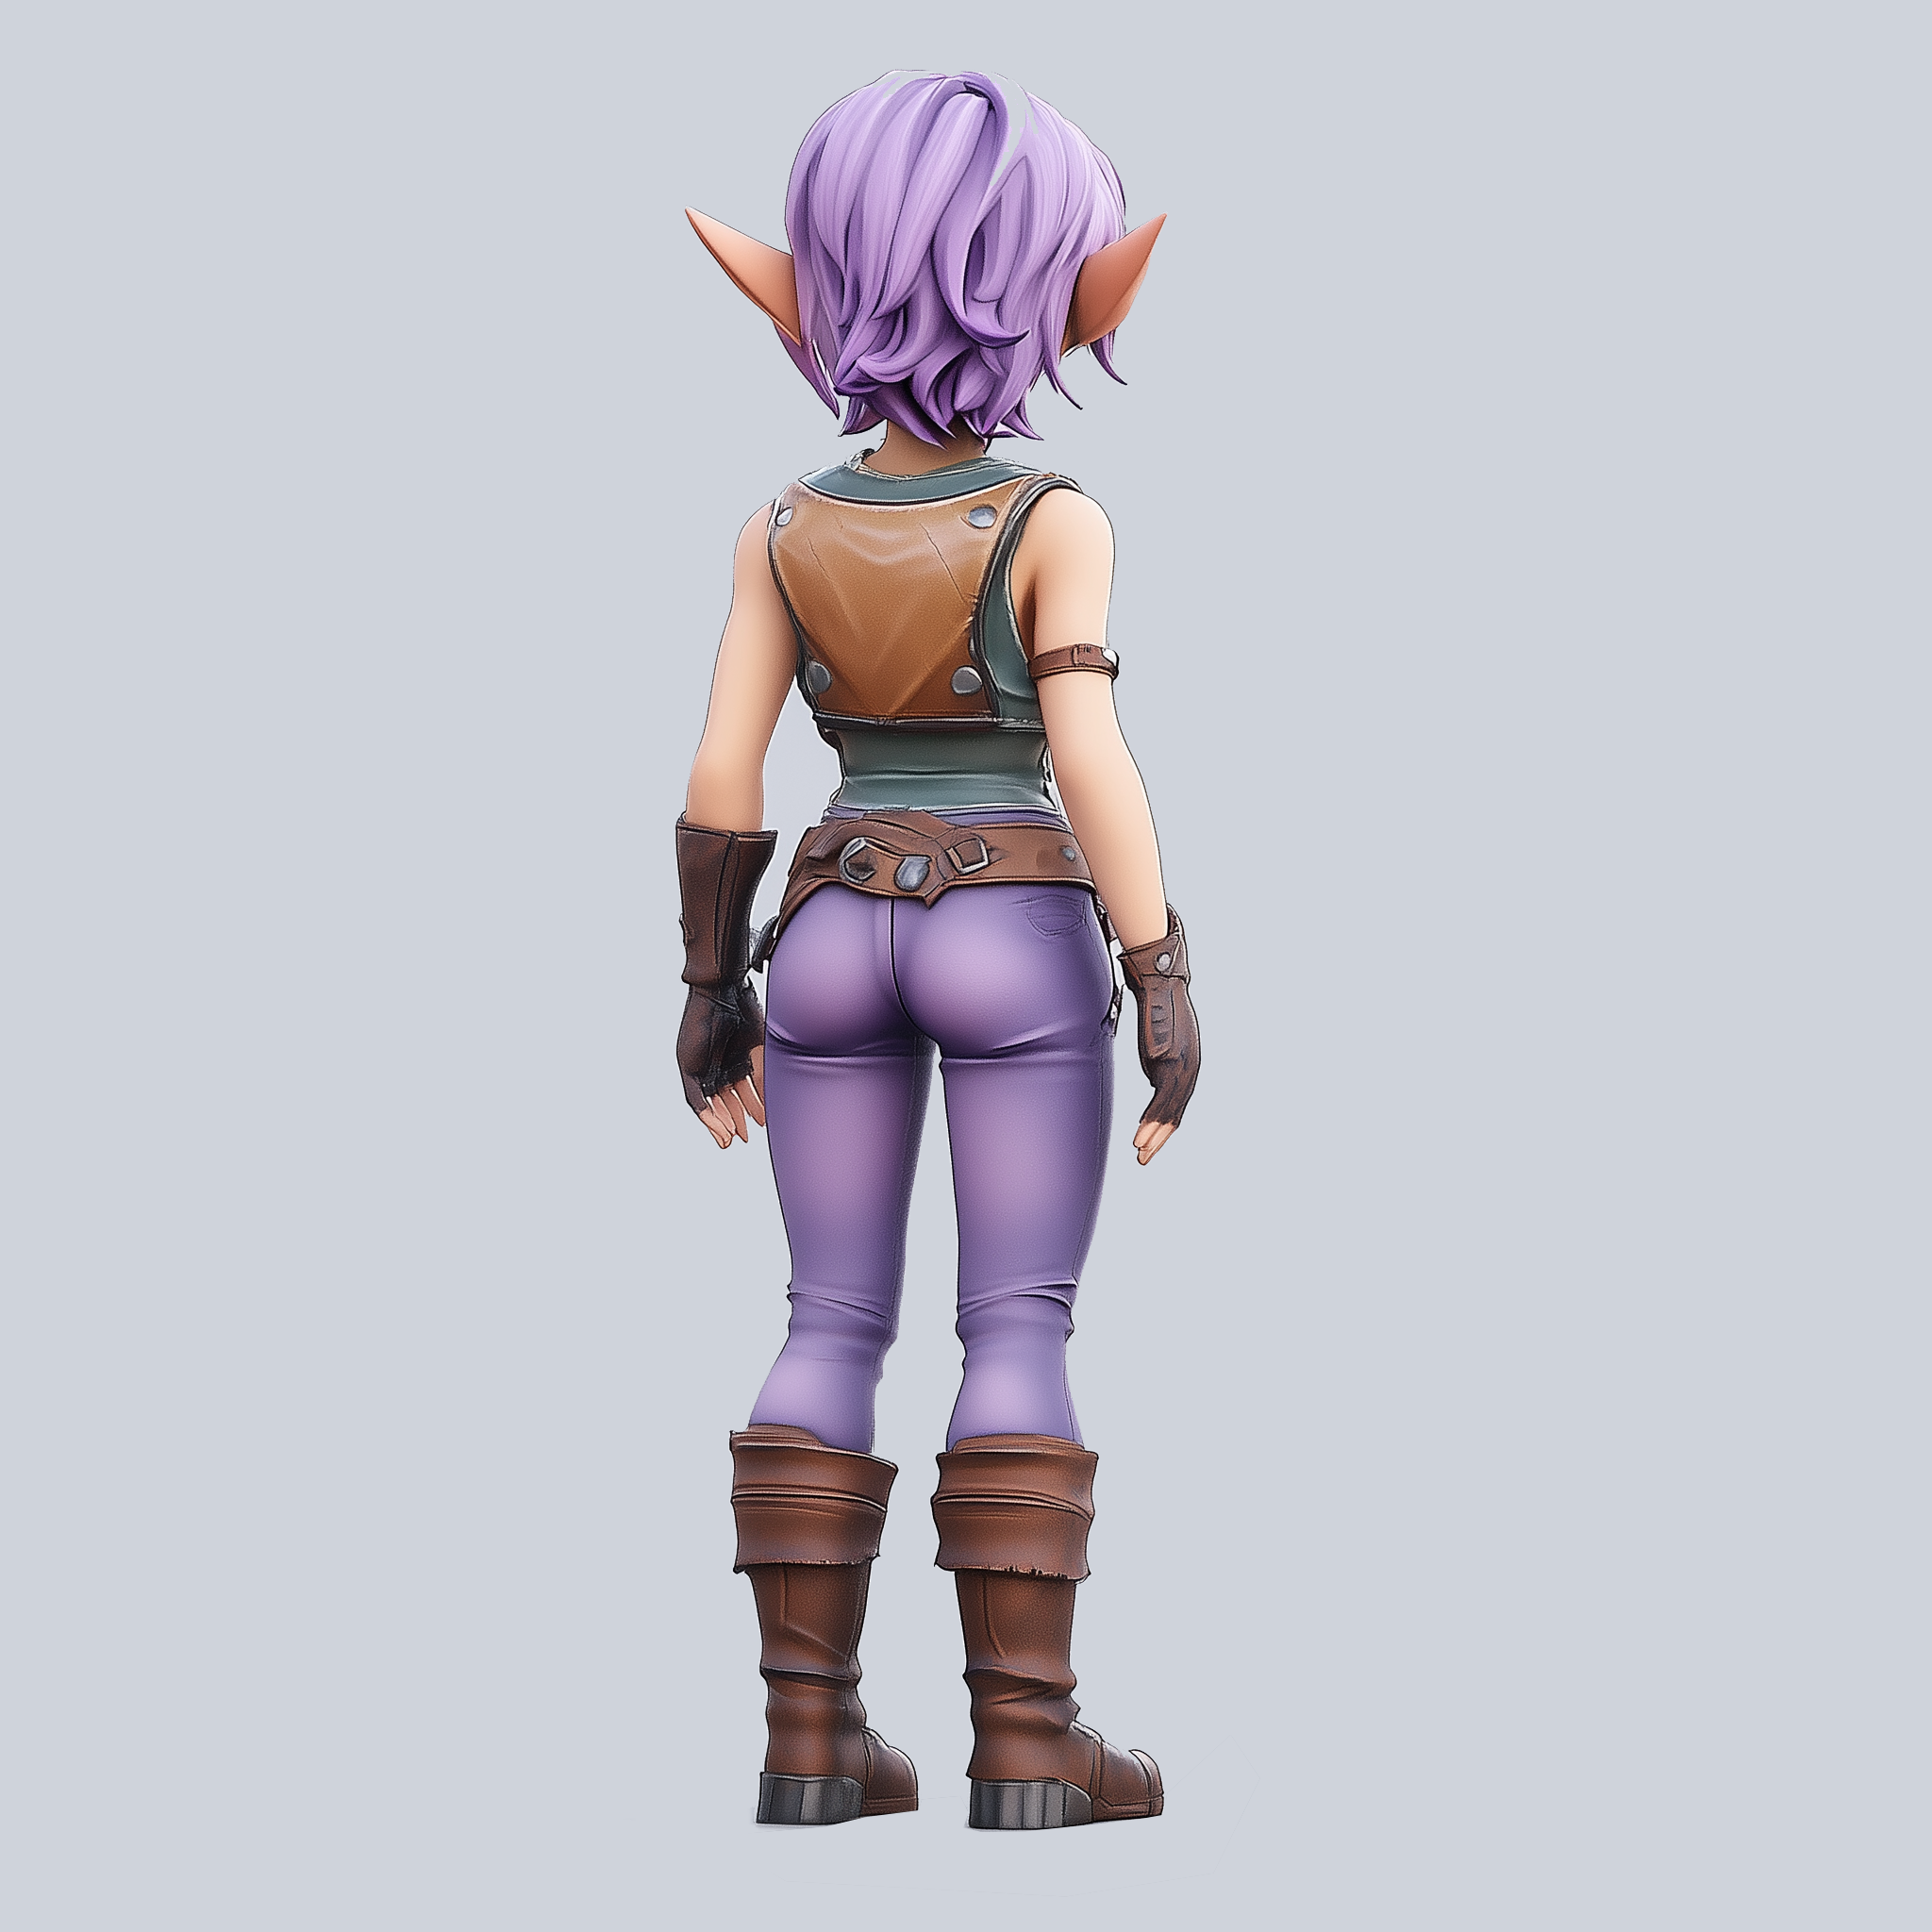
3.2 Input Image Example

3.3 Manual Model Installation
Download hunyuan3d-dit-v2.safetensors, rename it to hunyuan3d-dit-v2.safetensors, and save it to the ComfyUI/models/checkpoints/ directory.
3.4 Step-by-Step Workflow Execution
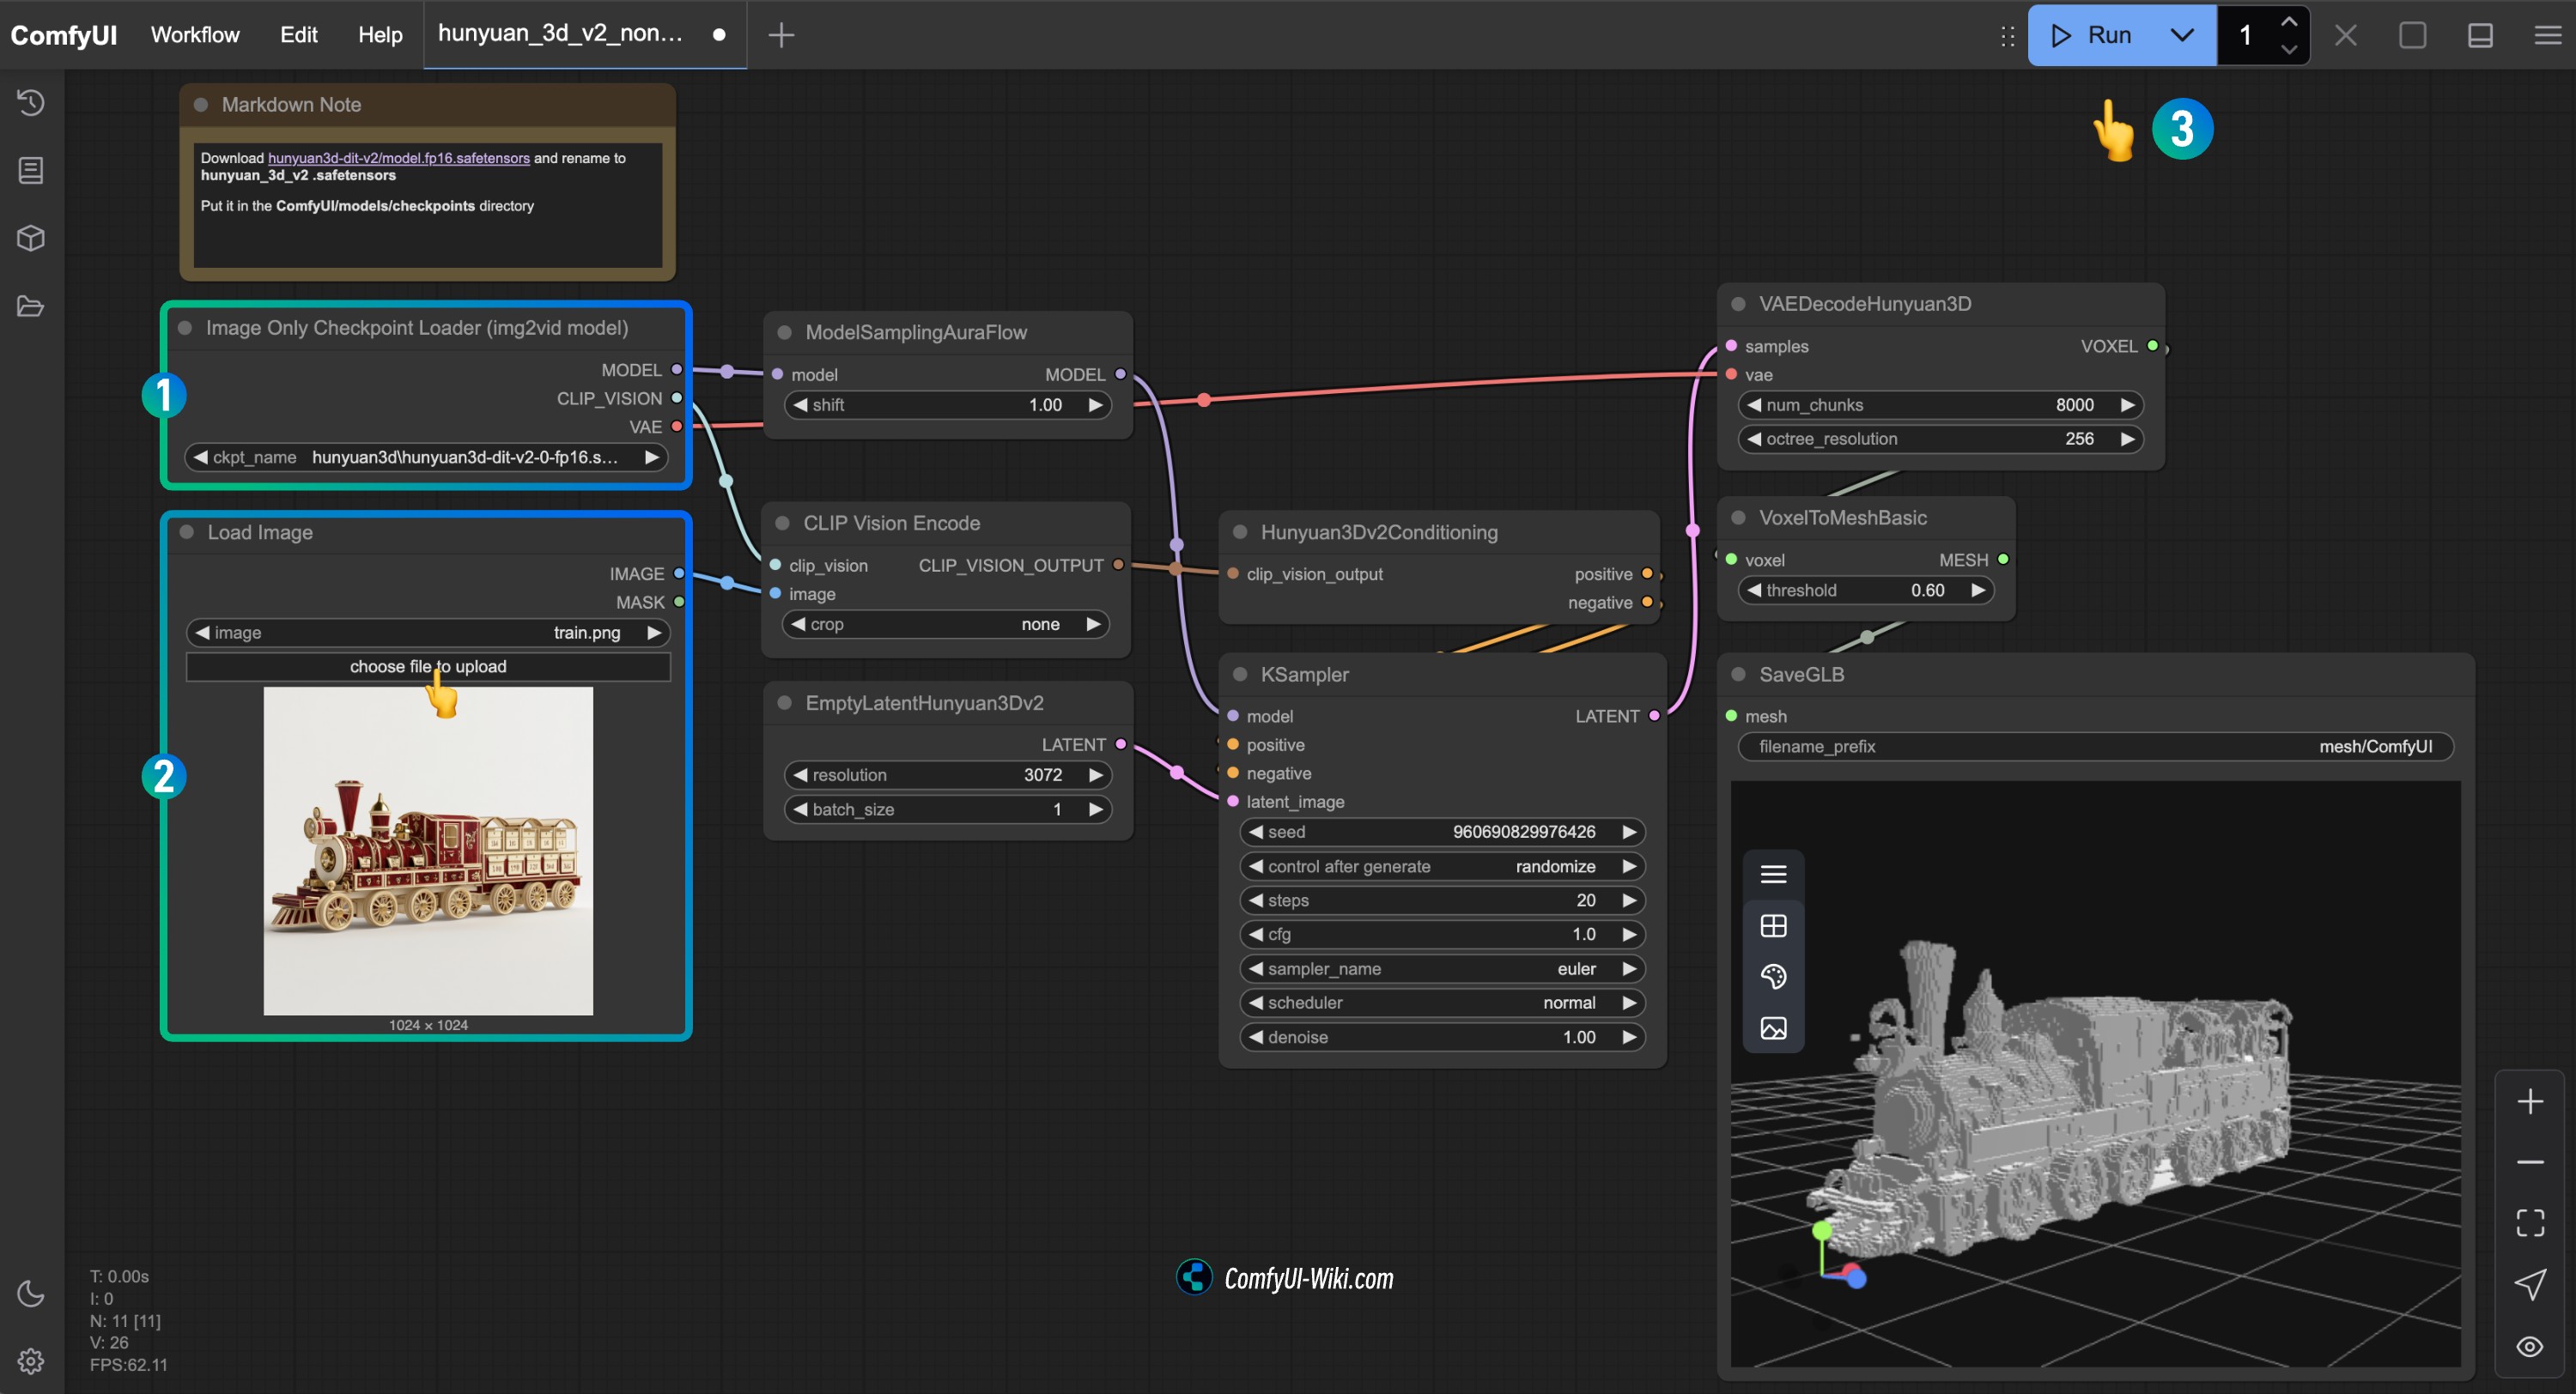
- Make sure the
Image Only Checkpoint Loader(img2vid model)node has loaded thehunyuan3d-dit-v2.safetensorsmodel - Load the input image in the
Load Imagenode - Note that this workflow uses the
Hunyuan3Dv2Conditioningnode rather thanHunyuan3Dv2ConditioningMultiView - Run the workflow to generate the 3D model
ComfyUI 3D Pack
The main issue when installing ComfyUI 3D Pack is dependency conflicts. The plugin’s environment requirements differ from those of the latest ComfyUI version, especially regarding PyTorch and CUDA version support. If you want to try it, you can refer to the installation instructions for the ComfyUI-3D-Pack project. Additionally, community users have provided integrated packages that you can try: Comfy3D-WinPortable | Integrated Package
Additional Content
How to Generate Models from Text
In the workflows above, we used input images. You can add a text-to-image workflow before these workflows to generate the corresponding image content. If you need multi-view inputs, you can try using the ComfyUI-MVAdapter plugin to generate multi-angle images of the corresponding character.
Hunyuan3D 2.0 Open Source Model Series
Hunyuan3D 2.0 has open-sourced multiple models covering the complete 3D generation process. You can visit Hunyuan3D-2 to learn more.
Hunyuan3D-2mini Series
| Model | Description | Date | Parameters | Huggingface |
|---|---|---|---|---|
| Hunyuan3D-DiT-v2-mini | Mini image-to-shape model | 2025-03-18 | 0.6B | Link |
Hunyuan3D-2mv Series
| Model | Description | Date | Parameters | Huggingface |
|---|---|---|---|---|
| Hunyuan3D-DiT-v2-mv-Fast | Guidance distilled version that can halve DIT inference time | 2025-03-18 | 1.1B | Link |
| Hunyuan3D-DiT-v2-mv | Multi-view image-to-shape model, ideal for 3D creation requiring multiple angles | 2025-03-18 | 1.1B | Link |
Hunyuan3D-2 Series
| Model | Description | Date | Parameters | Huggingface |
|---|---|---|---|---|
| Hunyuan3D-DiT-v2-0-Fast | Guidance distilled model | 2025-02-03 | 1.1B | Link |
| Hunyuan3D-DiT-v2-0 | Image-to-shape model | 2025-01-21 | 1.1B | Link |
| Hunyuan3D-Paint-v2-0 | Texture generation model | 2025-01-21 | 1.3B | Link |
| Hunyuan3D-Delight-v2-0 | Image delighting model | 2025-01-21 | 1.3B | Link |
Hunyuan 3D 2.0 Related Links
- Hunyuan3D Homepage: https://3d.hunyuan.tencent.com
- Hunyuan3D-2 Demo: https://huggingface.co/spaces/tencent/Hunyuan3D-2
- Hunyuan3D-2 Models: https://huggingface.co/Tencent/Hunyuan3D-2
- Hunyuan3D-2mv Models: https://huggingface.co/tencent/Hunyuan3D-2mv
- Hunyuan3D-2mv Demo: https://huggingface.co/spaces/tencent/Hunyuan3D-2mv
- GitHub: https://github.com/Tencent/Hunyuan3D-2
- Discord: https://discord.gg/GuaWYwzKbX
- Report: https://github.com/Tencent/Hunyuan3D-2/blob/main/assets/report/Tencent_Hunyuan3D_2_0.pdf
- Official Website: http://3d-models.hunyuan.tencent.com