Using Embedding Models in ComfyUI
On some model platforms, we can find embedding models that can output specific styles. For example, they can generate flat-style images, give characters in the image certain characteristics, or make the entire image present a specific artistic style. Additionally, embedding models are usually very small, only a few KB in size. You can simply think of it as a “compressed package” of prompts. Effects that would normally require complex text descriptions can be easily achieved through Embedding models, and with their small size, they are very convenient to use.
Therefore, Embedding models are used in the CLIP Text Encode node. This article will guide you on where to download, install, and provide specific usage examples.
Where to Download Embedding Models?
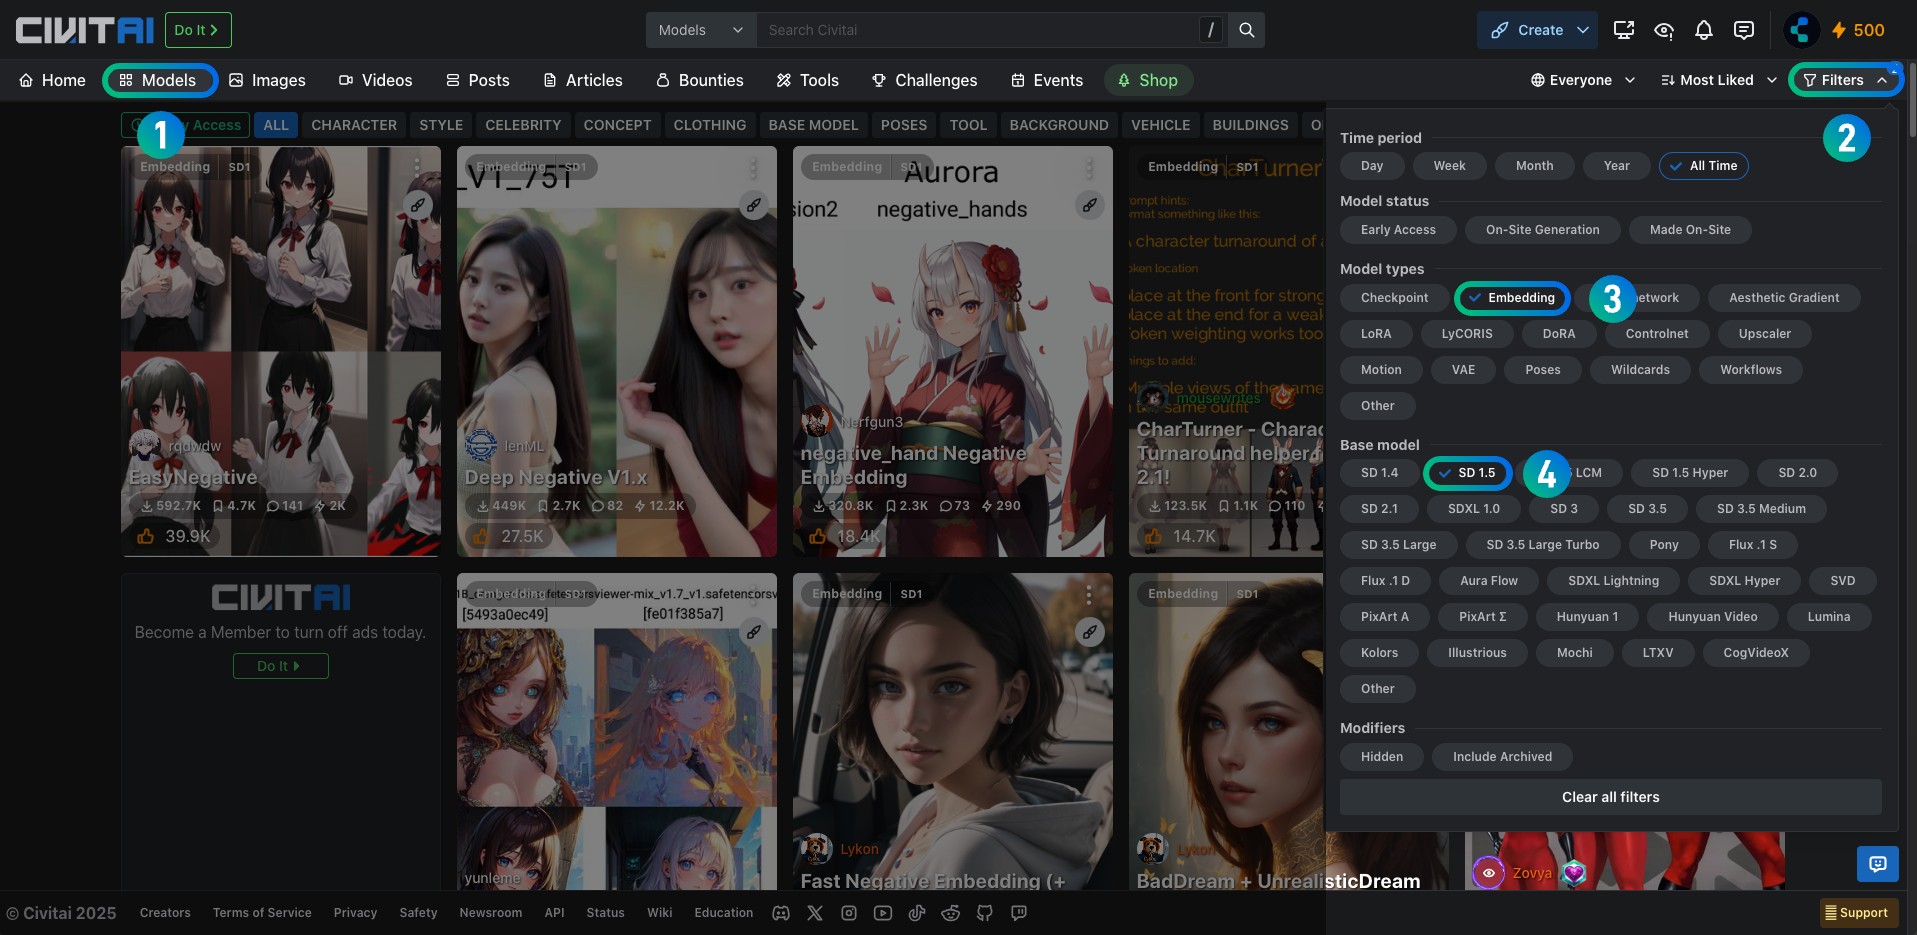
These are common websites where you can download embedding models. Usually, on the corresponding model pages, use the filter to select embedding or Textual Inversion to filter out the corresponding models.
As shown below, the screenshot shows filtered embedding models used for SD1.5 models.

How to Install Embedding Models?
Practical Example Explanation
Below, I will use the EasyNegative model as an example to explain how to use embedding models in ComfyUI.
1. Related Model Downloads and Installation
| Model Type | Model Name | Download Link | Description |
|---|---|---|---|
| SD1.5 Model | DreamShaper v8 | Download | Base model for SD1.5 |
| Embedding Model | EasyNegative | Download | Please note the usage instructions on the corresponding page, authors usually provide detailed instructions for model usage |
The above models can be downloaded from the respective links, ensure to follow the usage instructions for best results.
In your ComfyUI directory, ensure you have the following folder structure:
📁ComfyUI
├── 📁models
│   ├── 📁checkpoints
│   │   └── 📁SD1.5              // Store DreamShaper v8
│   └── 📁embeddings
│ └── 📁SD1.5 // Store embedding model "EasyNegative"- Place the downloaded EasyNegative model in the
models/embeddings/SD1.5folder - Restart or refresh the ComfyUI interface to let ComfyUI recognize the new model
The reason for using the SD1.5 subfolder in the corresponding model directory is that there are currently many different models like SD1.5, SD3.0, SDXL, FLUX, etc., and their model resources are not necessarily compatible, so subfolders are needed for distinction. Additionally, you can rename the corresponding model files to add some simple model information descriptions, making it easier to distinguish when you have many models later.
Plugin Installation (Optional): ComfyUI-Custom-Scripts
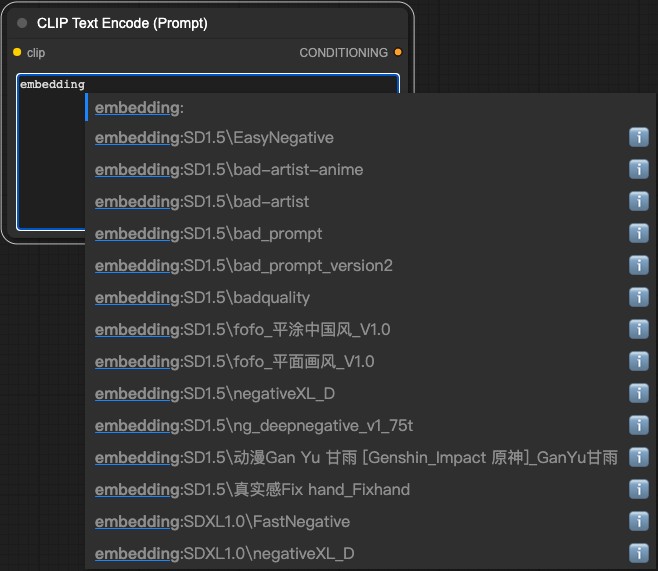
This plugin allows you to enter the embedding model name in the text encoder, and it will automatically help you generate the corresponding embedding model. For installation instructions, refer to How to Install Custom Nodes in ComfyUI

2. Load Embedding Workflow File
Download the above file and drag it into the ComfyUI interface or open it using the menu

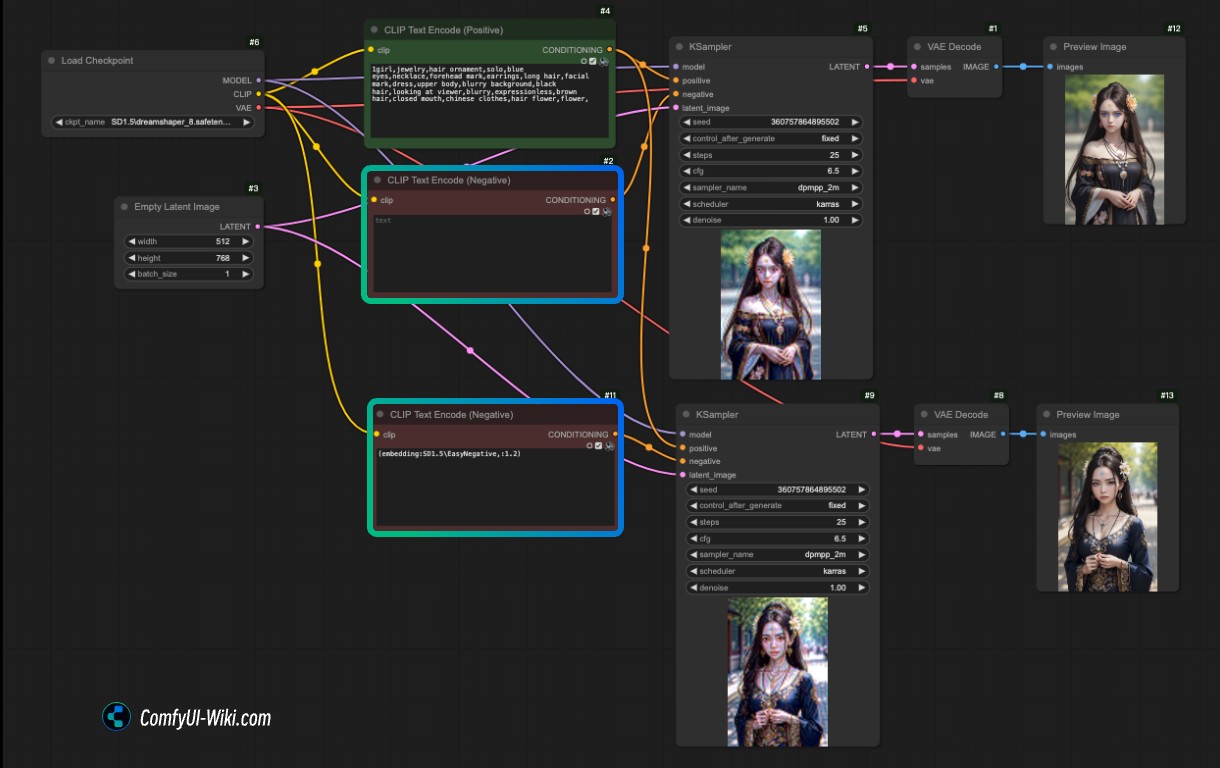
Related explanation: There are two image generation processes in the corresponding workflow, the only difference being that the upper process has no content input for negative prompts, while the lower process uses the EasyNegative model with input (embedding:SD1.5\EasyNegative,:1.2)
Embedding models can be used like normal prompts, using ComfyUI’s method of adding prompts to increase weight.
Related Articles
How to Install Embedding Models Embedding Model Resources