How to Inpaint an Image in ComfyUI
This article explains how to perform inpainting in ComfyUI with complete workflow and examples
Image inpainting refers to modifying specific parts of an image while leaving other parts unchanged, such as:
- Removing objects from the scene
- Modifying details of a person (expression, clothing)
- Changing clothing colors etc.
All these can be achieved through image inpainting. This article demonstrates a basic inpainting workflow. You can find the official example using VAE Inpainting Encoder in the ComfyUI Official Inpainting Workflow. However, in this tutorial, I'll demonstrate inpainting using Set Latent Noise Mask.
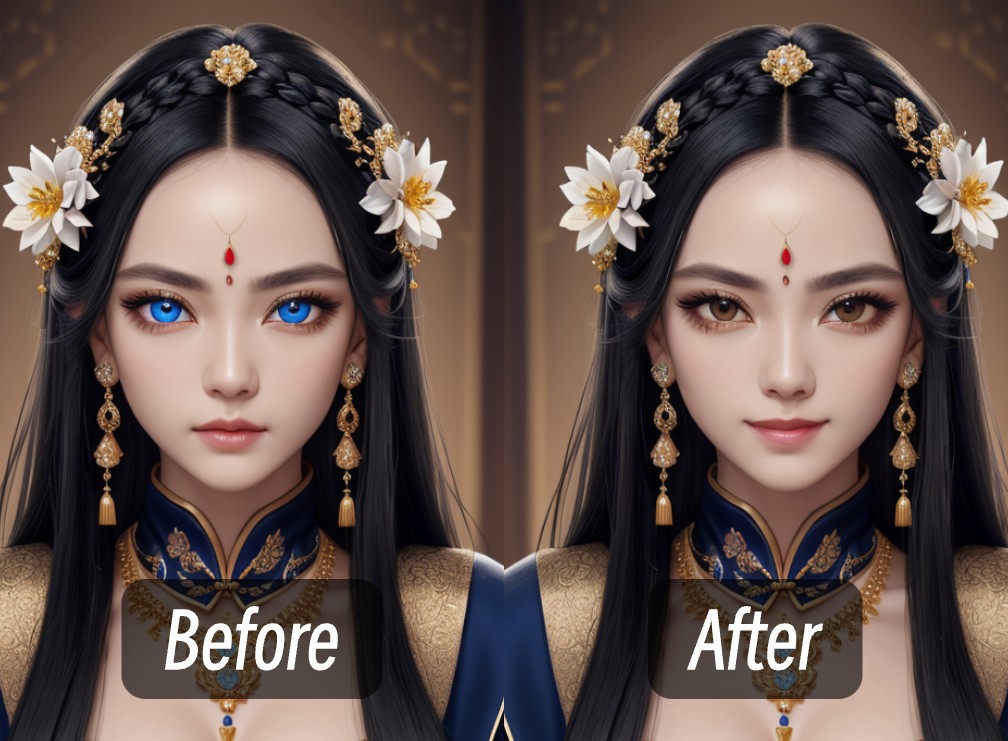
This tutorial mainly demonstrates modifying a person's eye color and expression in an image.
Preparation Before Starting the Inpainting Workflow (Optional)
This workflow will use the following model, but it's not mandatory unless you don't have any SD1.5 model on your computer:
| Model Type | Model Name | Download Link | Description |
|---|---|---|---|
| SD1.5 Model | DreamShaper v8 | Download Here | Base model for SD1.5 |
After downloading, please save the model file in the following directory:
📁ComfyUI
├── 📁models
│   ├── 📁checkpoints
│   │   └── 📁SD1.5                                  // Create a new SD1.5 folder
│   │       └── dreamshaper_8.safetensors            // Place DreamShaper v8 here
Inpainting Workflow Materials
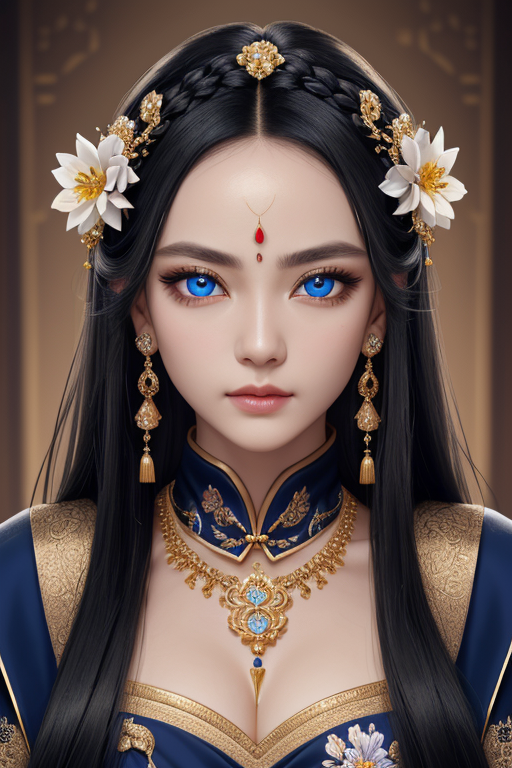
Please download the image below and click the button to download the workflow file
Inpainting Workflow Explanation
After opening ComfyUI, drag the workflow file into ComfyUI or use the menu to open and load it
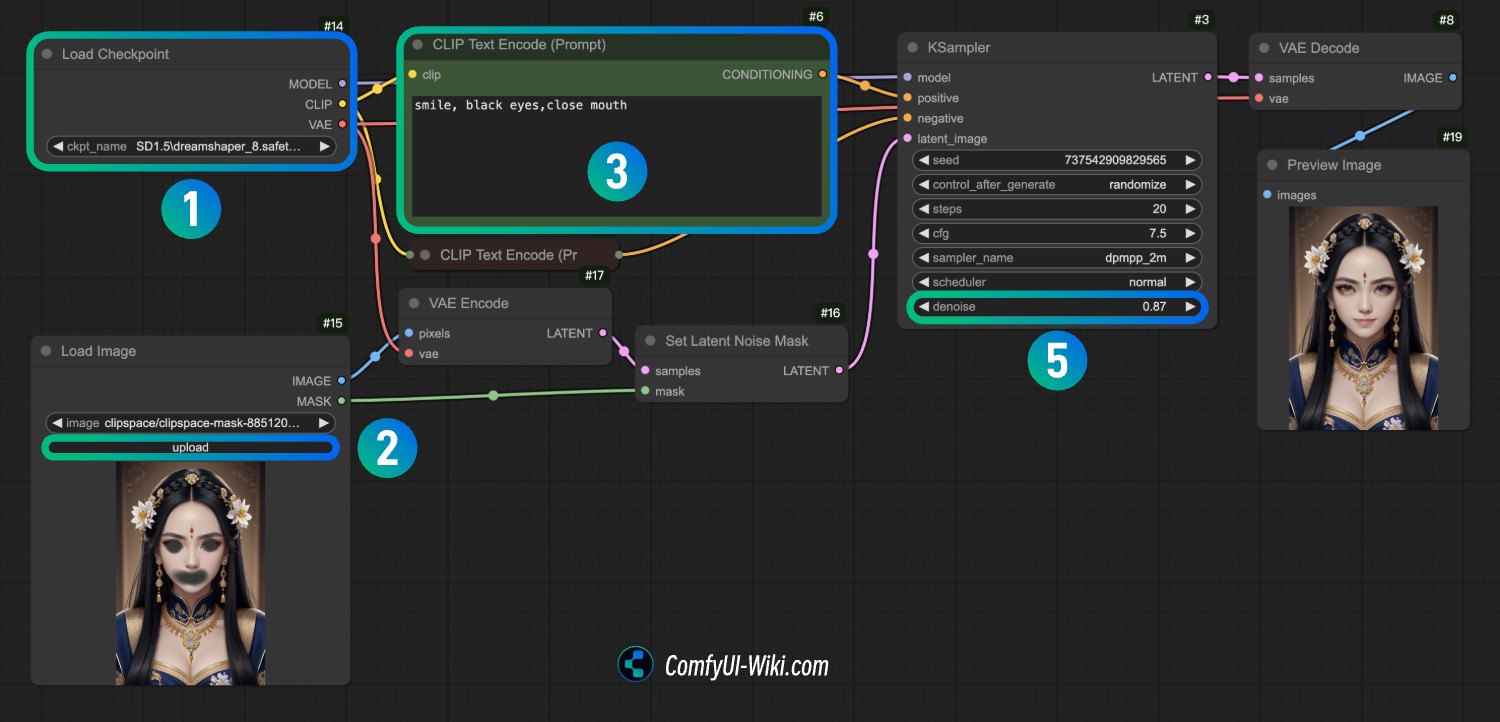
- At point
1, load theDreamShaper v8model, or any other model you have on your computer - At point
2, use Load Image to load the image provided in the previous step
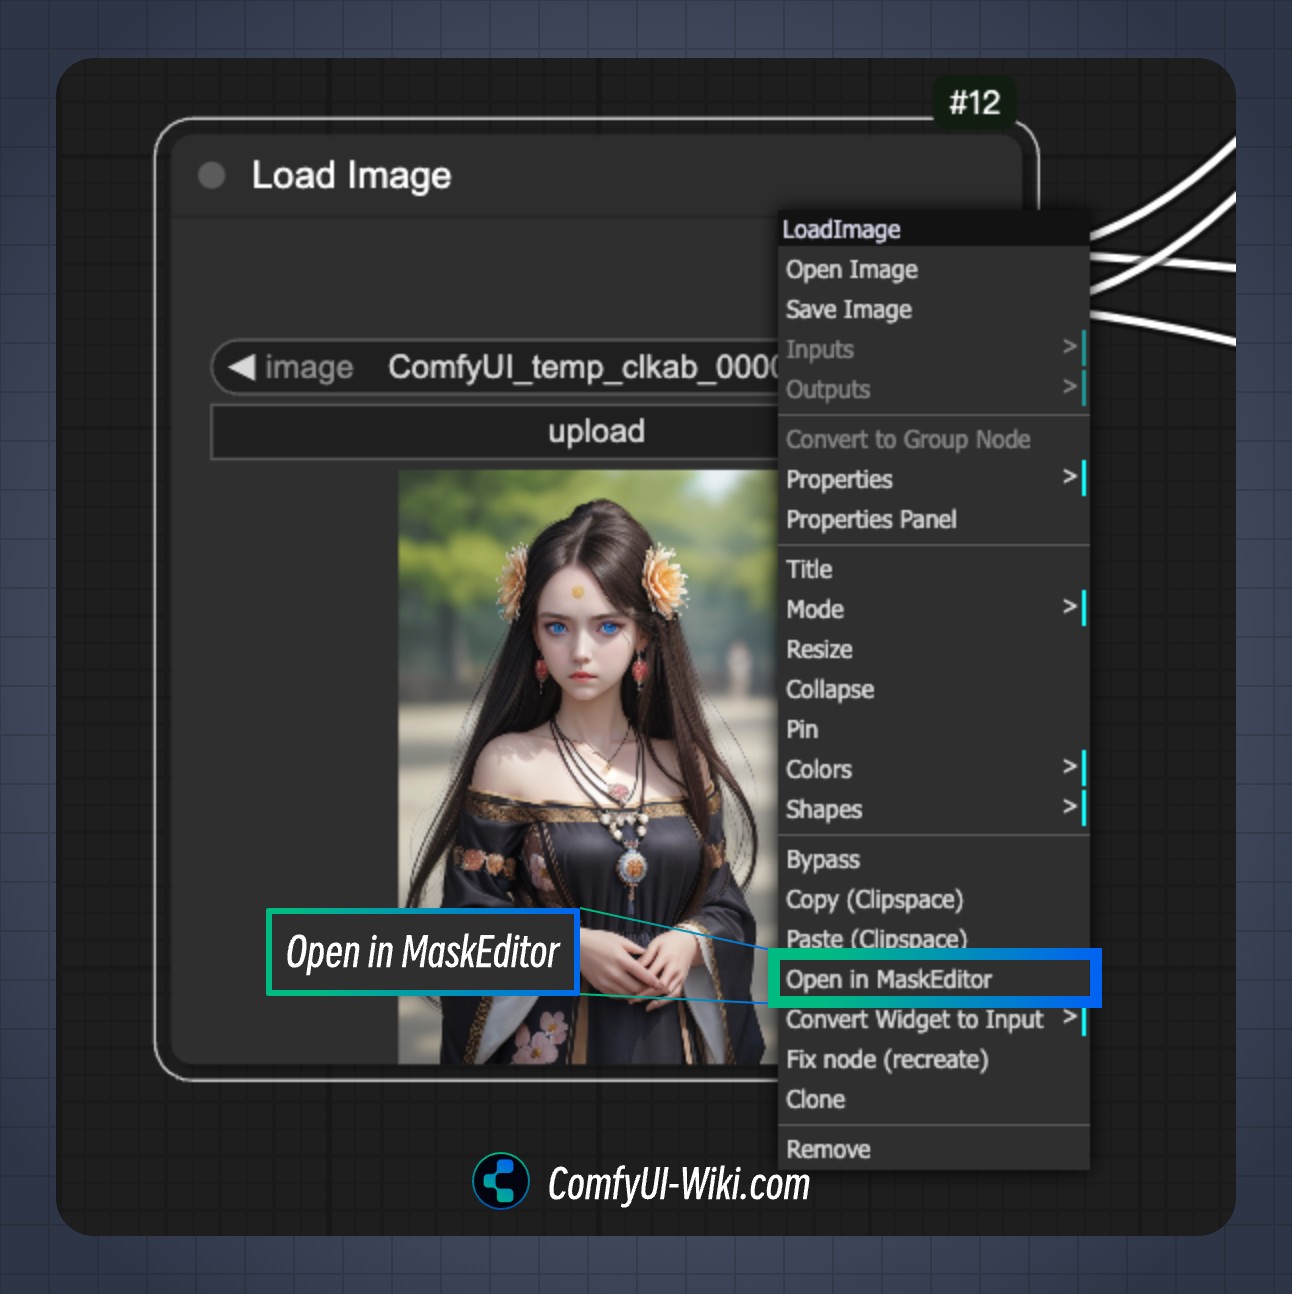
Draw a mask for the area you want to inpaint. For complete mask drawing instructions, please refer to the Mask Editor usage guide.
-
Modify the text at point
3in CLIP Text Encode. In my workflow, it'ssmile, black eyes, close mouth- you can modify it to whatever content you want -
Use Queue or the shortcut
Ctrl(Command)+Enterto run the workflow and generate images. You might need several attempts to get satisfactory results
You can try optimizing by using the following positive and negative prompts to compare different generation effects
Positive Prompts:
black eyes,smile, 1girl, upper body portrait, front view, symmetrical face, detailed face, intricate jewelry, ornate hair ornament, elegant chinese dress,, black hair, long hair, earrings, forehead mark, facial mark, hair flower, flower accessory, looking at viewer, expressionless, soft lighting, depth of field, blurry background,```Negative Prompts:
blurry, low quality, cropped, extra limbs, disfigured face, deformed, watermark, text, multiple girls, exaggerated features, side view, profile, asymmetrical face, turned head, looking away- Try adjusting different denoise parameters to see different generation effects, starting with a small value like 0.1
Comments
Sign in with GitHub to join the discussion.