Mask Editor - ComfyUI Mask Editor Usage and Settings Guide
This article will cover:
- What is a mask
- Mask editor in settings menu
- How to use mask editing in ComfyUI
What is a Mask
Imagine we have a black paper with some holes in it. When we place this paper over a photo, only the parts under the holes will be visible. In computer terms, a mask works just like this black paper. Black areas in the mask hide the content underneath, while white areas (like the holes) allow the content to show through. We can use masks to select specific parts of an image that we need. Semi-transparent areas can be understood as transition zones.
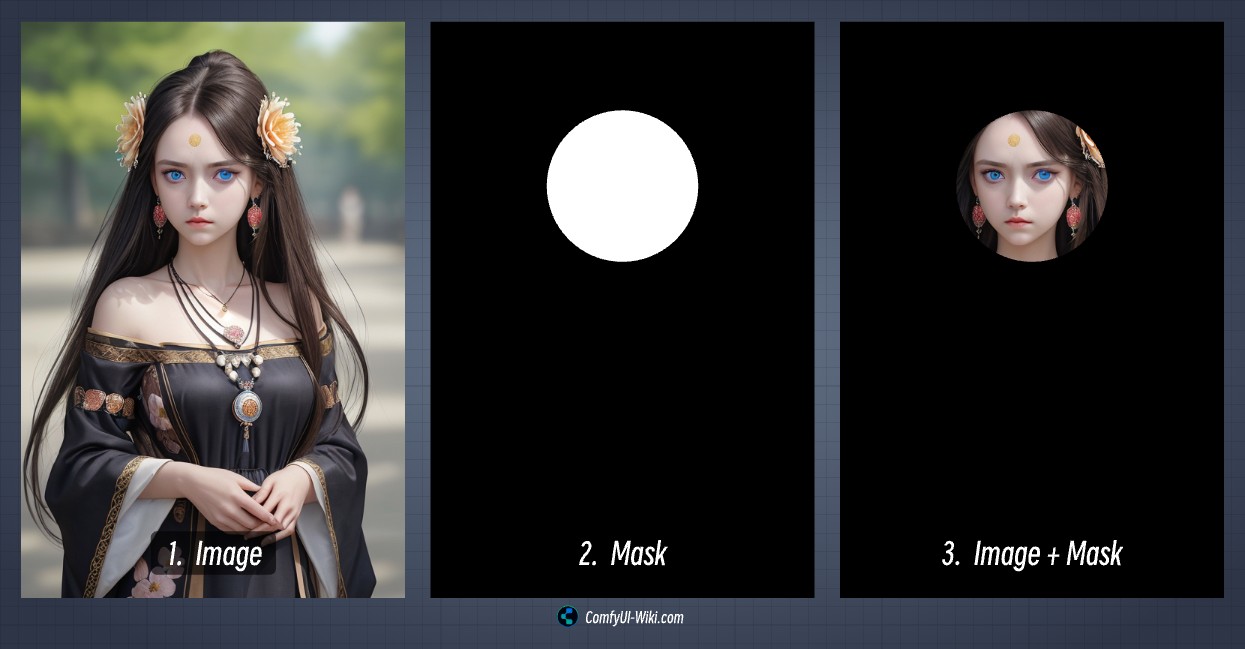
As shown in this image, we use black to indicate the selected areas and white for unselected areas. Of course, you can use the invert function to swap black and white colors for inverse selection.
Mask Editor Settings Menu
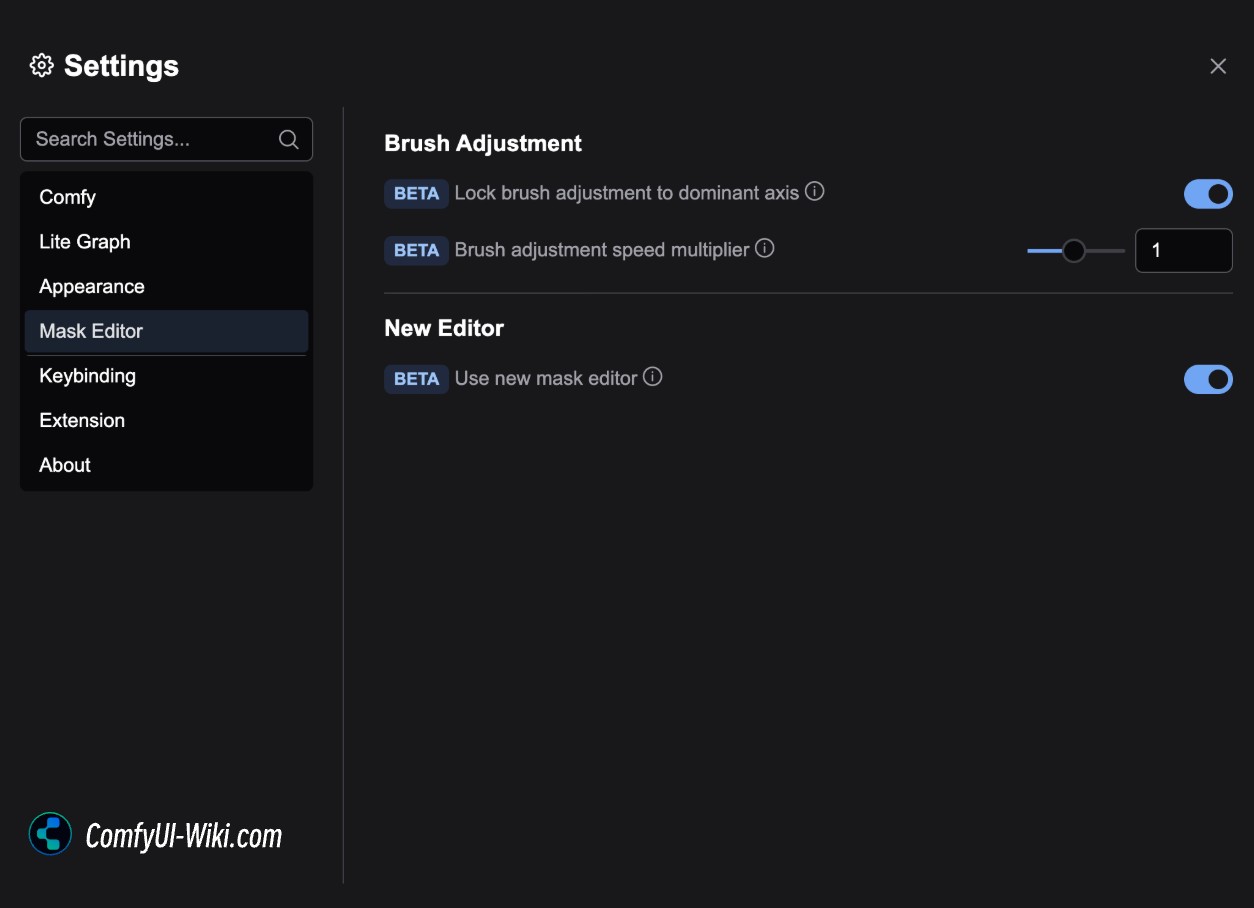
Brush Adjustment
- Lock brush adjustment to main axis: When enabled, brush adjustments will only affect size or hardness based on the direction you move.
- Brush adjustment speed multiplier: Controls how quickly the brush size and hardness change during adjustment. Higher values mean faster changes.
New Editor
- Use new brush editor: Enables the new version of the mask editor
New version is enabled by default, featuring a clearer UI and easier usage
How to Open ComfyUI’s Mask Editor
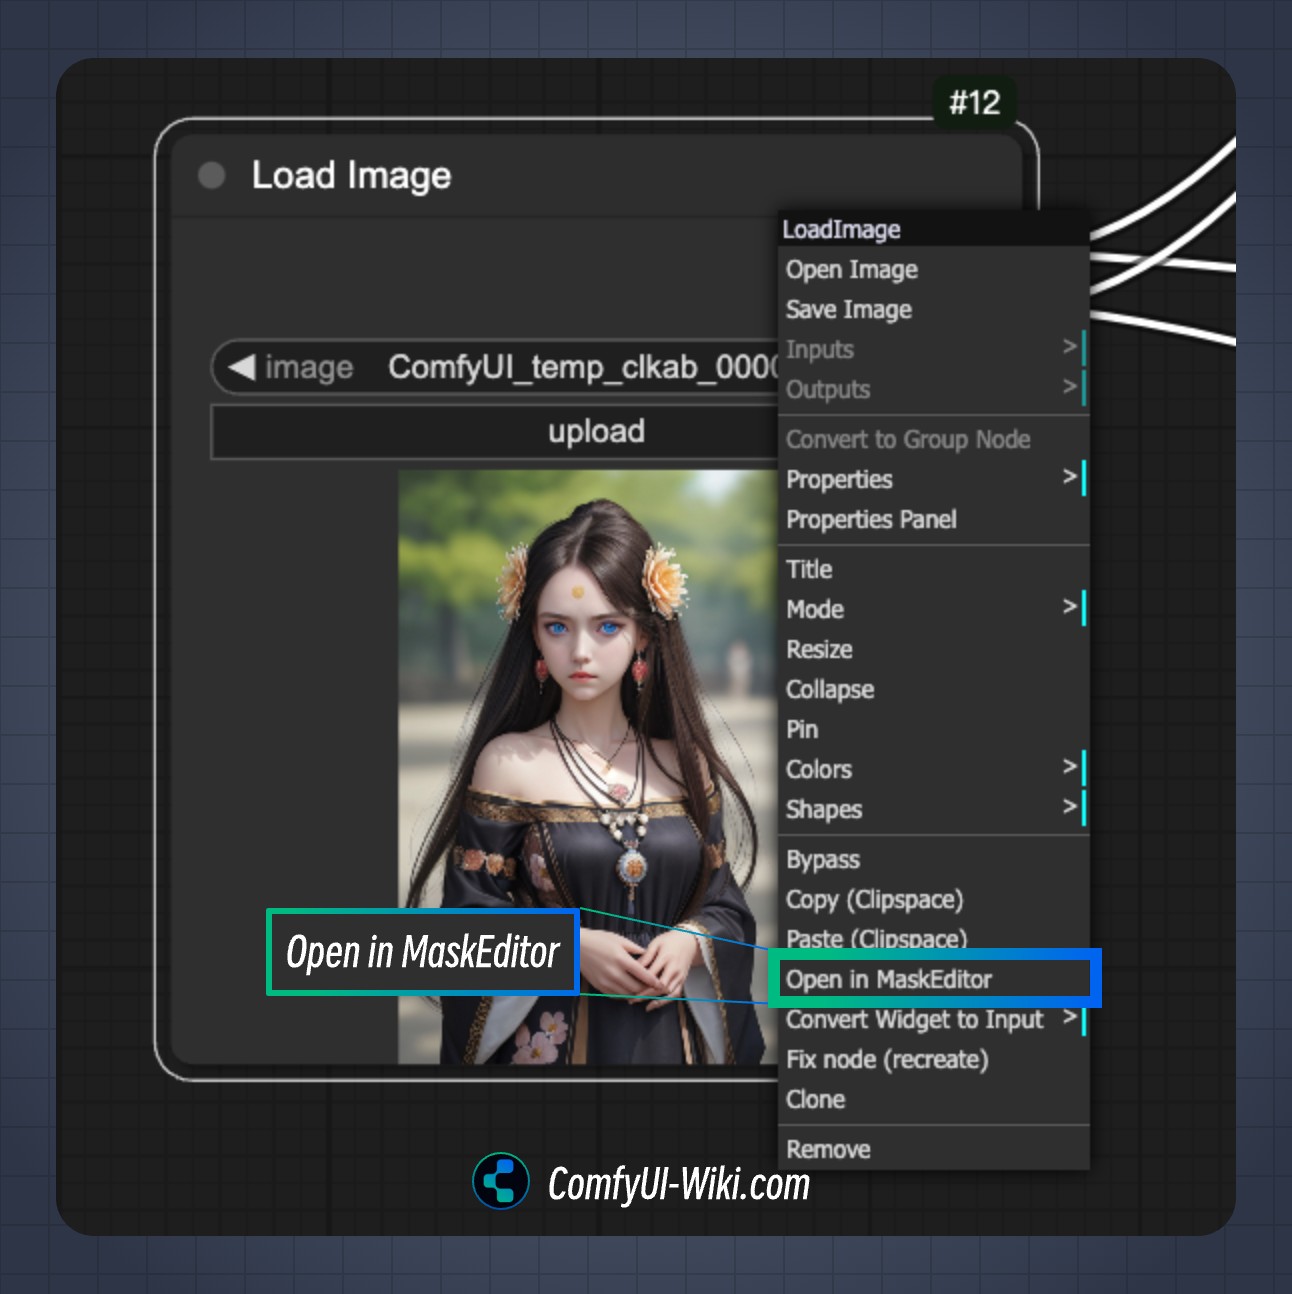
In ComfyUI, mask editing is primarily used for editing image masks, typically needed in Inpainting workflows.
As shown in the image below, after loading an image into a Load image node, you can right-click on the node and select Open in MaskEditor to open the mask editor. The mask editing output will be available on the node’s Mask output.
ComfyUI Mask Editor Interface Guide

The mask editor consists of three main parts:
-
Top Operation Menu
- Undo and Redo
- b1: Invert mask (reverse black and white colors)
- b2: Clear all drawn masks
- b3: Save mask edits and exit the Mask Editor
- b4: Cancel current edits and exit the Mask Editor
-
Left Tool Selection Menu
- a1: Brush Tool - Draw mask
- a2: Eraser Tool - Erase drawn mask
- a3: Bucket Tool - Quickly add mask to areas
- a4: Color Select Tool: Quickly add similar colors to mask
-
Right Tool Options Menu
Using the Brush Tool
Select the brush tool and paint over the areas you want to mask. The brush tool settings are shown below:
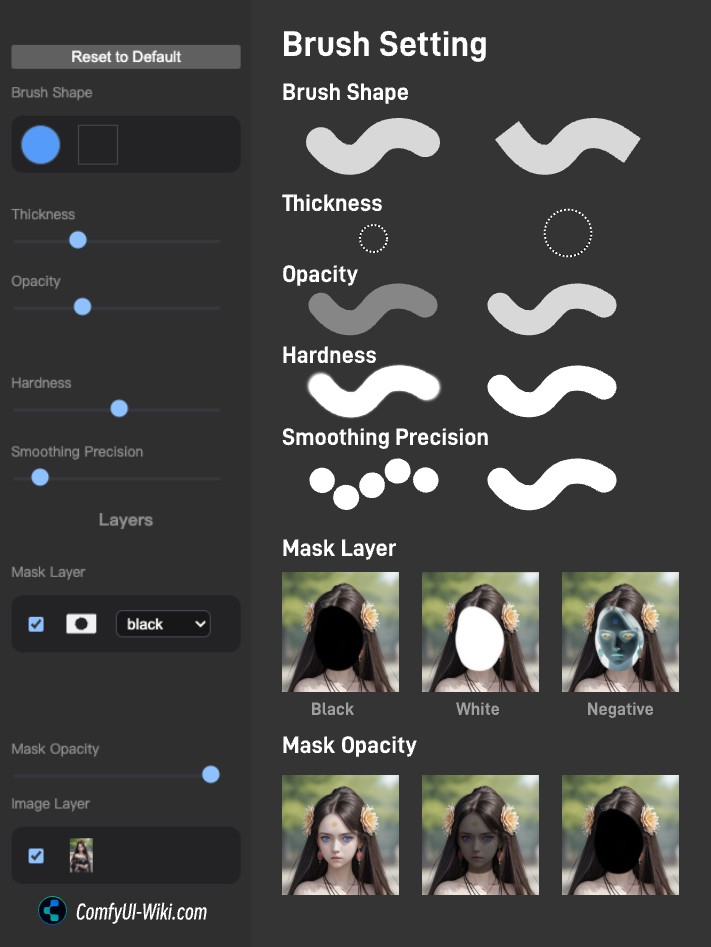
- Brush Shape: Circle or Square
- Thickness: Brush size
- Opacity: Transparency of the drawn area, lower values mean more transparent
- Hardness: Brush hardness, lower values create softer edges, higher values create sharper edges
- Smoothing Precision: Continuity of the drawing path
Using the Eraser Tool
Select and use on masked areas to remove unwanted parts
Eraser tool settings are the same as brush tool settings
Using the Bucket Tool
The bucket tool is mainly used for quickly filling enclosed areas. It requires closed areas on the current mask to work. Please refer to the video below for an example of quick area filling:
- Tolerance: Higher tolerance means less noticeable gaps between fill area and enclosed edges, it sets a threshold for identifying fill areas
Using the Color Select Tool
The color select tool is useful for quickly adding similar colors to the mask, especially suitable for solid color images or material segmentation maps created using tools like Segment Anything. Available options include:
- Tolerance: Determines how many similar colors are added to the mask area, higher values include more similar colors
- Live Preview: After selecting some colors with the eyedropper tool, enable this option to see real-time changes when adjusting tolerance
- Apply to whole Image: If disabled, only selects similar colors near your click area; if enabled, samples similar colors across the entire image
- Method: Simple, hsl, lab
- Stop at mask: To be added
- Mask Tolerance: To be added
Please refer to the video below for demonstration: