Flux Fill Workflow Step-by-Step Guide
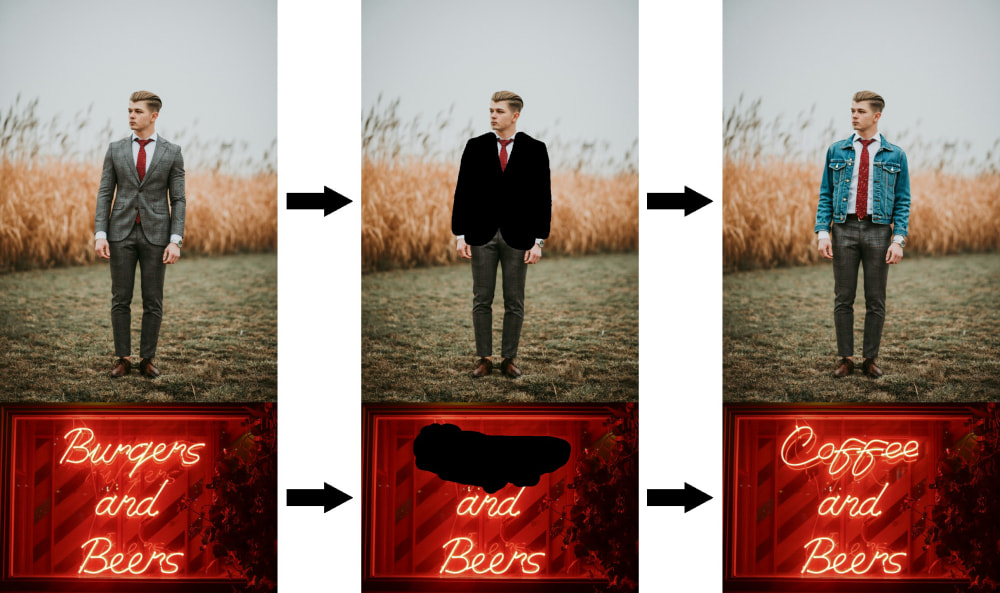
Flux.1 Fill Dev is an open-source image editing model released by Black Forest Labs, a key component of the FLUX.1 Tools suite, focused on image inpainting and outpainting tasks.
In this tutorial, we will briefly introduce the model and provide complete instructions for Flux Fill model installation, workflow files, and usage.
In this guide, we will cover:
- Flux.1 fill dev inpainting workflow
- Flux.1 fill dev outpainting workflow
Introduction to Flux.1 Fill dev Model
Flux.1 Fill dev is one of the core tools in the FLUX.1 Tools suite released by Black Forest Labs, designed specifically for image repair and extension. This model is primarily used for:
- Image inpainting: filling in missing or removed areas of an image
- Image outpainting: seamlessly extending the boundaries of existing images
- Precise control over generated content using masks and prompts
Key features of Flux.1 Fill dev:
- Powerful image inpainting and outpainting capabilities
- Excellent prompt understanding and following ability, accurately capturing user intent while maintaining high consistency with the original image
- Advanced guided distillation training techniques, making the model more efficient while maintaining high-quality outputs
- Flexible usage license, generated content can be used for personal, scientific, and commercial purposes - please check the FLUX.1 [dev] Non-Commercial License
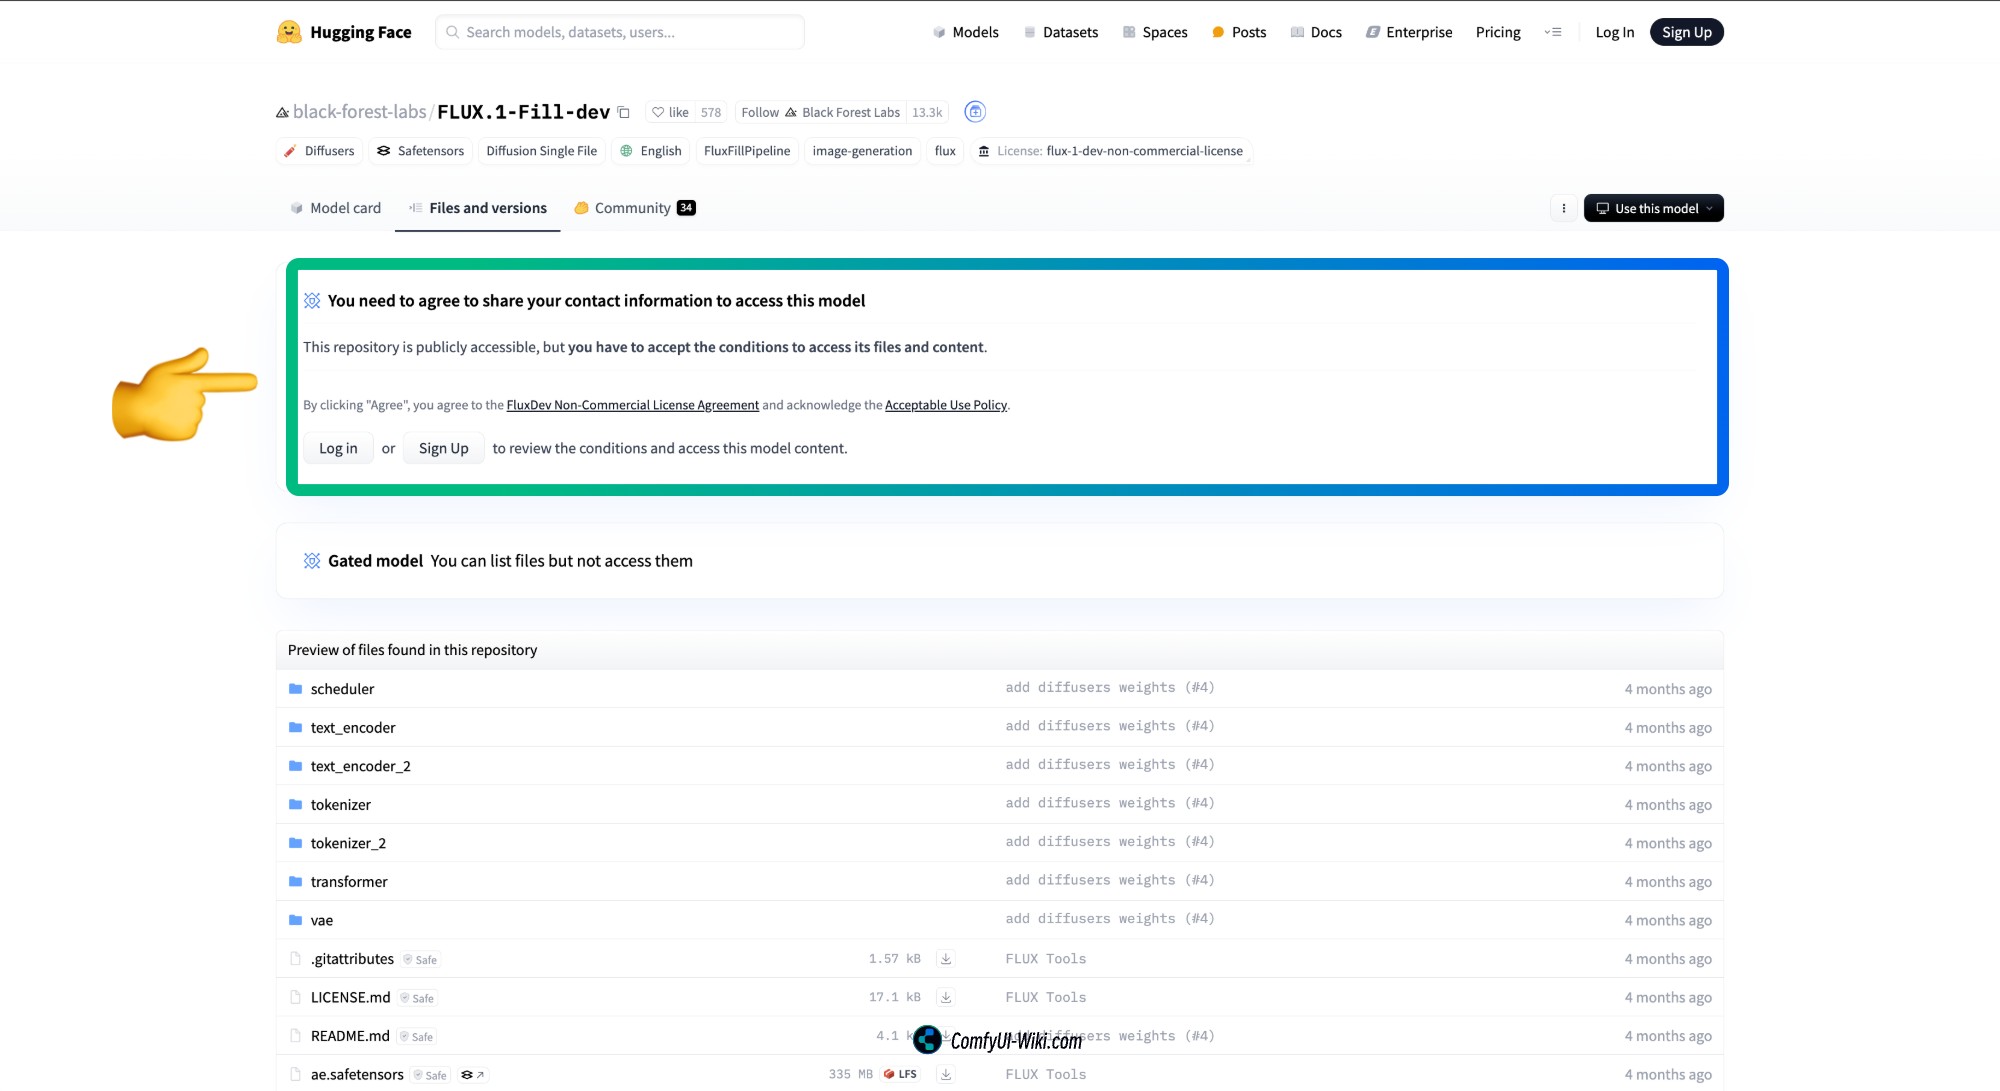
Flux.1 Fill dev model repository: Flux.1 Fill dev
Flux.1 Fill dev Complete Workflow
Before starting this section, please ensure you have upgraded to the latest version of ComfyUI. You can refer to How to Update and Upgrade ComfyUI for the update process.
The workflow images in this article include model file downloads and workflow information:
- Simply drag the corresponding image into ComfyUI to load the workflow
- If automatic downloads fail, please refer to the manual installation section to complete model installation
Since the Flux.1 Fill dev model requires agreement to the corresponding model repository license, please ensure you have agreed to the license before starting, so you can download the corresponding workflow.
Flux.1 Fill dev Inpainting Workflow
1. Inpainting Workflow File Download
Download the image below and drag it into ComfyUI to load the workflow

We will use the following image as our input:

This image has already been processed and contains an alpha channel, so you don’t need to process it further. If you want to process it yourself, you can use the original image below as an input example:

And refer to the ComfyUI Mask Editor Usage Tutorial section to complete the mask drawing.
2. Manual Model Installation
If you encounter problems with model downloads, please refer to the model file list below, manually download the corresponding model files, and place them in the appropriate ComfyUI directories.
You need to download the following model files:
| Model Name | File Name | Installation Location | Download Link |
|---|---|---|---|
| CLIP Model | clip_l.safetensors | ComfyUI/models/text_encoders | Download |
t5xxl_fp16.safetensors | ComfyUI/models/text_encoders | Download | |
| VAE Model | ae.safetensors | ComfyUI/models/vae | Download |
| Flux Fill Model | flux1-fill-dev.safetensors | ComfyUI/models/diffusion_models | Download |
File storage locations:
ComfyUI/
├── models/
│   ├── text_encoders/
│   │    ├── clip_l.safetensors
│   │    └── t5xxl_fp16.safetensors
│   ├── vae/
│   │    └── ae.safetensors
│   └── diffusion_models/
│        └── flux1-fill-dev.safetensors
3. Check the Corresponding Nodes and Complete the Workflow Run
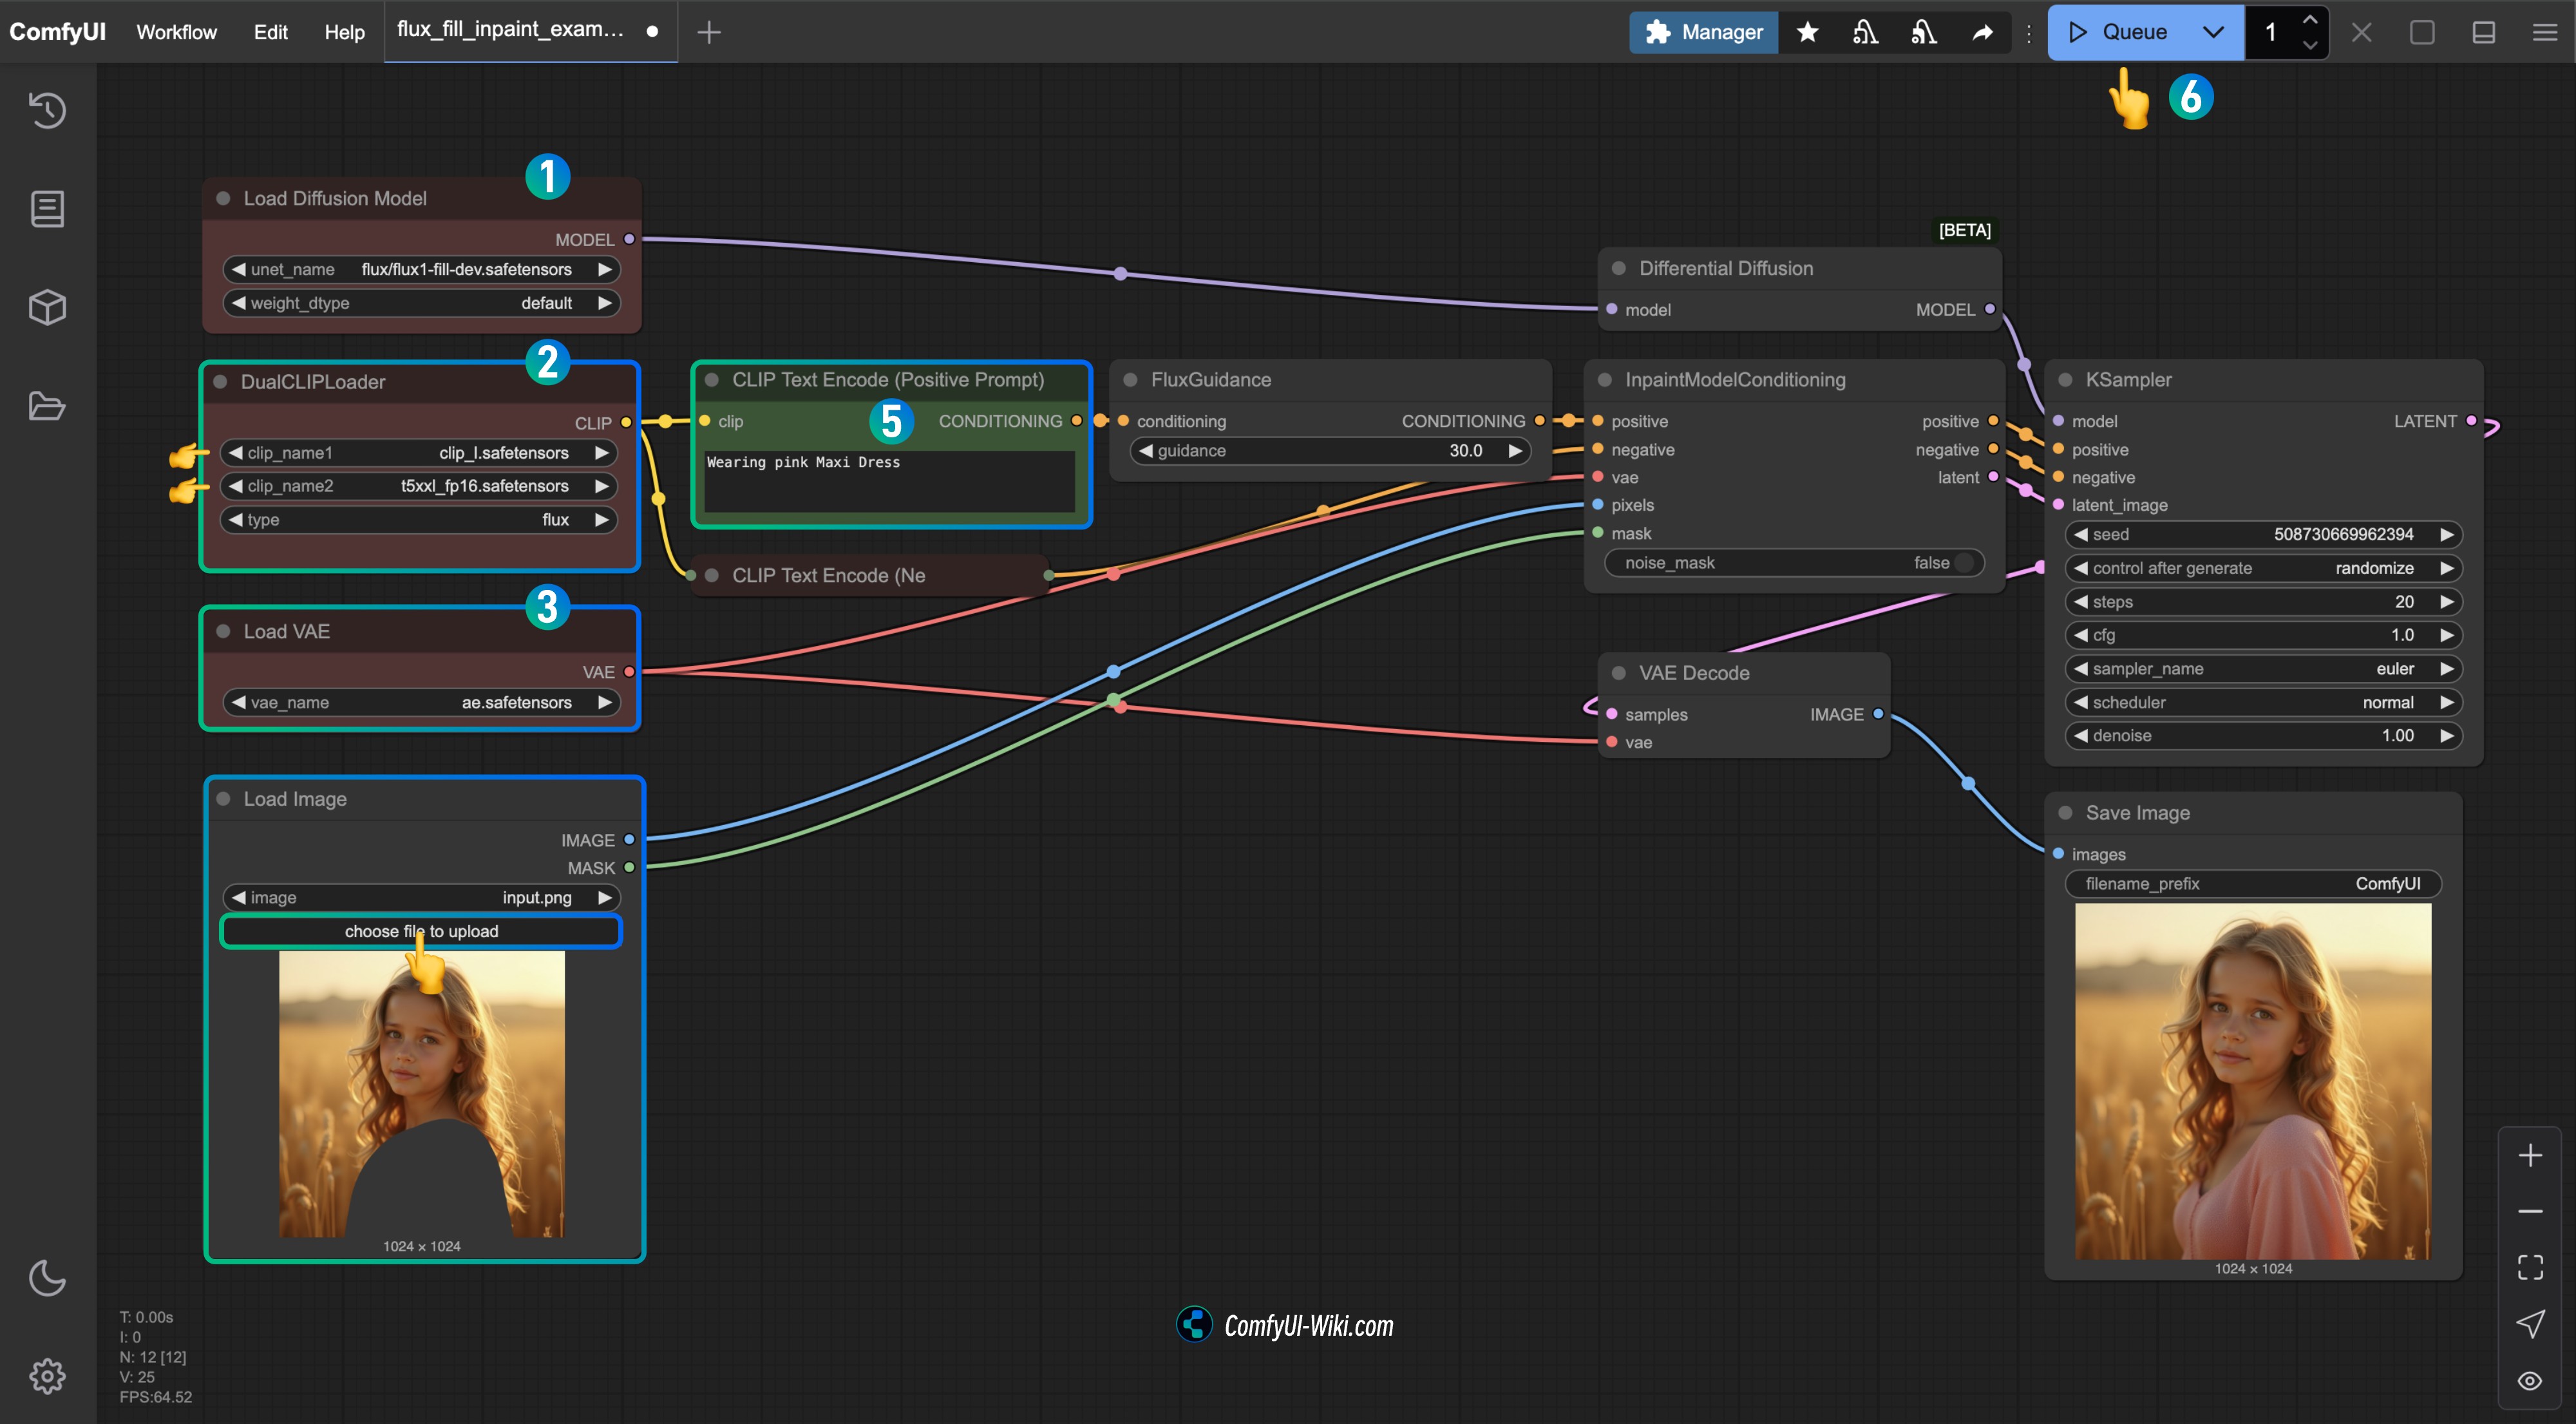
- Ensure
flux1-fill-dev.safetensorsis loaded in theLoad Diffusion Modelnode - Ensure the following models are loaded in the
DualCLIPLoadernode:- clip_name1: t5xxl_fp16.safetensors
- clip_name2: clip_l.safetensors
- Ensure
ae.safetensorsis loaded in theLoad VAEnode - Upload the input image provided in the document to the
Load Imagenode; if you’re using the version without a mask, remember to use the mask editor to draw the mask - Enter the content you want for the masked part of the image in the
CLIP Text Encode(Positive Prompt)node - Click the
Runbutton, or use the shortcutCtrl(cmd) + Enterto run the workflow
4. Workflow Explanation
This version is a complete inpainting workflow. Due to the Flux series models’ excellent prompt understanding capability, we only need to input simple prompts to get very good results.
If you’re a beginner using an inpainting workflow for the first time:
- We uploaded the input image in the
Load Imagenode and used theMaskEditortool to draw the mask, which marks the area that needs to be modified by the model
Flux.1 fill dev Outpainting Workflow
1. Outpainting Workflow File Download
Download the image below and drag it into ComfyUI to load the workflow

We will use the following image as our input:
2. Manual Model Installation
The model installation is the same as the inpainting section, please refer to the inpainting section above.
3. Check the Corresponding Nodes and Complete the Workflow Run
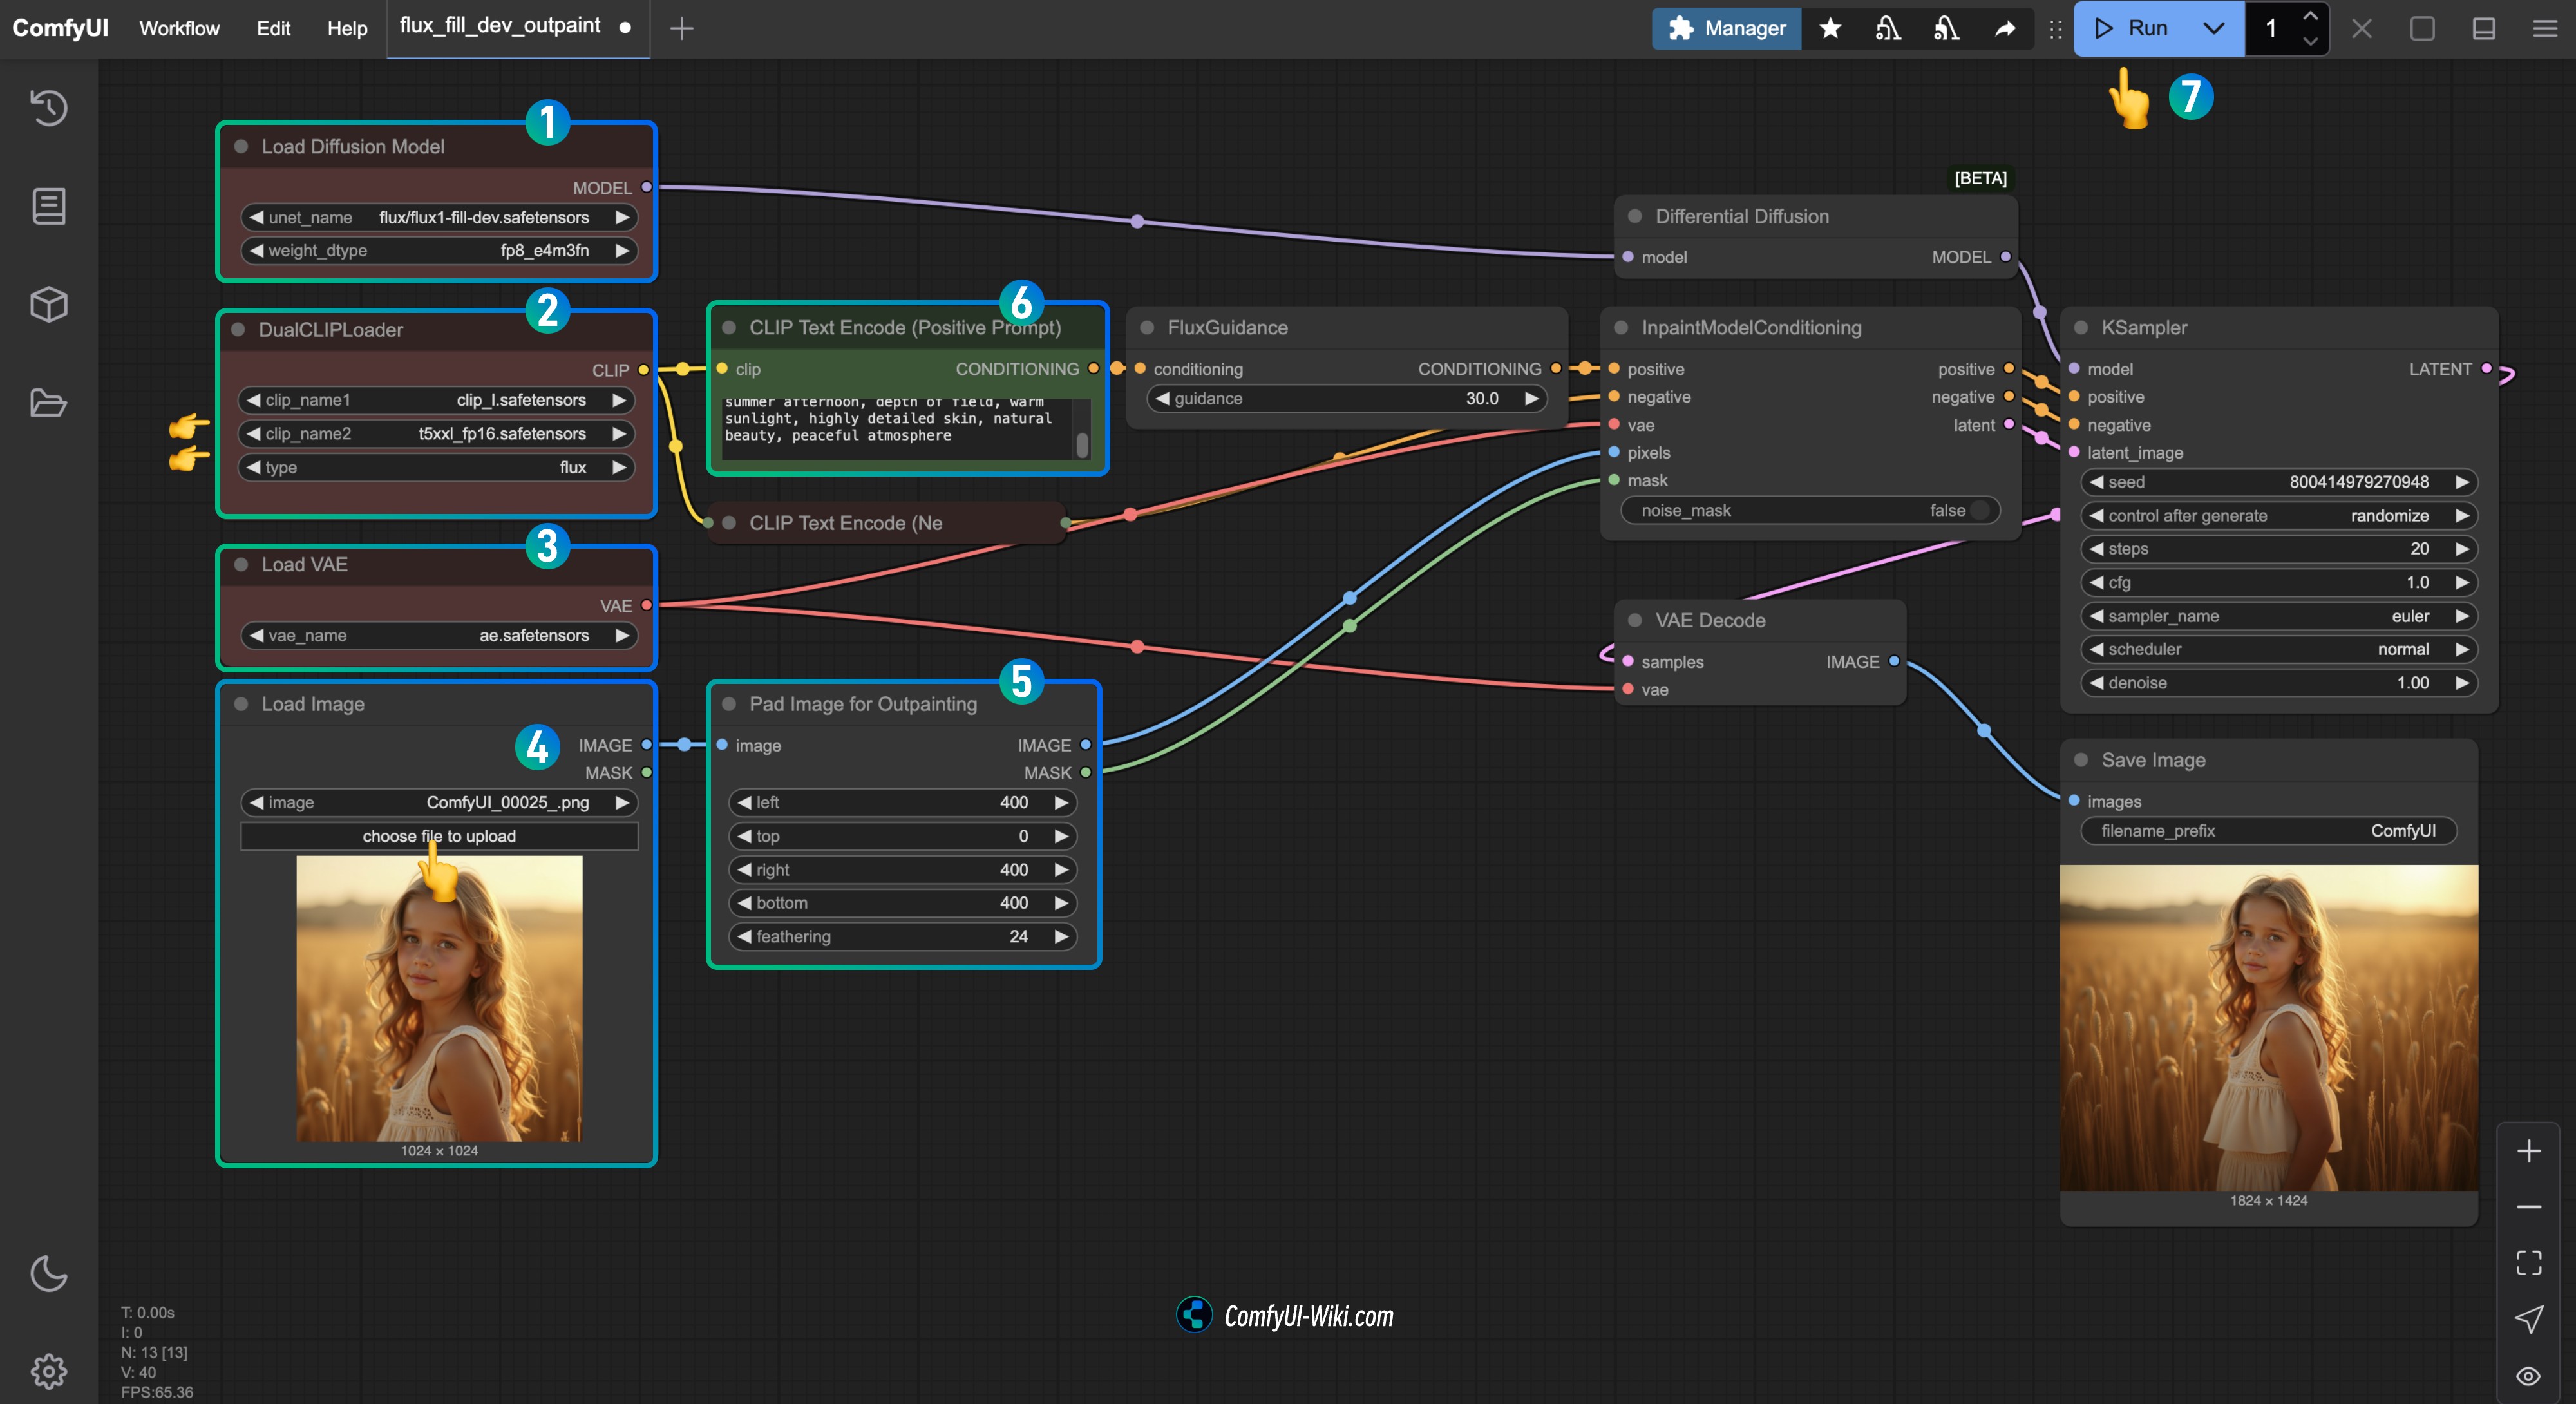
- Ensure
flux1-fill-dev.safetensorsis loaded in theLoad Diffusion Modelnode - Ensure the following models are loaded in the
DualCLIPLoadernode:- clip_name1: t5xxl_fp16.safetensors
- clip_name2: clip_l.safetensors
- Ensure
ae.safetensorsis loaded in theLoad VAEnode - Upload the input image provided in the document to the
Load Imagenode - In the
Pad Image for Outpaintingnode, you can customize the size of the areas you want to extend in each direction - Enter the corresponding description in the
CLIP Text Encode(Positive Prompt)node - Click the
Runbutton, or use the shortcutCtrl(cmd) + Enterto run the workflow