Subgraph Feature - Workflow Organization Tool in ComfyUI
Explains how to use the Subgraph feature in ComfyUI, including creation, navigation, and management of subgraphs
Subgraph is a very practical workflow feature in ComfyUI that helps you package complex workflows into independent nodes, making the entire workflow more concise and easier to manage.

Simply put, subgraphs are like "folders" in workflows. You can organize a series of related nodes together and then operate the entire combination like using a single node. This approach makes complex workflows clearer and easier to understand.
Using the subgraph feature, you can achieve the following goals:
- Simplify complex workflows and improve readability
- Easily reuse common node combinations and avoid repetitive operations
- Create modular node combinations to improve workflow building efficiency
How to Create a Subgraph?
### Click the Subgraph Function Button
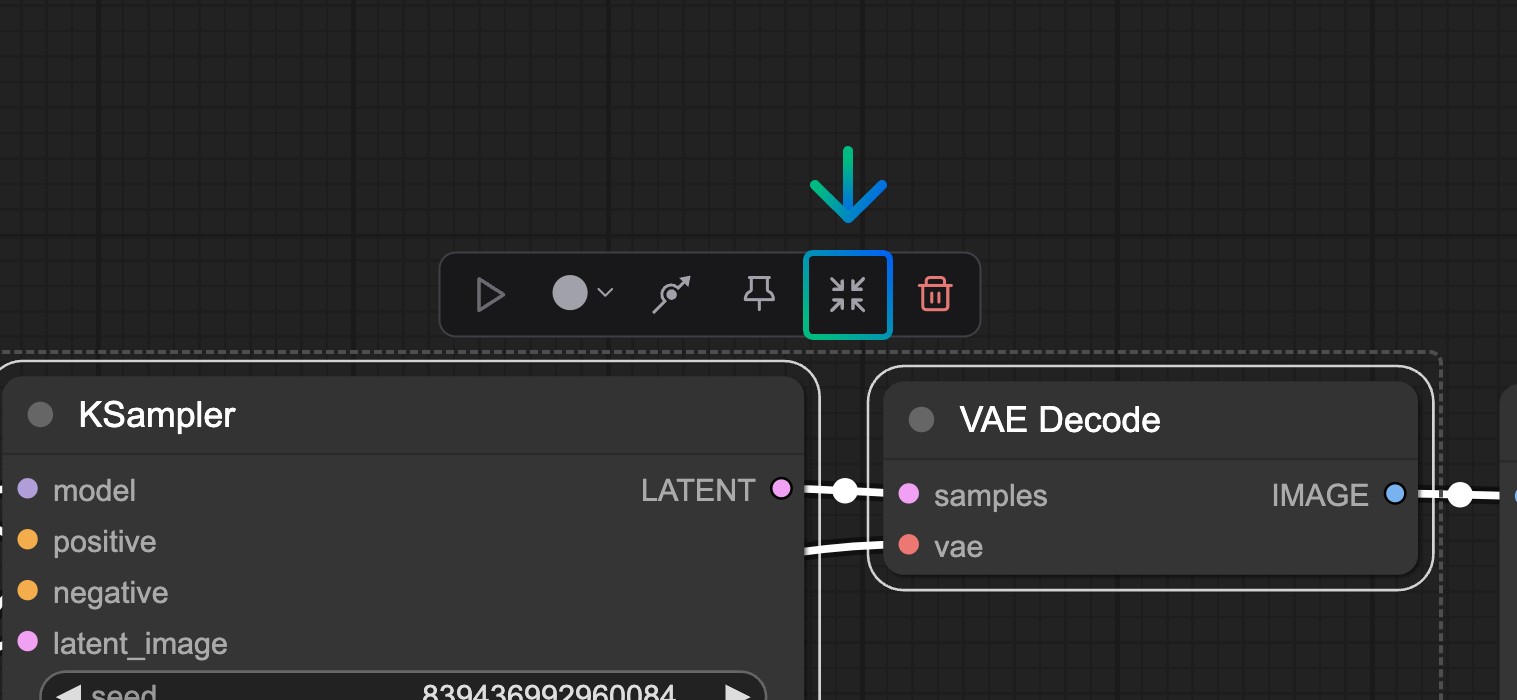
Find the subgraph function icon in the selection toolbar and click it
### Complete Subgraph Creation
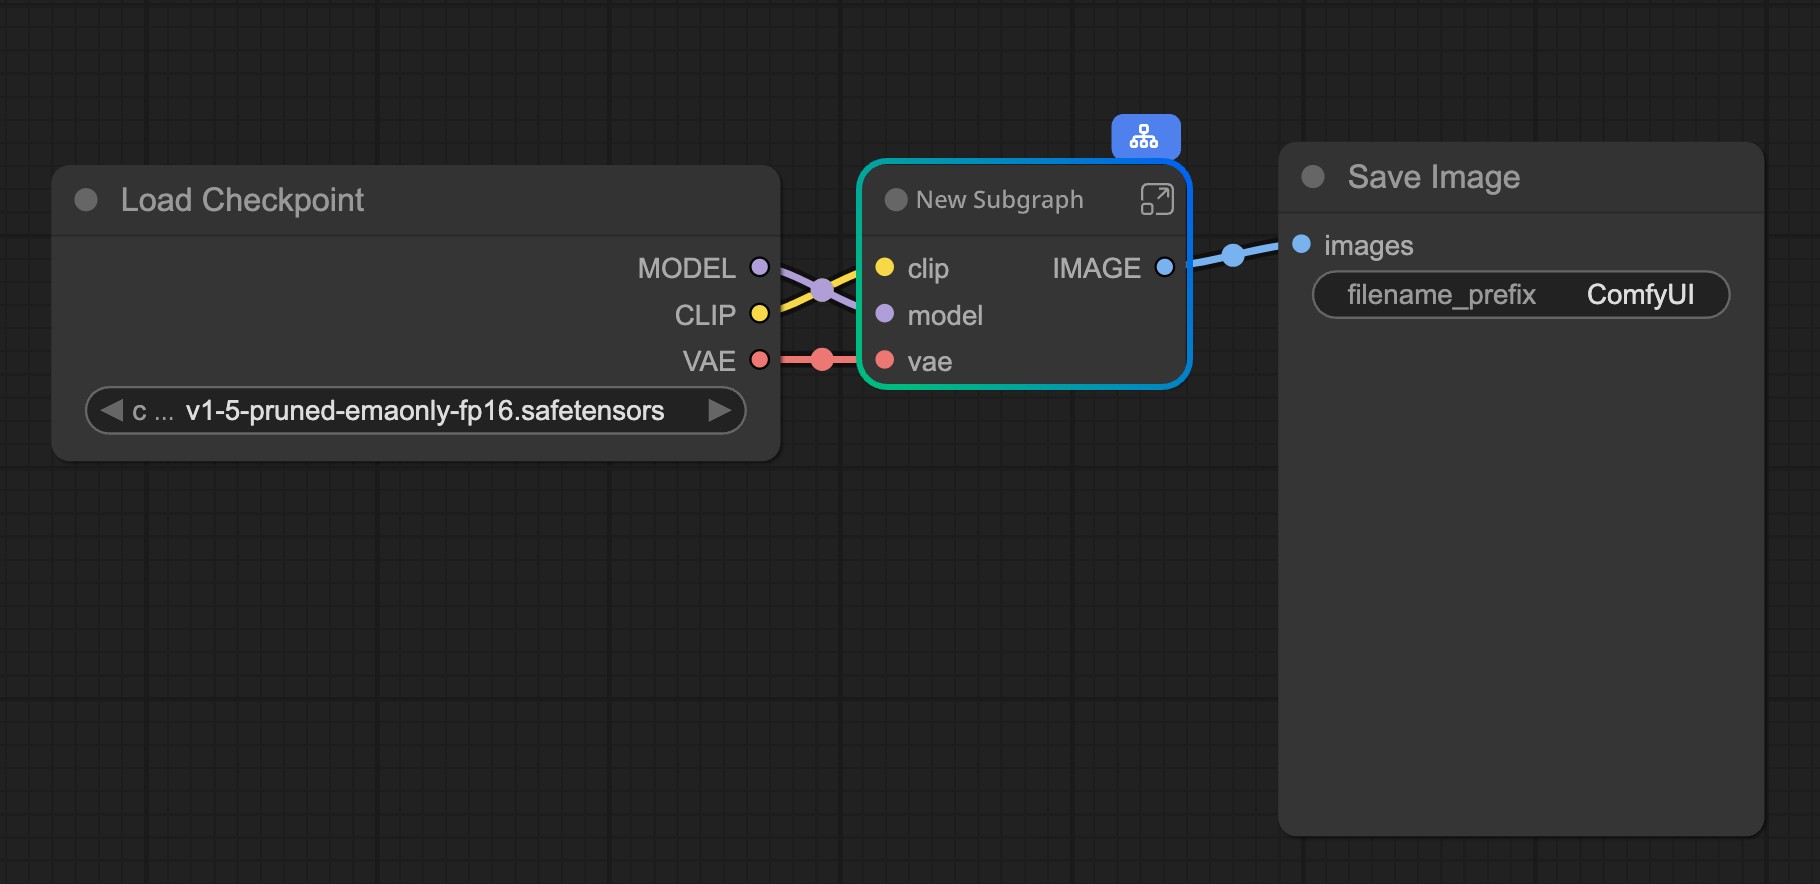
ComfyUI will automatically analyze the input-output relationships of the selected nodes and create a new subgraph node to add to the canvas.
### Optimize Subgraph Structure
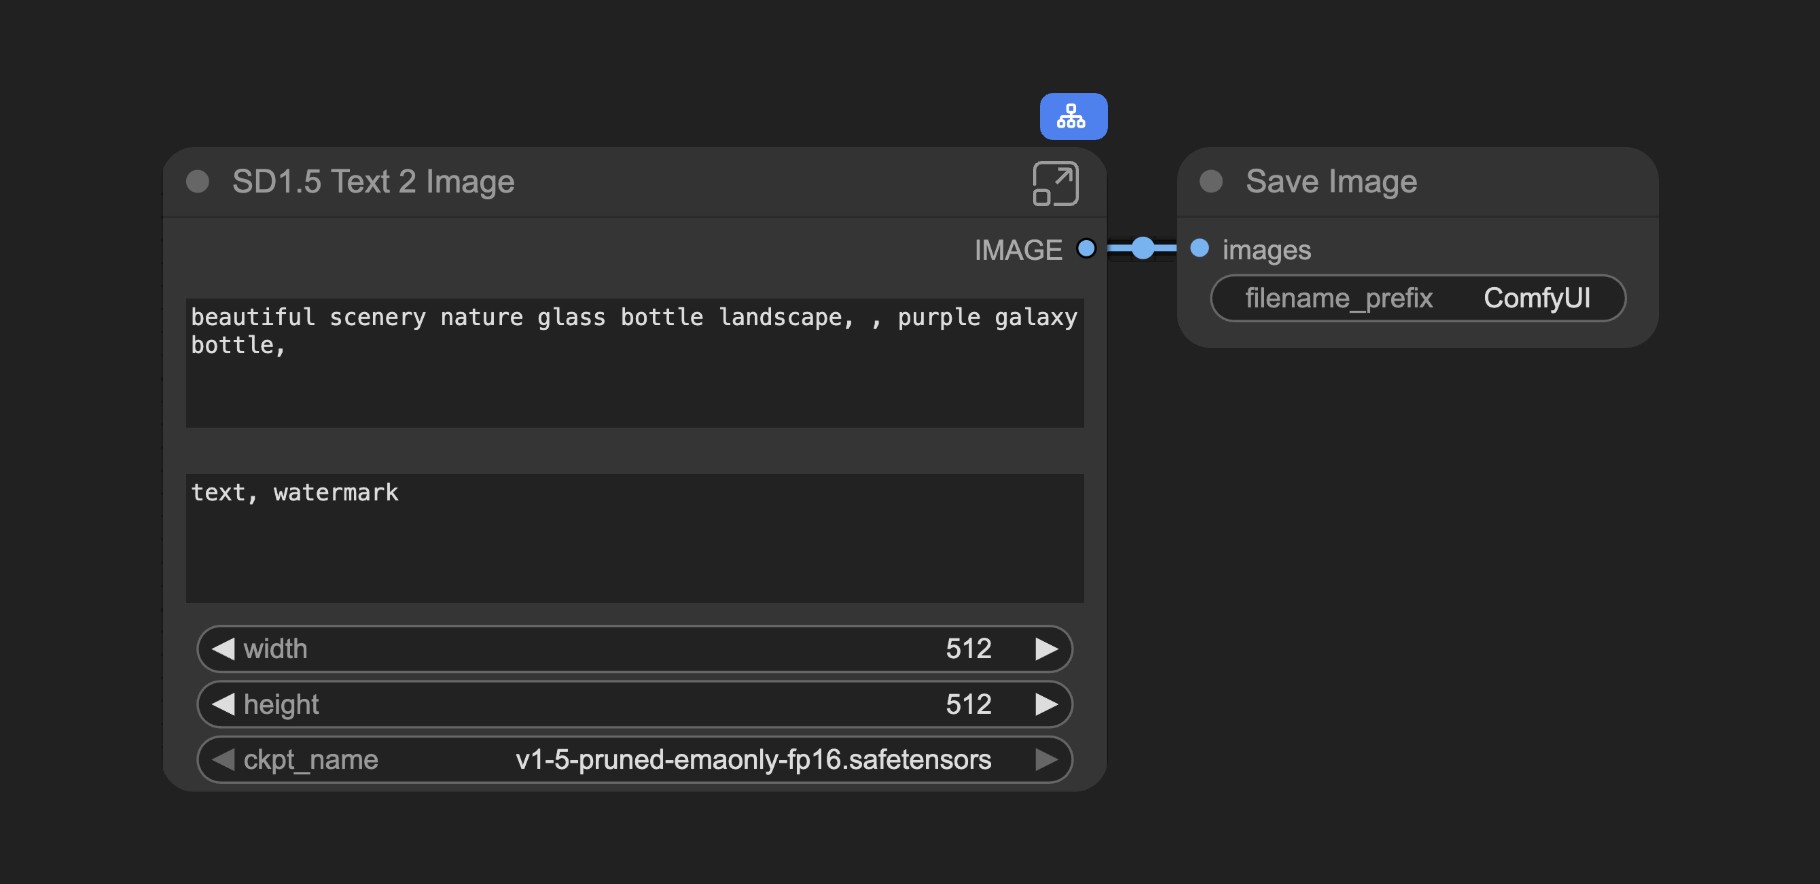
Through further editing and adjustment, you can optimize the subgraph into a functionally complete and structurally clear node module.Detailed Subgraph Editing Features
1. Basic Editing Operations
Subgraph nodes have the same editing functions as regular nodes. You can perform the following operations:
- Adjust node colors and appearance
- Modify node names and labels
- Use the Bypass function to temporarily disable
- Other regular node operations
2. Deep Editing of Subgraphs
To enter the detailed editing mode of a subgraph, you can:
- Double-click the mouse in the non-component area of the subgraph node
- Or click the edit button on the subgraph
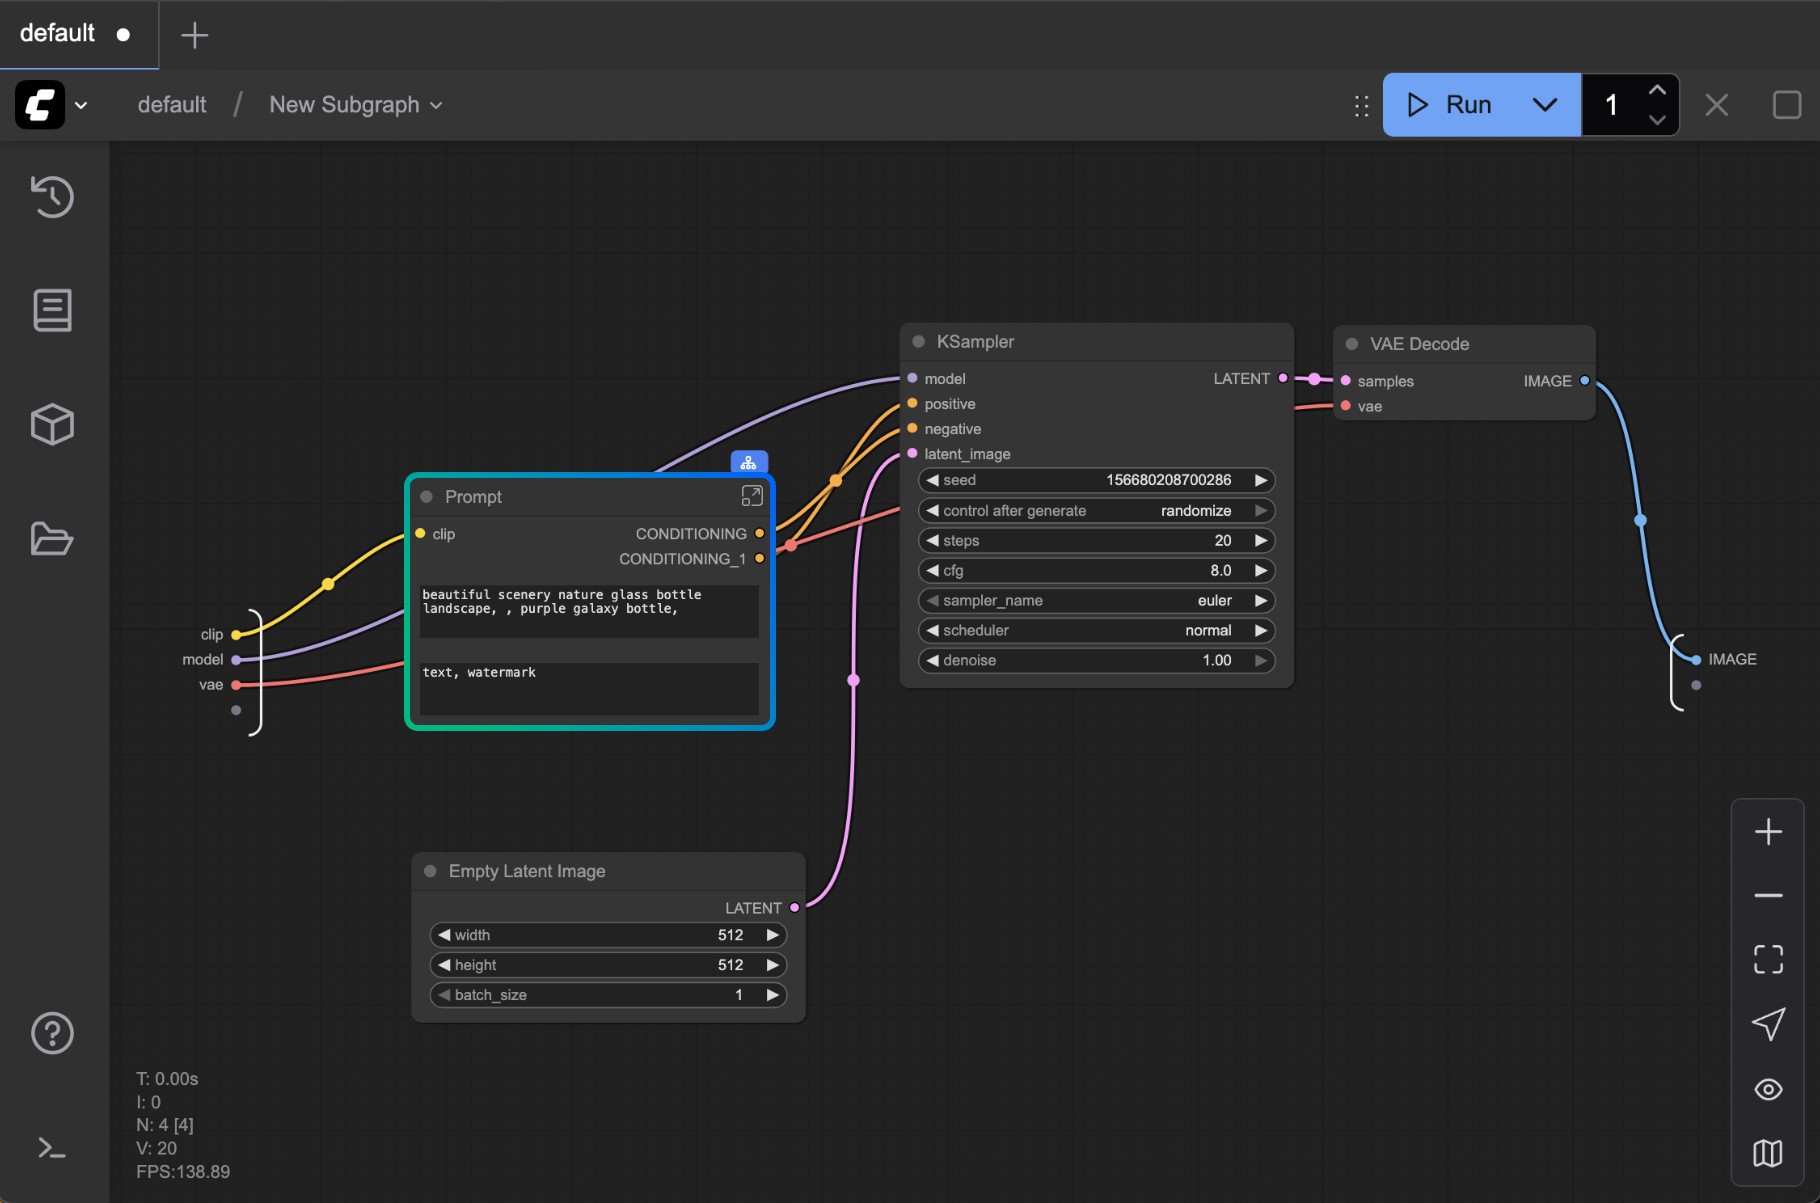
The interface after entering edit mode is as follows:
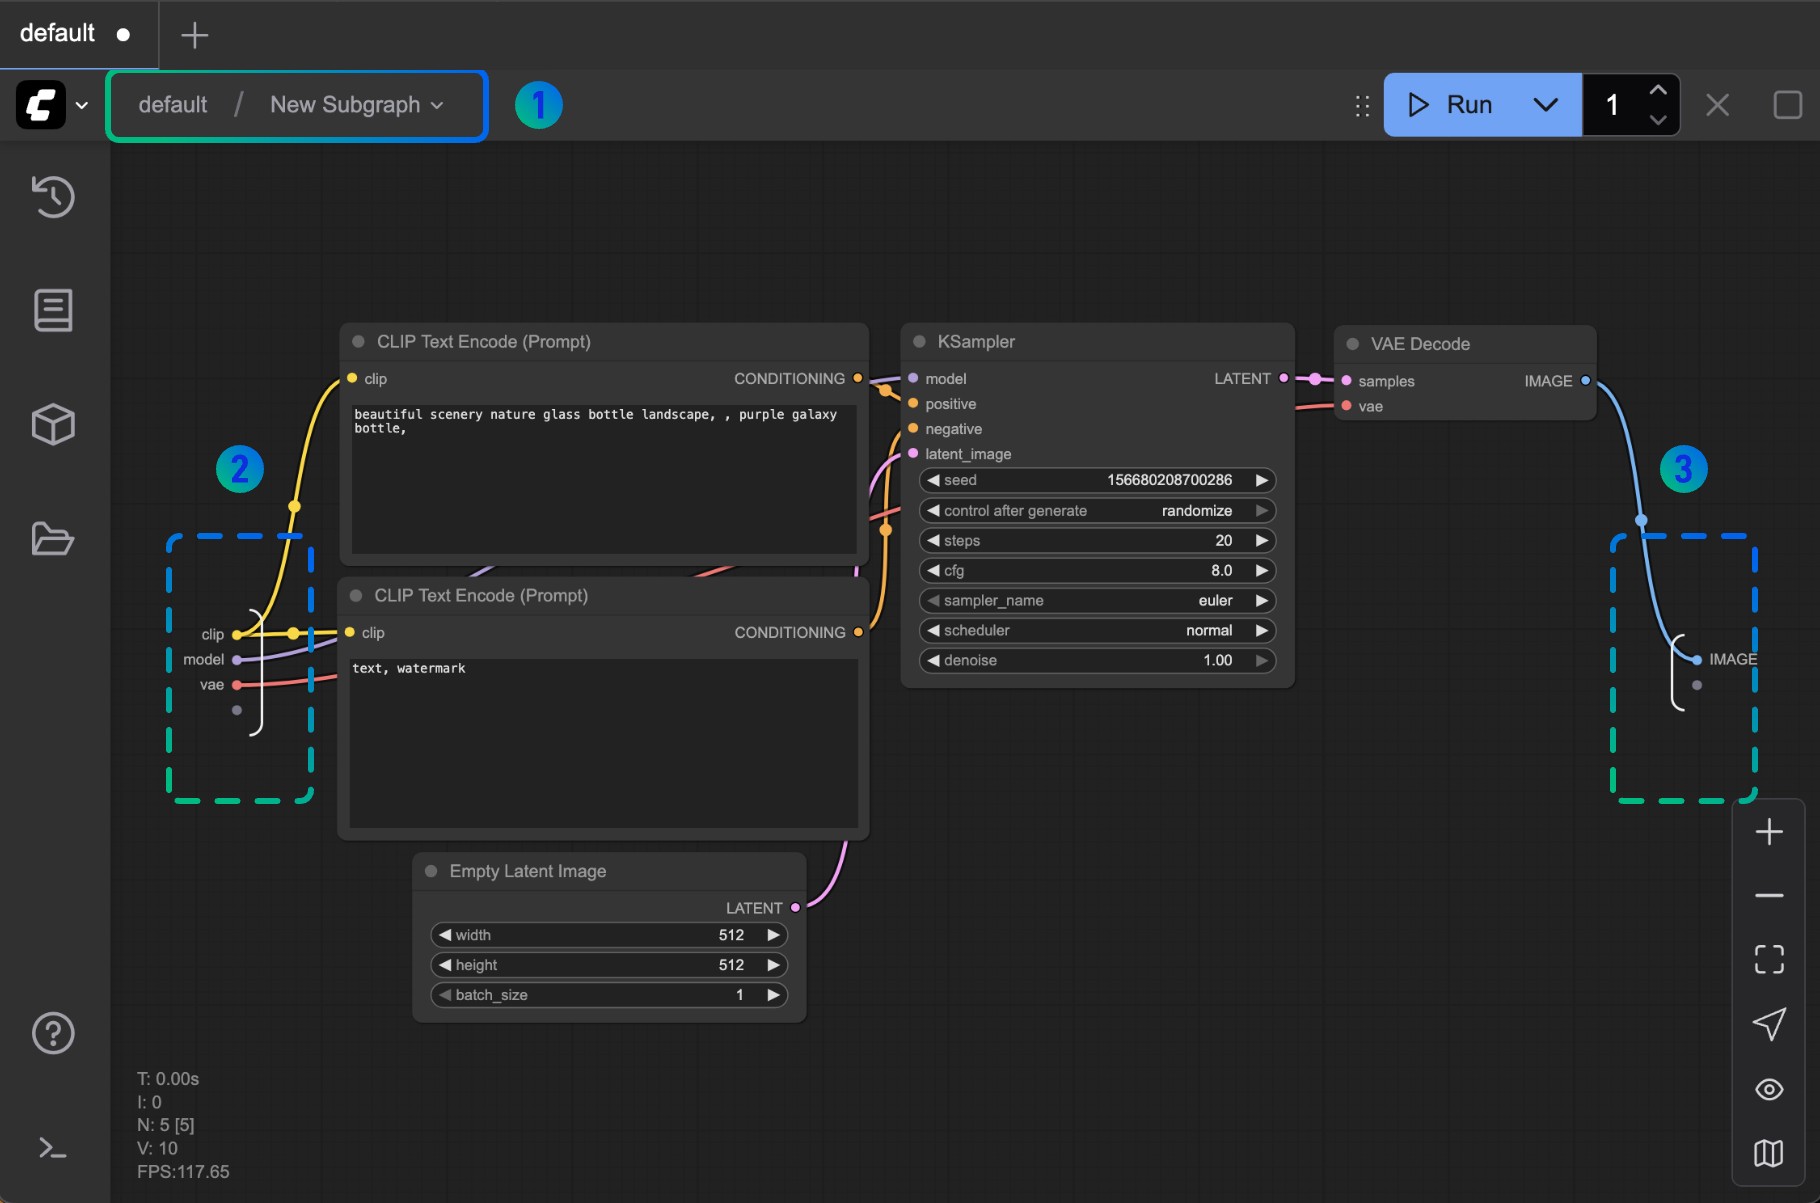
Interface Element Description:
- Navigation Bar: Shows the current subgraph level and allows quick return to the upper-level workflow
- Input Slots: Connection points for receiving external data
- You can connect outputs from other nodes to these slots
- Right-click on connection points to rename or delete slots
- Output Slots: Connection points for sending data to external sources, with similar functions to input slots
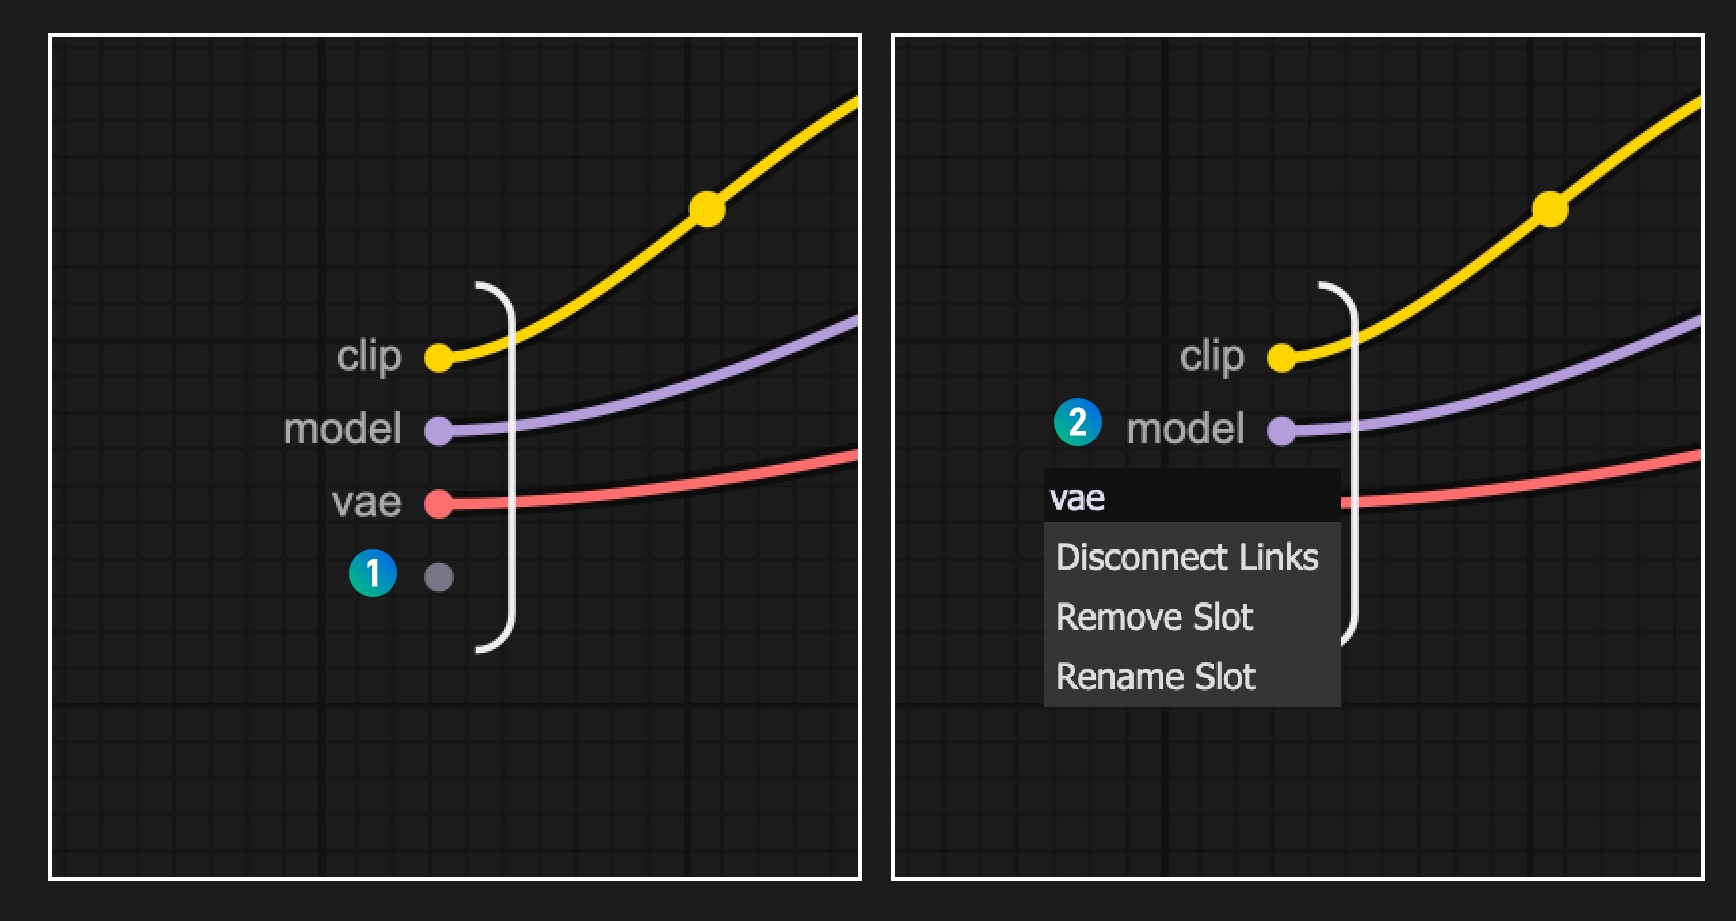
Slot Operation Guide:
- Slots marked with number 1 are default slots: Used to add new input or output connections to expose internal nodes to the outside
- Right-click on existing slots to perform operations such as renaming, deleting, or canceling connections
Note: Slot connections also need to follow data type matching rules
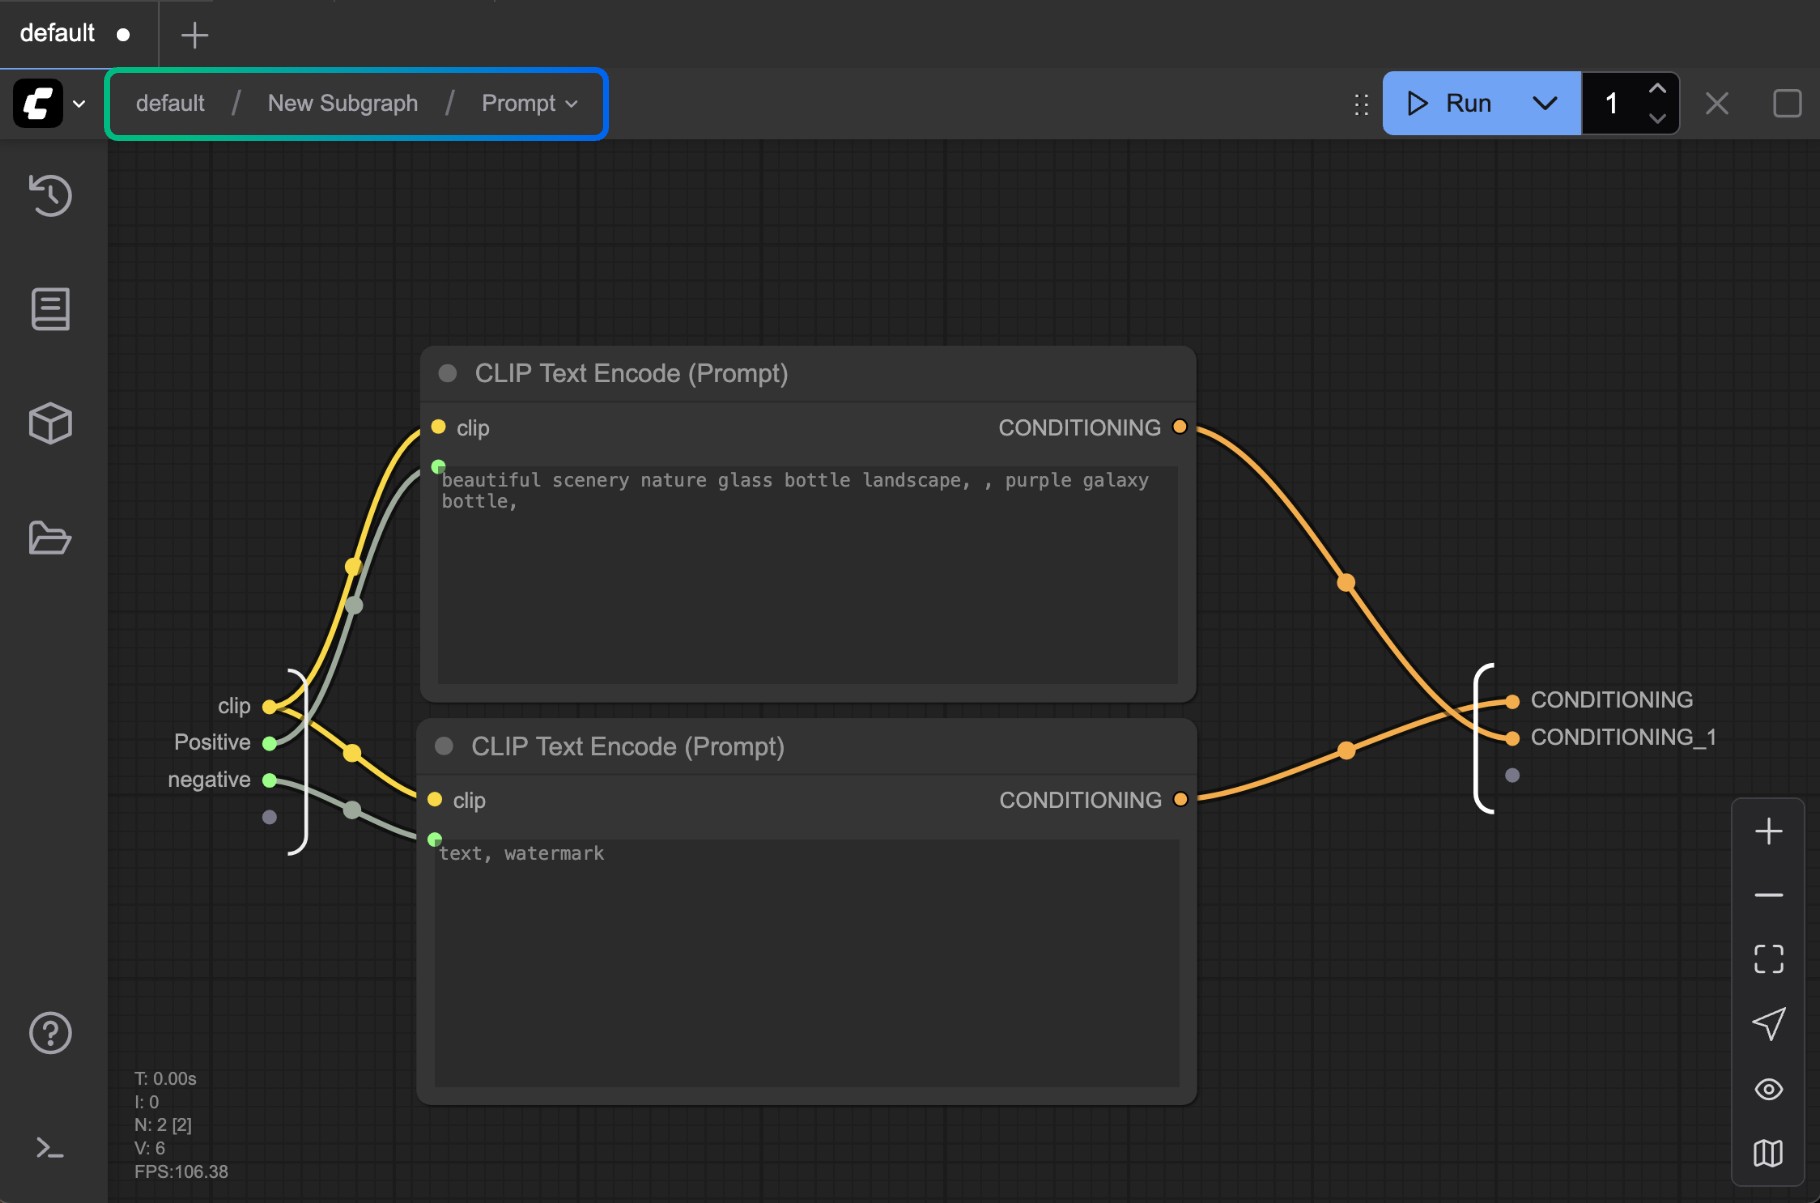
3. Subgraph Nesting Function
Subgraphs support multi-level nesting, which means you can create other subgraphs inside a subgraph, thus building more complex and modular workflow structures.
When editing nested subgraphs, the system provides multi-level navigation functions to help you quickly switch and return between different levels.
Unpack Subgraphs to Nodes
When you're done creating a subgraph, you can convert it back to nodes if you need to.

- You can select the subgraph node then use right-click menu "Unpack subgraph" to convert it back to nodes.
- Click the "Unpack subgraph" button in the select toolbox to convert it back to nodes.
Comments
Sign in with GitHub to join the discussion.