Alibaba Cloud PAI Releases Z-Image-Turbo-Fun-Controlnet-Union - Multi-Condition ControlNet Model
12/02/2025
Complete Guide - How to Use Depth ControlNet with SD1.5 in ComfyUI
Introduction to SD1.5 Depth ControlNet

Depth ControlNet is a specialized ControlNet model designed to control image depth and spatial structure. By analyzing the depth information of input images, it helps AI maintain correct spatial relationships and perspective effects when generating new images. This model is particularly useful in interior design, architectural design, and scene reconstruction as it can accurately understand and preserve spatial depth information.
This tutorial focuses on the usage and techniques of the Depth ControlNet model for SD1.5. We will cover other versions and types of ControlNet models in future tutorials.
Key Features of Depth ControlNet
- Spatial Control: Precise control over spatial depth and perspective relationships
- Scene Reconstruction: Maintains original spatial layout while changing style and content
- Interior Design: Particularly suitable for interior scene redesign and style transformation
- Architectural Visualization: Highly effective for 3D visualization of architectural and interior designs
- Product Showcase: Ideal for creating product displays with depth perception
- Scene Planning: Assists in landscape design and urban planning visualization
SD1.5 Depth ControlNet Workflow Preparation
1. Installing Required Plugins
Since ComfyUI Core doesn’t come with the corresponding Depth image preprocessor, you’ll need to download the preprocessor plugin first. This tutorial requires the ComfyUI ControlNet Auxiliary Preprocessors plugin to generate depth maps.
We recommend using ComfyUI Manager for installation. For detailed plugin installation instructions, refer to ComfyUI Plugin Installation Guide
The latest version of ComfyUI Desktop comes with ComfyUI Manager pre-installed
Method 1: Using ComfyUI Manager (Recommended)
- First install ComfyUI Manager
- Search for and install “ComfyUI ControlNet Auxiliary Preprocessors” in the Manager
Method 2: Installation via Git
- Open command line and cd into ComfyUI’s custom_nodes directory
- Execute the following commands:
git clone https://github.com/Fannovel16/comfyui_controlnet_aux
cd comfyui_controlnet_aux
pip install -r requirements.txt
Note: Restart ComfyUI after installing plugins
Method 3: Manual Installation (Not Recommended)
- Visit https://github.com/Fannovel16/comfyui_controlnet_aux
- Download the ZIP file of the repository code
- Extract and copy the files to the
ComfyUI/custom_nodes/folder
2.1 Download Required Models
You’ll need to install the following models:
| Model Type | Model File | Download Link |
|---|---|---|
| SD1.5 Base Model | dreamshaper_8.safetensors | Civitai |
| Depth ControlNet Model | control_v11f1p_sd15_depth.pth | Hugging Face |
| VAE Model (Optional) | vae-ft-mse-840000-ema-pruned.safetensors | Hugging Face |
While you can use any SD1.5 model you have, this tutorial uses dreamshaper_8 as an example. For interior design and similar applications, you should choose models specifically optimized for interior or architectural design.
2.2 Model File Structure
Place the model files according to this structure:
📁ComfyUI
├── 📁models
│   ├── 📁checkpoints
│   │   └── 📁SD1.5
│   │       └── dreamshaper_8.safetensors
│   ├── 📁controlnet
│   │   └── 📁SD1.5
│   │       └── control_v11f1p_sd15_depth.pth
│   └── 📁vae
│       └── vae-ft-mse-840000-ema-pruned.safetensors
3. Workflow Files
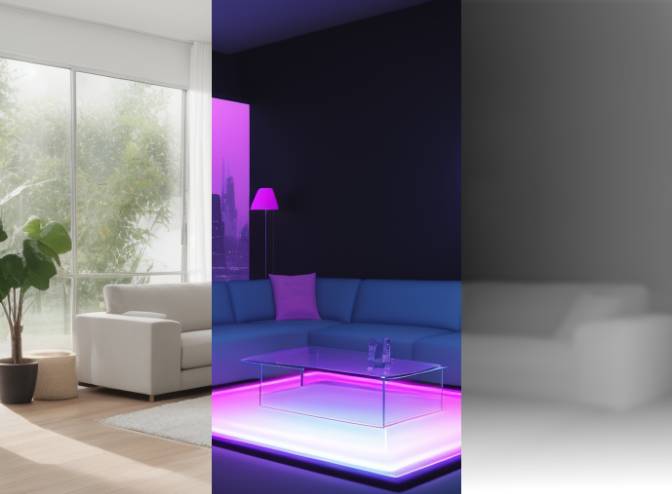
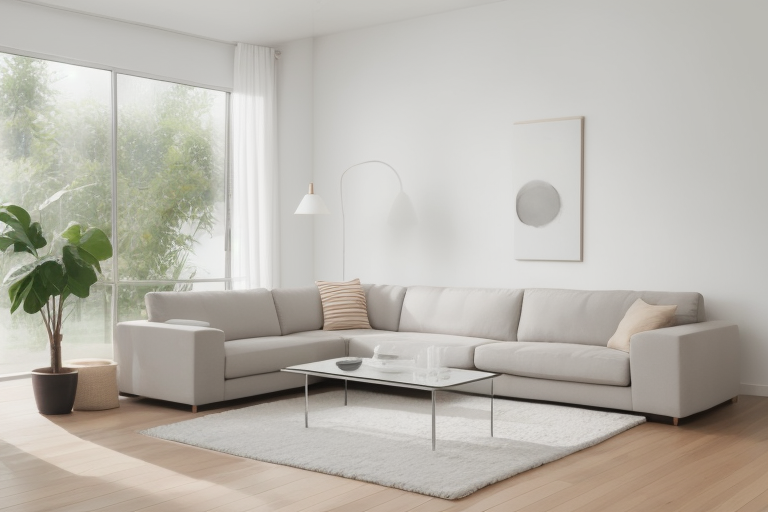
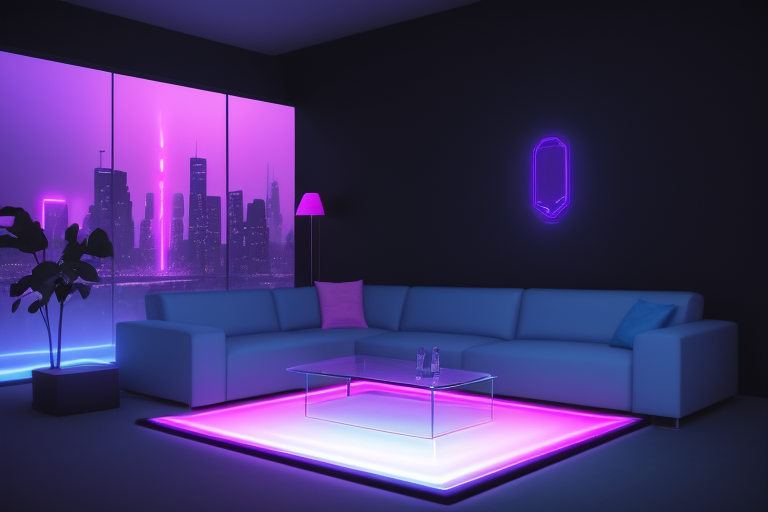
Interior design is one of the most common applications for Depth ControlNet. Through depth information control, you can maintain the original spatial layout while completely transforming the interior style and atmosphere.
Here’s an example of converting a traditional living room into a cyberpunk style:


SD1.5 Depth ControlNet Workflow Guide
Main Components
This workflow uses the following key nodes:
- LoadImage: Loads the input image
- Zoe-DepthMapPreprocessor: Generates depth maps, provided by the ComfyUI ControlNet Auxiliary Preprocessors plugin
- resolution: Controls the depth map resolution, affecting its detail level:
- Higher resolution (e.g., 768, 1024):
- Pros: Captures more details, better for complex interiors and architecture
- Cons: Slower processing, higher VRAM usage
- Use cases: Detailed interior design, architectural detail reproduction
- Lower resolution (e.g., 384, 512):
- Pros: Faster processing, lower VRAM usage
- Cons: May lose some detail information
- Use cases: Quick previews, simple scene reconstruction
- Recommended settings:
- General scenes: 512 is a good balance
- High detail requirements: 768 or higher
- Quick testing: 384
- Higher resolution (e.g., 768, 1024):
- Uses Zoe depth estimation algorithm for high-quality depth maps
- Particularly suitable for interior and architectural scenes
- Can preview generated depth maps through PreviewImage node
- resolution: Controls the depth map resolution, affecting its detail level:
Tip: Start with lower resolution for testing and adjustment, then increase resolution for final generation
Tip: Zoe-DepthMapPreprocessor is currently one of the best depth map generators for architectural and interior scenes, handling complex spatial structures and details well
Workflow Node Description
Main node connections:
-
Input Section:
- LoadImage → Zoe-DepthMapPreprocessor → PreviewImage (for depth map preview)
- LoadImage → Zoe-DepthMapPreprocessor → ControlNetApplyAdvanced
-
Model Loading Section:
- CheckpointLoaderSimple (loads base model)
- ControlNetLoader (loads Depth ControlNet)
-
Prompt Processing Section:
- CLIPTextEncode (positive prompts)
- CLIPTextEncode (negative prompts)
-
Generation Control Section:
- KSampler (controls generation process)
- VAEDecode (converts latent to final image)
Depth ControlNet Tips and Best Practices
-
Depth Map Quality Control
- Use high-quality input images
- Ensure clear spatial hierarchy
- Avoid overly complex scenes
- Consider lighting’s effect on depth maps
-
Prompt Writing
- Detail spatial relationships
- Include material and lighting information
- Specify important depth elements
- Use professional terminology
- Recommended keywords:
- Spatial: depth, perspective, spatial layout, composition
- Quality: professional, high quality, detailed, realistic
- Style: modern, minimalist, futuristic (as needed)
-
Troubleshooting
- Weak spatial feel: Increase strength
- Lost details: Lower cfg
- Structure distortion: Increase steps
- Inaccurate depth: Adjust resolution
- Wrong style: Optimize prompts
FAQ
-
Why is spatial sense weak in generated images?
- Check depth map clarity
- Verify strength value
- Consider increasing steps
-
How to improve image quality?
- Use higher resolution
- Select appropriate sampler
- Optimize prompts
-
How to speed up generation?
- Lower resolution
- Use faster sampler
- Reduce steps
-
How to maintain original layout?
- Increase strength
- Keep end_percent at 1
- Use detailed spatial descriptions