ComfyUI Node Interface Explanation
This section explains the workflow node interface of ComfyUI, including how to add nodes, node menu options, error states, and other common operations.
How to Create a New Workflow Node?
Here are several ways you can create a new node:
- Right-click on an empty area to bring up the context menu
- Double-click with the left mouse button to bring up the search menu
- Search and drag nodes from the sidebar panel
- Use
Ctrl+C/Ctrl+Vto copy existing node content
You can also hold the alt key and drag to copy nodes directly
Node Interface Explanation
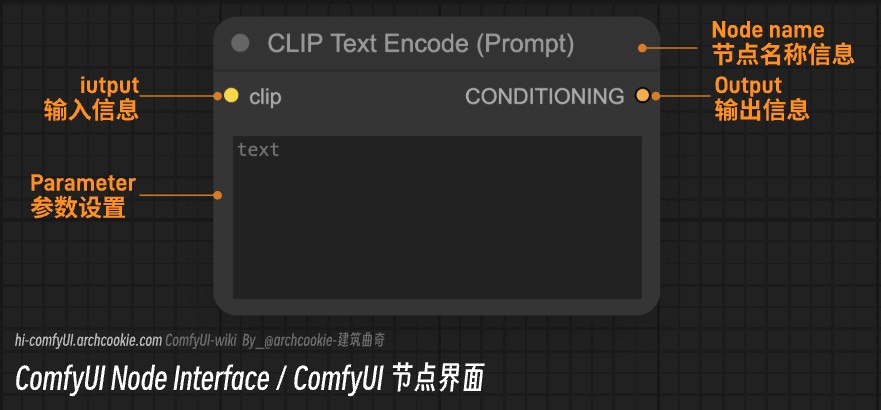
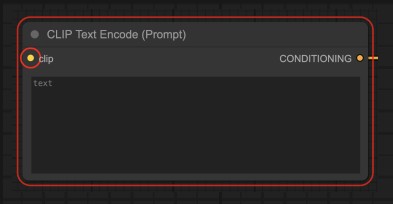
A typical node usually consists of the following parts:
- Node name information (can be modified through right-click menu or by double-clicking the name)
- Input: Supports input types distinguished by different colors, and only matching types can be connected
- Output: Outputs different types of information after node processing (different colors represent different outputs)
- Parameter: The parameter setting part
Single Node Menu Options
Right-click on any node option to bring up the node’s related menu
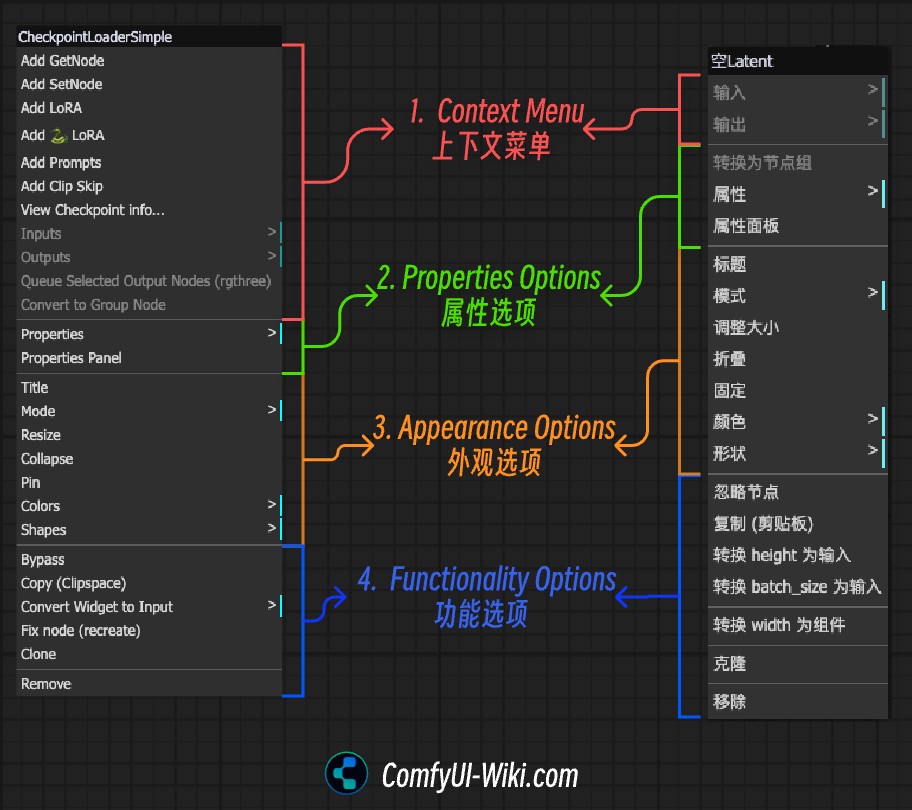
In the node menu, there are mainly four categories:
- Context Menu: The context menu displays functions specific to the current node type and conditions
- Properties: Used to open the node’s property panel or view current node property information
- Appearance: Such as setting or modifying the node name, size, color, shape, collapse, etc.
- Functions: Operation-related functions, such as disabling nodes, converting node parameters to inputs, editing node component states, deleting nodes, etc.
Node Operations
This section explains some quick operations related to nodes
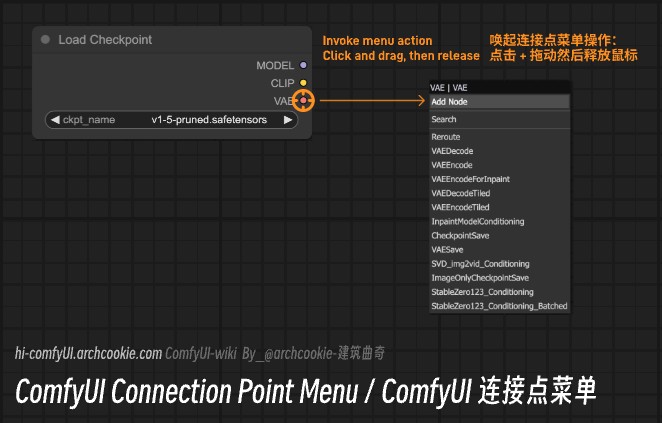
1. Quick Add Related Nodes
As shown in the video below, you can drag on the input/output points of the corresponding node to quickly add other ComfyUI nodes that can be connected
By dragging on the input/output points of the corresponding node, you can bring up the menu for that node, showing other nodes that can be connected to this connection point
2. Convert ComfyUI Node Options to widget or input
As shown in the video below, you can right-click on a node and use the Convert to widget or Convert to input options to convert node options between widget and input
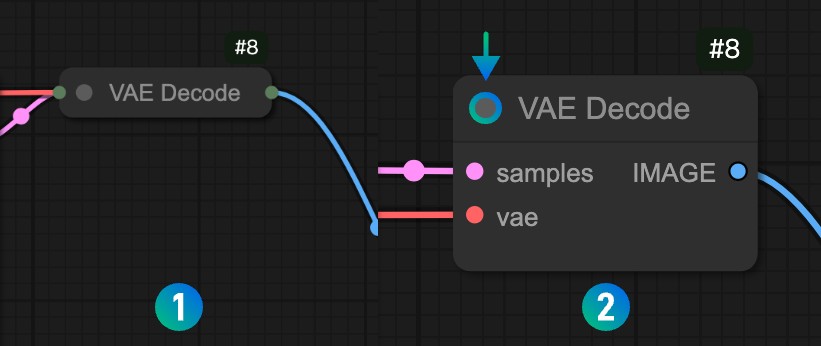
3. Collapse Nodes
As shown in the image below, click the gray button in the top-left corner of each node to toggle the node’s collapse state, or use the Collapse option in the right-click menu
4. Delete Nodes
Use the Delete key to delete the currently selected node, or use the Remove option in the right-click menu
Node Error State
When there is an error with a node, it will display as shown in the image below, with a red outline on the frame, and there will be a red circle prompt on the corresponding connected node, indicating that the connection point is not connected
Multi-Node Menu
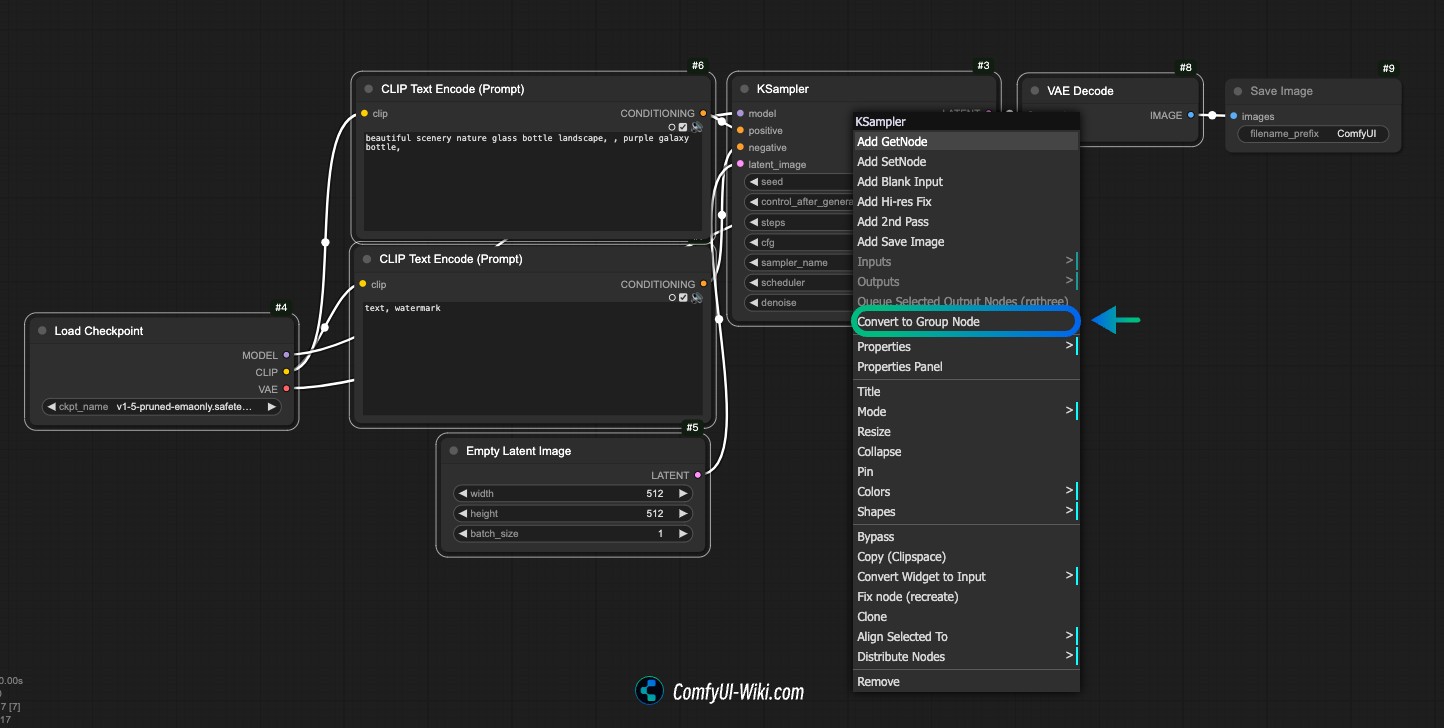
When you select multiple nodes, a different menu appears compared to single nodes, such as the Convert to Group Node option, which allows you to merge multiple nodes into a custom node. After selecting this menu, you’ll be prompted to enter a custom name
- You can convert commonly used workflows into Group Nodes for quick access later
- Group Nodes can be added in the same way as regular nodes, whether through right-click menu, double-clicking empty space, or dragging from the sidebar
Below is an example of merging a Text to Image node into a Group Node
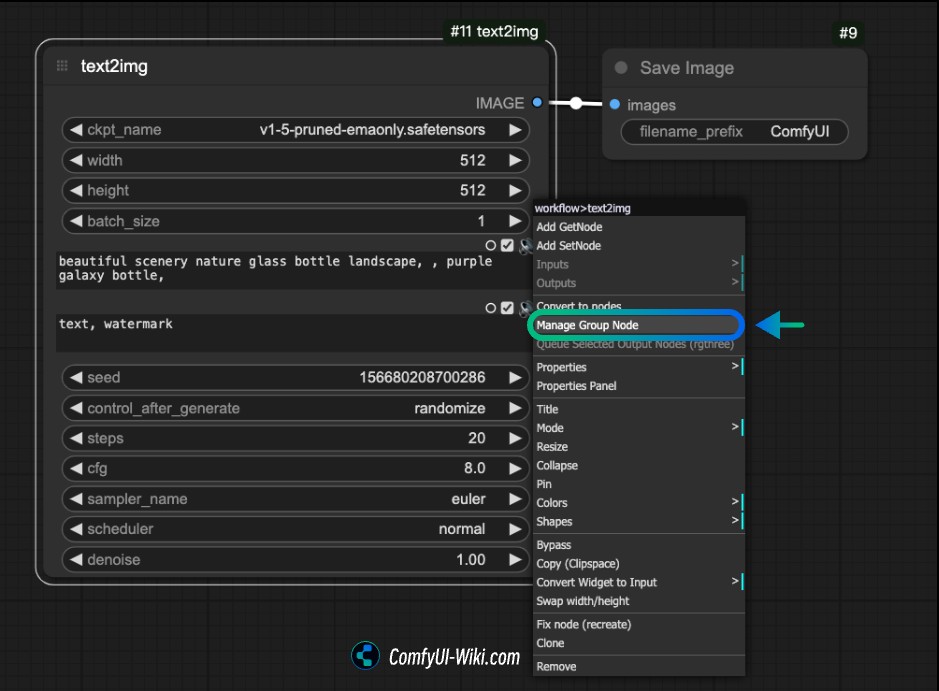
If you need to edit or adjust the Group Node’s parameters and settings, right-click on the corresponding node and click the Manage Group Node option to bring up the Group Node menu for related operations
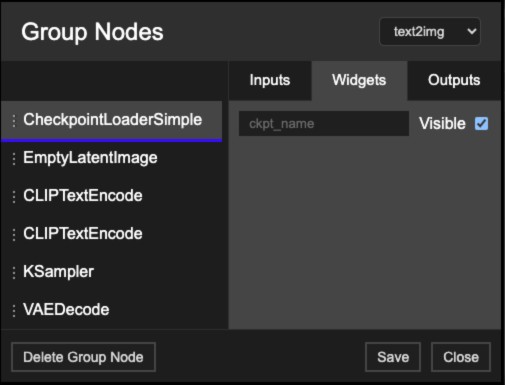 As shown, you can perform the following operations in the Group Node Manager menu:
- Modify option visibility
- Adjust option order
- Delete Group Node, etc.
Node Grouping
In ComfyUI, you can hold the Ctrl key and click multiple nodes, or hold ctrl (or possibly alt) while dragging with the left mouse button to select multiple nodes, then use the Ctrl+G shortcut to group the selected nodes
- Grouped nodes will automatically generate a group style in the background
- Grouped nodes can be moved together, commonly used to distinguish different functional logic
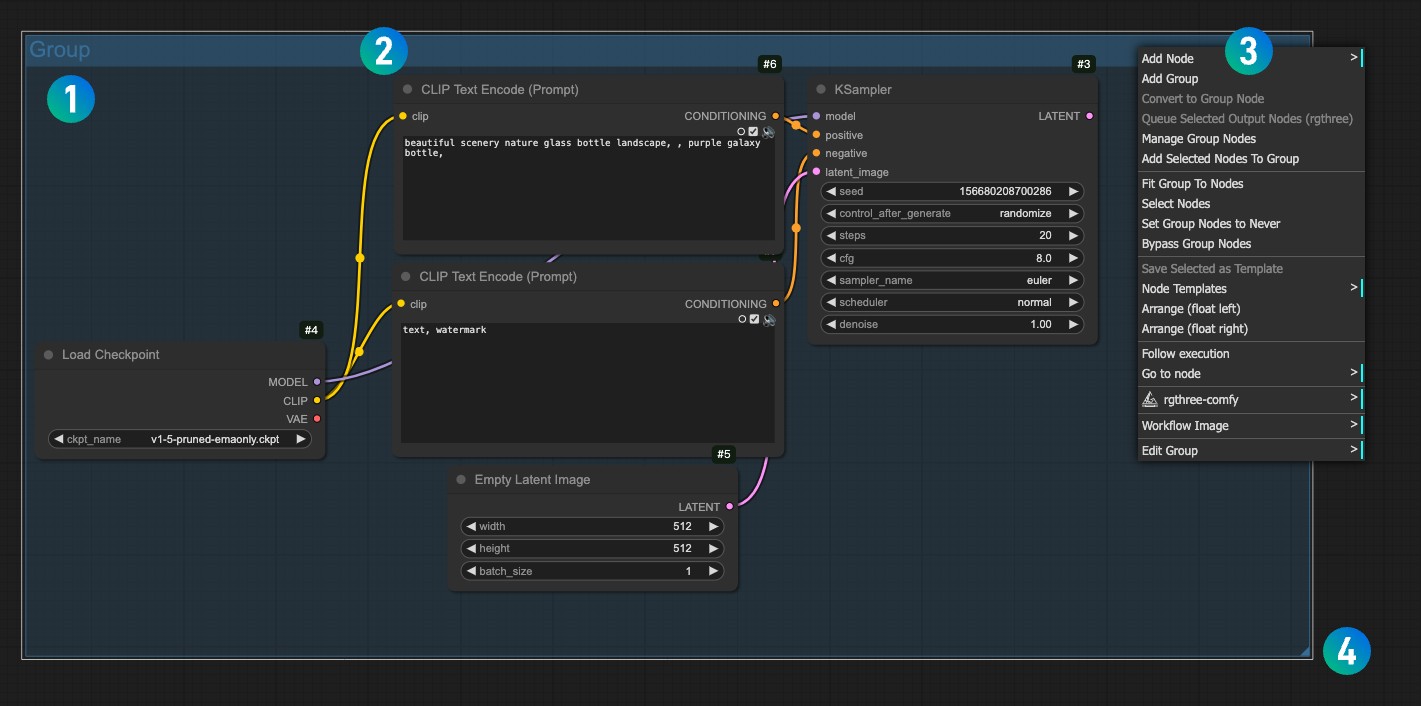
The different parts in the screenshot above are explained as follows:
- Double-click the title to modify the group name
- Click the operation bar in the title section to move the entire group together
- Right-click anywhere in the group space to bring up the group menu for related operations
- The small triangle in the bottom-right corner can be used to adjust the group size
If you want to delete a group:
- Click the title operation bar to activate the corresponding edit, then use the keyboard delete key to delete the group
- Right-click anywhere in the group space to bring up the group menu, find the
Edit Group > Removeoption, and click to delete the group