Alibaba Tongyi Lab Releases Z-Image-Base - Non-Distilled High-Quality Image Generation Model
01/28/2026
ComfyUI User Interface
This section provides an overview of the ComfyUI user interface, including basic operations, menu settings, node operations, and other common user interface options. Due to frequent ComfyUI version updates, some content in this section may be outdated - please refer to the actual interface.
After ComfyUI v0.2.0, the user interface was redesigned with many new features. The menu settings now support switching back to the old menu interface.
The current version of ComfyUI (as of 2024-12-25) has added support for many languages, including:
- English
- Chinese
- Japanese
- Korean
- Russian
Basic Interface Settings
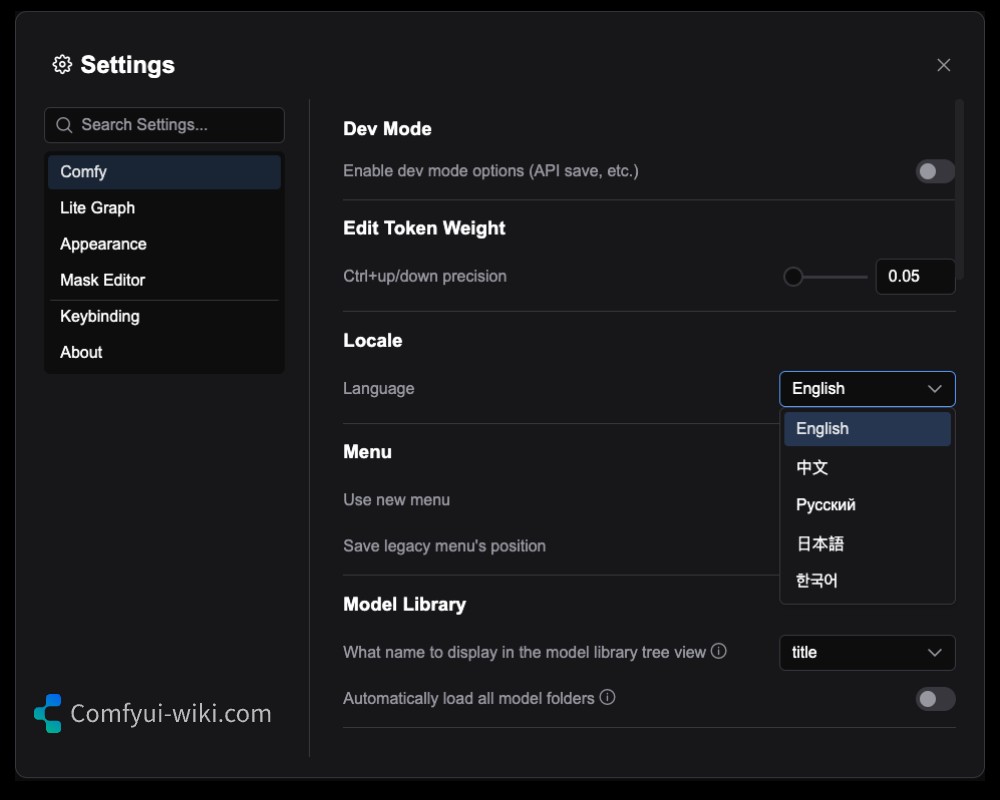
ComfyUI Interface Language Switching
Normally, ComfyUI will automatically switch languages based on your current browser/system language. If you open ComfyUI and find the language is not what you want, you can manually switch languages in the menu settings.
The old menu version only supports English, while the new menu version supports multiple languages. Language switching will not affect the old menu interface.
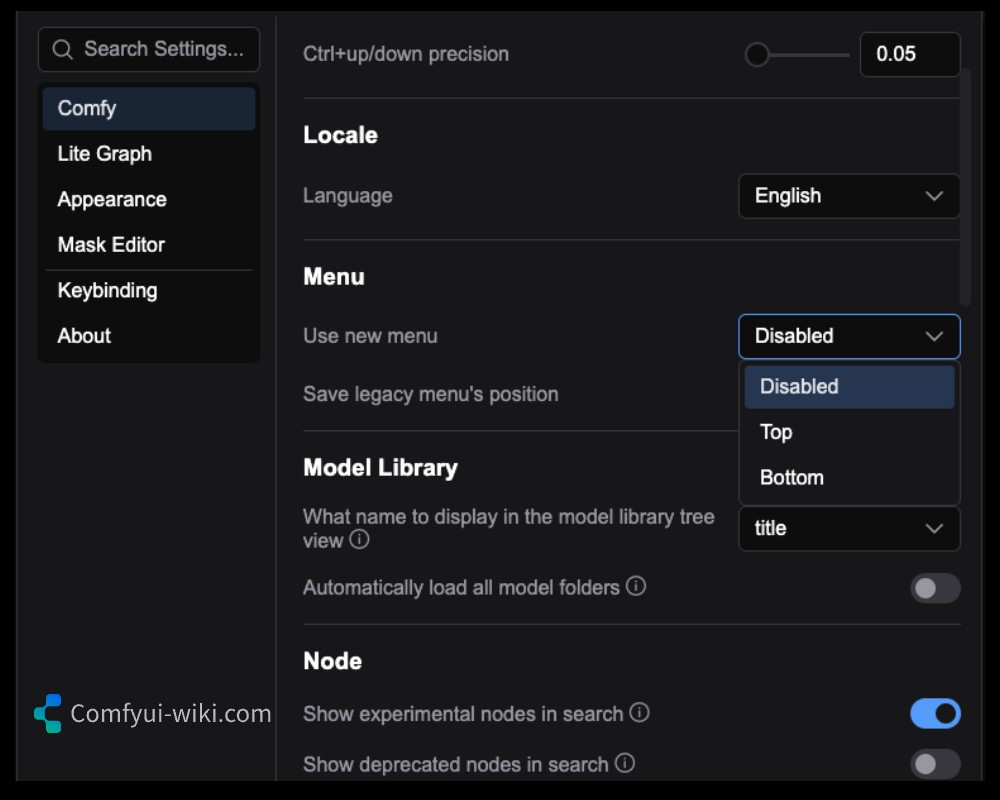
Switching Between New and Old Menu Versions
In the menu settings, you can switch between new and old menu versions. Go to ComfyUI > Menu > Use New Menu and set the option to Disable to switch back to the old menu interface.
New Menu Interface Description
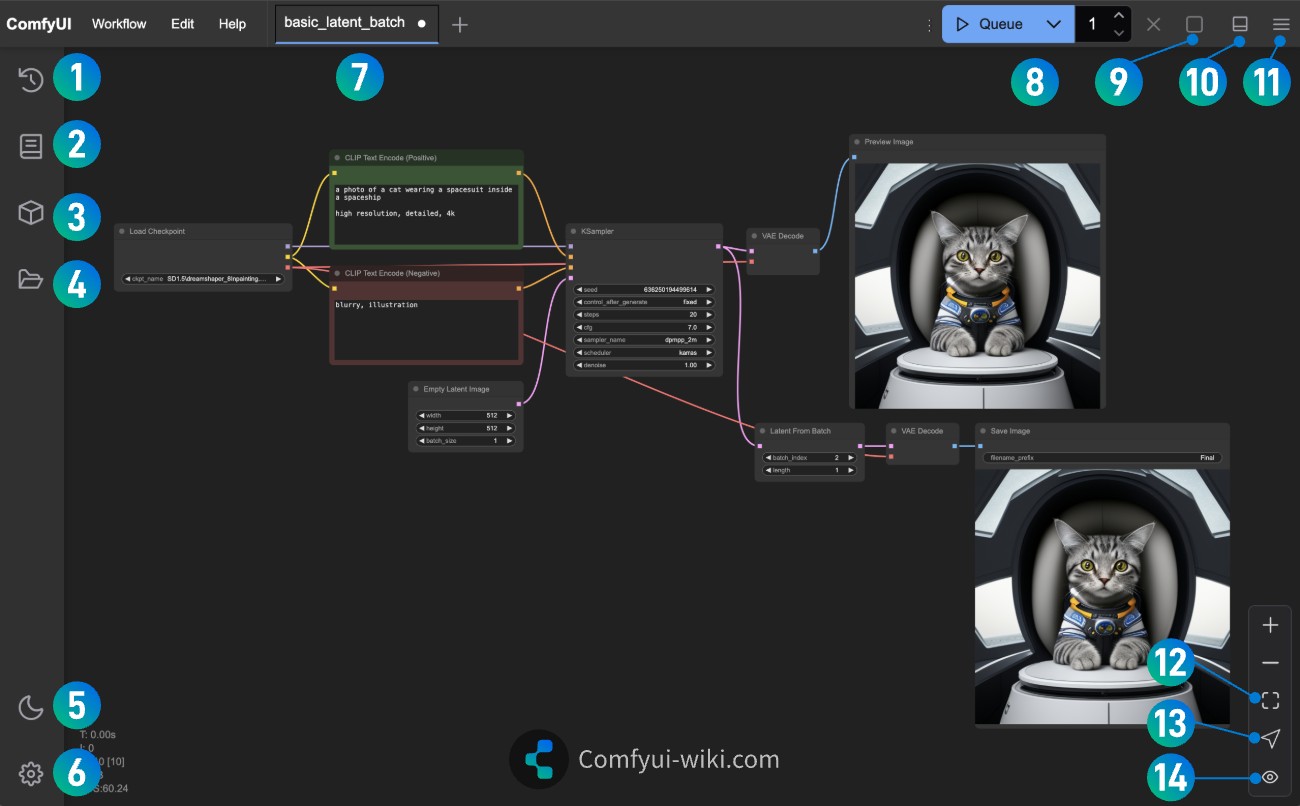
As labeled in the image above, here are the current new menu features:
| No. | Name | Shortcut | Description |
|---|---|---|---|
| 1 | Queue History | Q | History of image generation queue records, where you can quickly browse and switch |
| 2 | Node Library | N | New way to browse all ComfyUI nodes, where you can see the ComfyUI Core node library and browse nodes from other Custom Nodes, with powerful filtering capabilities |
| 3 | Model Library | M | Browse all locally indexed ComfyUI models, drag and drop to load models with corresponding loader nodes |
| 4 | Workflows | W | Browse all your locally saved ComfyUI workflows, double-click to load a workflow in a new workflow tab window |
| 5 | Theme Switch | - | Switch current ComfyUI interface theme, currently supports: Dark, Light |
| 6 | Settings | - | Click to open settings |
| 7 | Workflow Tabs | - | Support opening multiple workflows simultaneously, click plus to create a new workflow tab |
| 8 | Execute Workflow Queue | Ctrl / Command + Enter | Add current workflow to image generation queue, Ctrl / Command + Shift + Enter to set as highest priority queue |
| 9 | Clear Pending Tasks | - | Clear all pending tasks in current workflow queue |
| 10 | Bottom Panel | - | Old Until node Log functionality, view current workflow execution log information here |
| 11 | Show/Hide Menu | - | Click to show or hide menu |
| 12 | Fit View | - | Click to automatically fit current workflow nodes completely in current view |
| 13 | View Selection Mode | Space | Switch between Select Mode and Pan Mode, use Space key to quickly toggle |
| 14 | Toggle Node Connections | - | Click to toggle node connection line display mode, shown by default |
New Sidebar Features
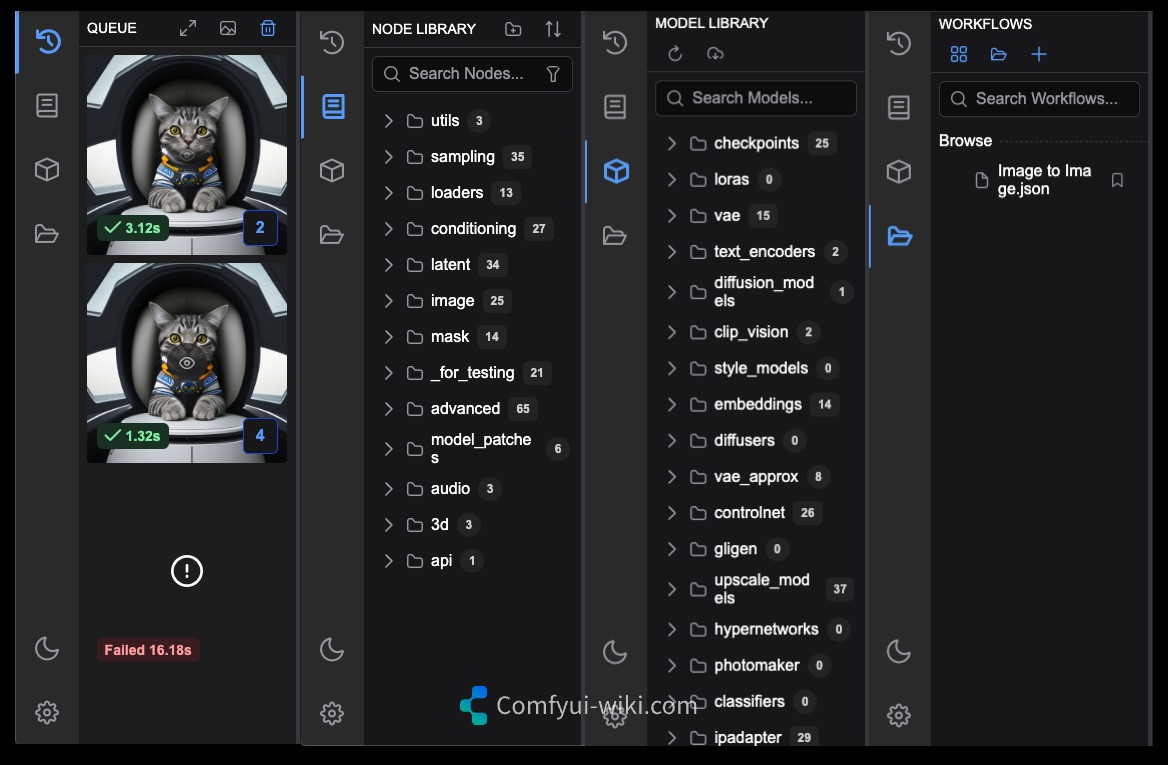 The new sidebar adds many menu features, mainly improving image generation queue management, node management, model management, and workflow management. Since these features are relatively simple to use, we won’t explain them in detail. Here are the main functionalities:
- Image generation queue management, quick browsing of queue history images
- Node management, node library browsing, node search, node filtering
- Model management, model library browsing, model search, model filtering
- Workflow management, workflow browsing, workflow search, workflow filtering
Old Menu Interface Description
The image below is a screenshot of the ComfyUI interface.
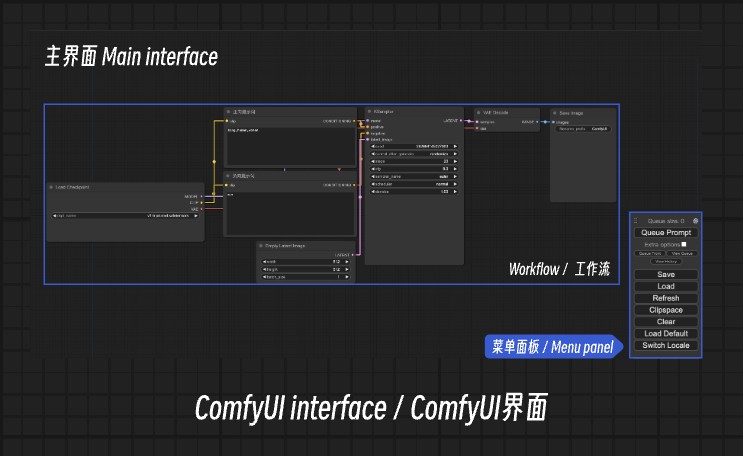
The ComfyUI interface includes:
- The main operation interface
- Workflow node information
- Menu panel
If you see additional panel information in other videos/tutorials, it is likely that the user has installed additional plugins.
Menu Panel Feature Description
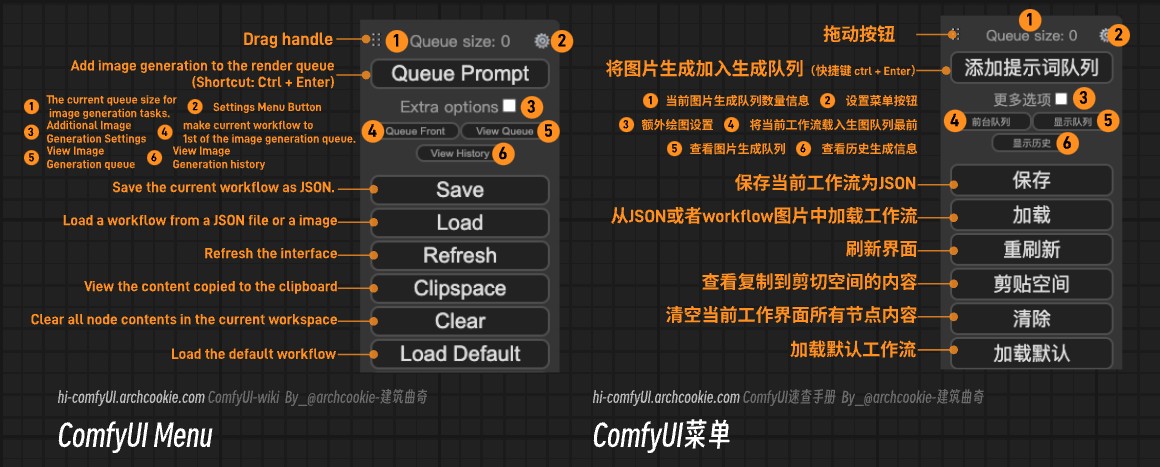
As annotated in the above image, the corresponding feature descriptions are as follows:
- Drag Button: After clicking, you can drag the menu panel to move its position.
- Queue Size: The current number of image generation tasks.
- Settings Button: After clicking, it opens the ComfyUI settings panel.
- Add Prompt Word Queue: Adds the current workflow to the image generation queue (at the end), with the shortcut key
Ctrl+Enter. - Additional Options: Image generation-related options, such as the number of images generated at a time, automatically executing the image generation task when parameters change, etc.
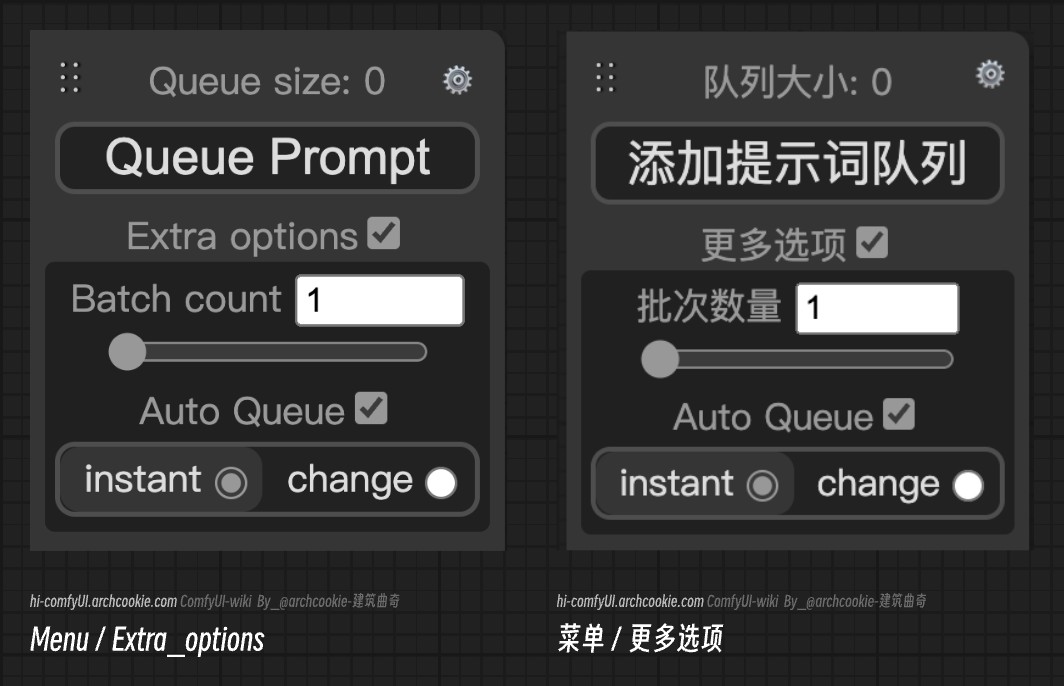
Batch Size: The number of images generated at one time. Auto Queue (Automatic Queue): Automatically adds the current workflow to the image generation queue based on set conditions.
- instant - Real-time: Generates in real-time.
- change - When there is a change: Executes the image generation when there is a parameter change in the workflow.
- Front Queue: Adds the current workflow to the image generation queue and makes it the highest priority queue.
- View Queue: Displays the current list of image generation tasks.
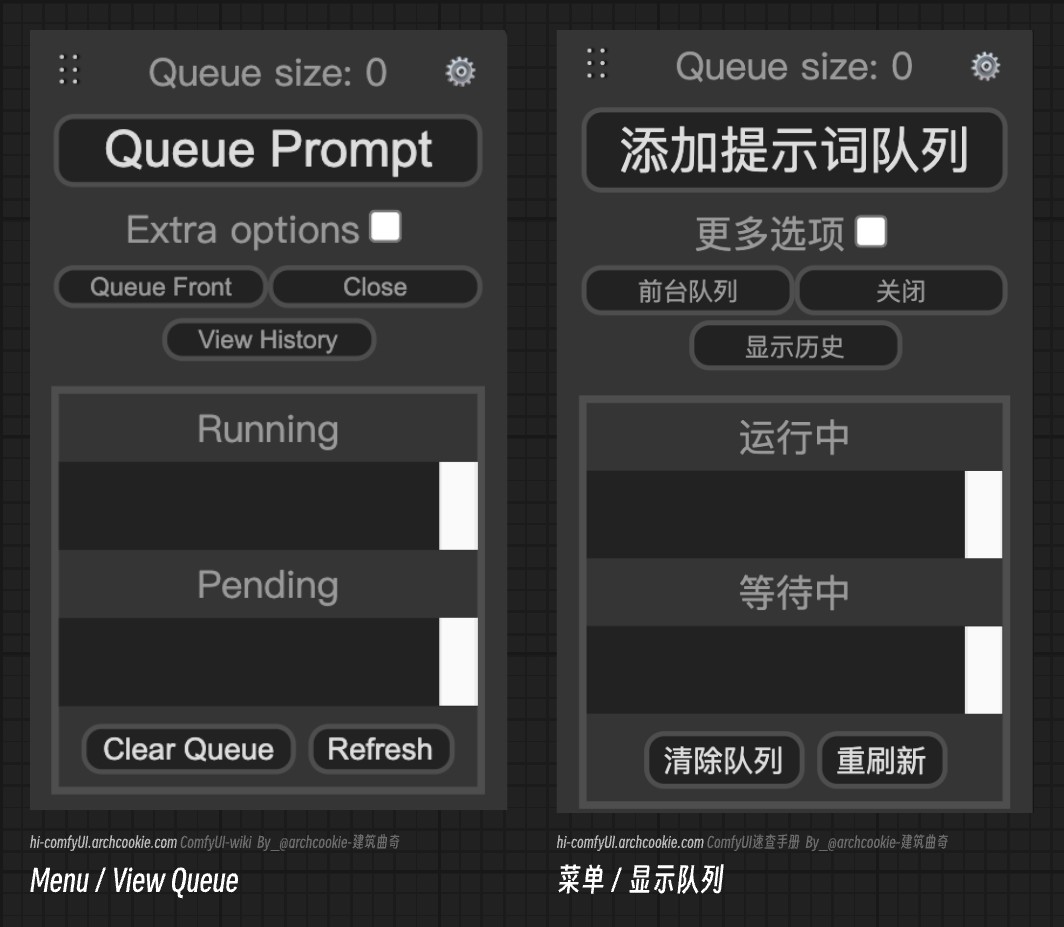
- Running: The queue currently generating images.
- Waiting: The queue currently waiting to generate images.
- Clear Queue: Deletes the image generation queue information.
- Refresh: Refreshes the queue information.
- View History: Displays the history and information of image generation.
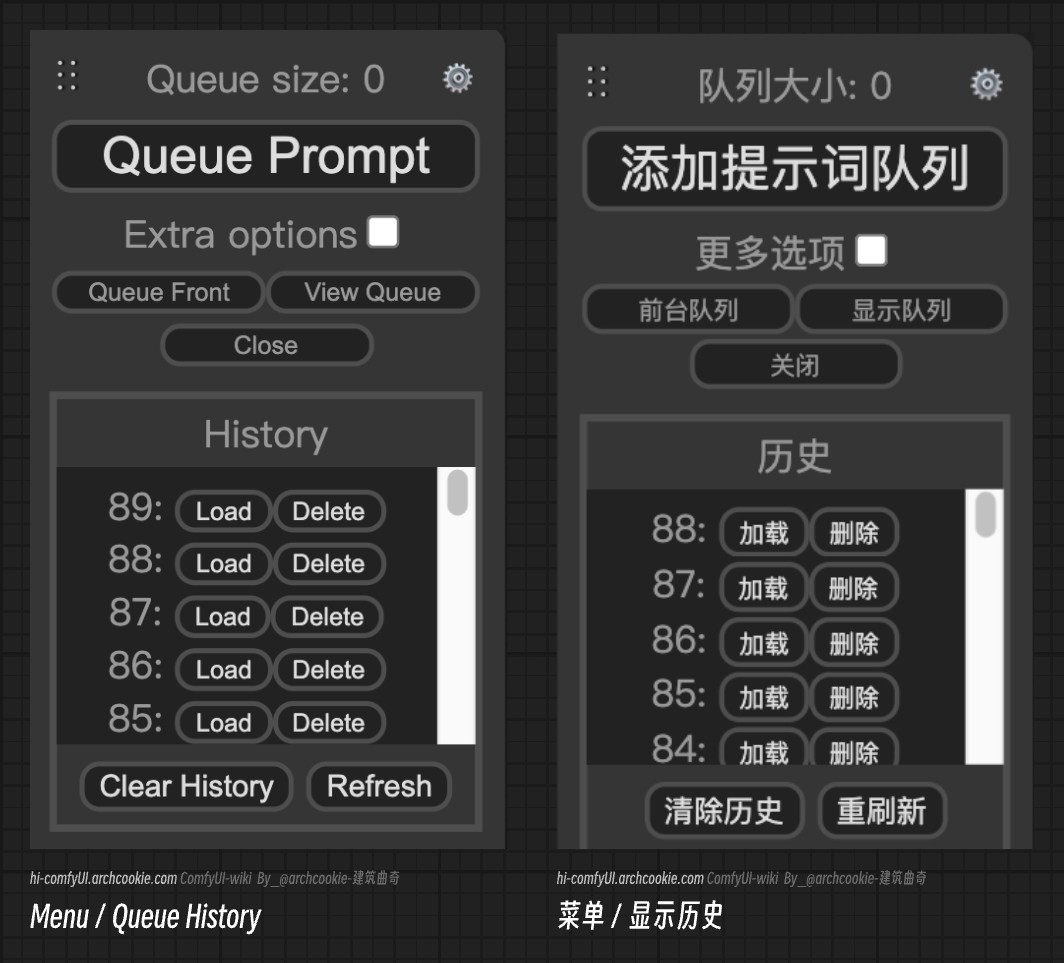
History List: The history of image generation, clicking Load can load the corresponding image generation parameters into the workflow, and clicking Delete will delete the corresponding image generation record information. Clear History: Deletes the image generation history. Refresh: Refreshes the history records.
- Save: Saves the current workflow as a JSON file.
- Load: Loads the workflow from a JSON file or from an image generated by ComfyUI.
- Refresh: Refreshes the current interface.
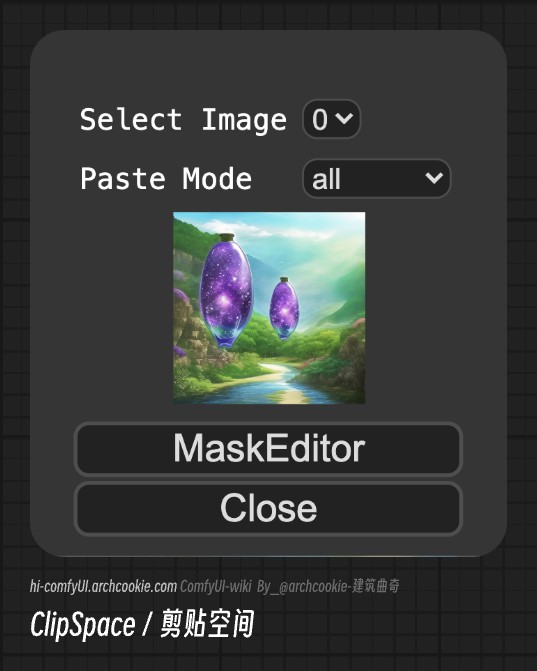
- Clip Space: Displays the content copied to the clipboard space.
After you complete the image generation, you can right-click on the preview/save image node to copy the corresponding image. At this point, clicking on the clipboard space will display the currently copied image, and you can load the image into nodes that support pasting (such as: Load Image node).
- Clear: Clears all node content in the current workspace.
- Load Default: Loads the ComfyUI default workflow.