ComfyUI Text-to-Image Tutorial, Creating Your First Image
This guide will walk you through generating your first image. We’ll be creating an image from text, so please make sure you have completed all the necessary preparations.
Prerequisites
Before starting this tutorial:
- Make sure you have ComfyUI installed. If you haven’t installed it yet, please follow the ComfyUI Installation Guide
- You should have at least one checkpoint model in your ComfyUI
If you haven’t installed any models, I recommend starting with one of these (choose either one):
- Dreamshaper: This is an SD1.5-based model that performs well in realistic images and portrait generation, Download here
- SD1.5: Download here, find and download the v1-5-pruned-emaonly.ckpt file
Using the official portable version as an example, we need to store the downloaded models in the corresponding folders
📁ComfyUI_windows_portable                     // ComfyUI Official Portable Version
├── 📁ComfyUI                                  // ComfyUI Main Folder
│  ├──📁 models                                // Model Installation Folder
│  |  ├── 📁 checkpoints                       // SD Model Installation Location
│  |  |   ├── 📁 SD1.5                         // Create SD1.5 Version Folder (not required, but helps organize and find models as your collection grows)
│  |  |   |   ├── dreamshaper_8.safetensors    // Downloaded Model File
│  |  |   |   └── v1-5-pruned-emaonly.ckpt     // Downloaded Model File
For detailed instructions, please refer to How to Install SD Models in ComfyUI
- Make sure you have started the ComfyUI service. If not, please refer to How to Run ComfyUI Service
Loading ComfyUI’s Default Text-to-Image Workflow
If the default workflow isn’t loaded after running ComfyUI, follow the steps shown in the images below to load ComfyUI’s default text-to-image workflow.
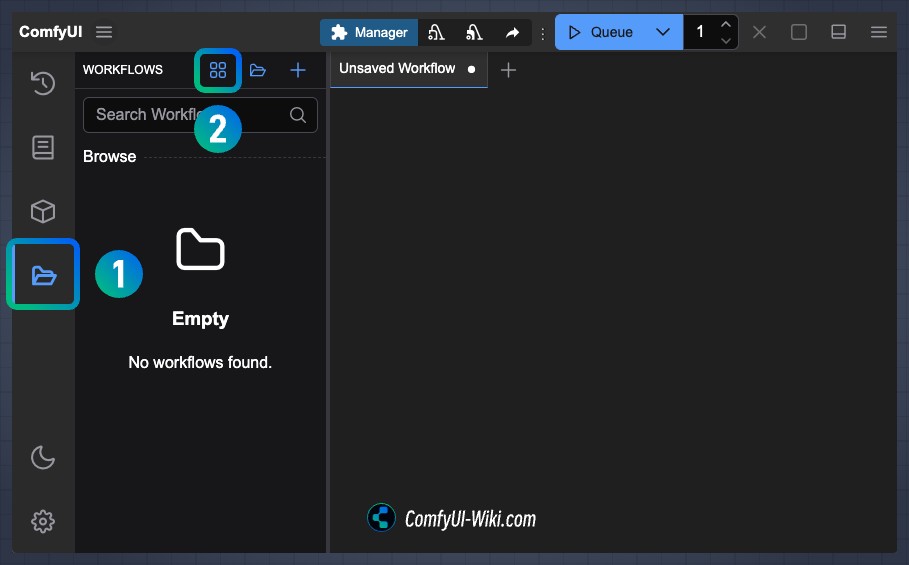
- Click on the
Workflowpanel in the sidebar - Click to browse workflow templates
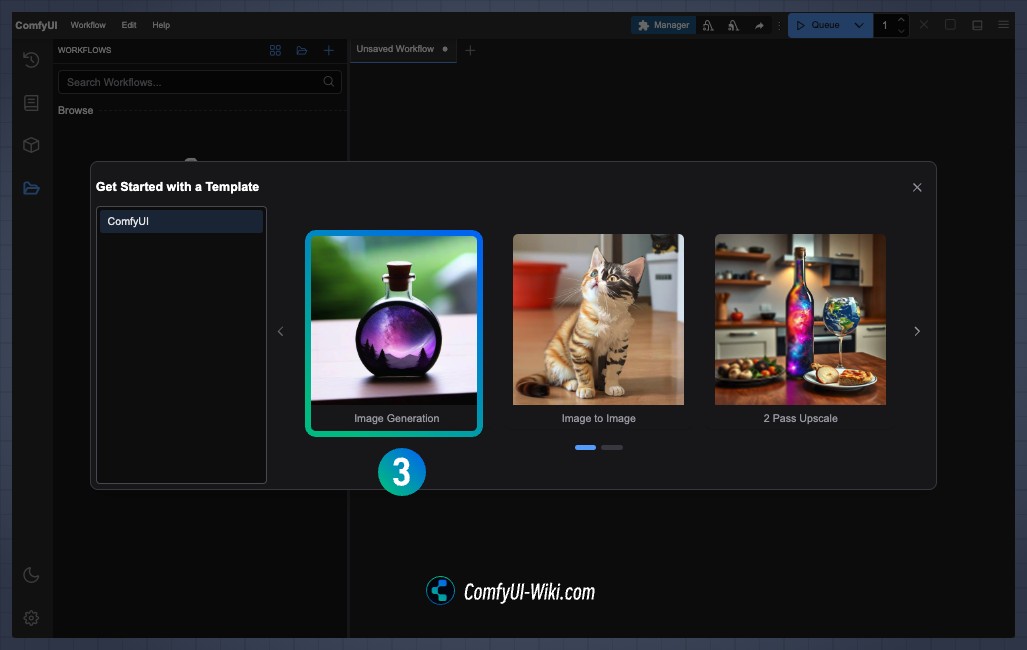
- Select
Image Generationfrom the default workflow templates to load the default workflow
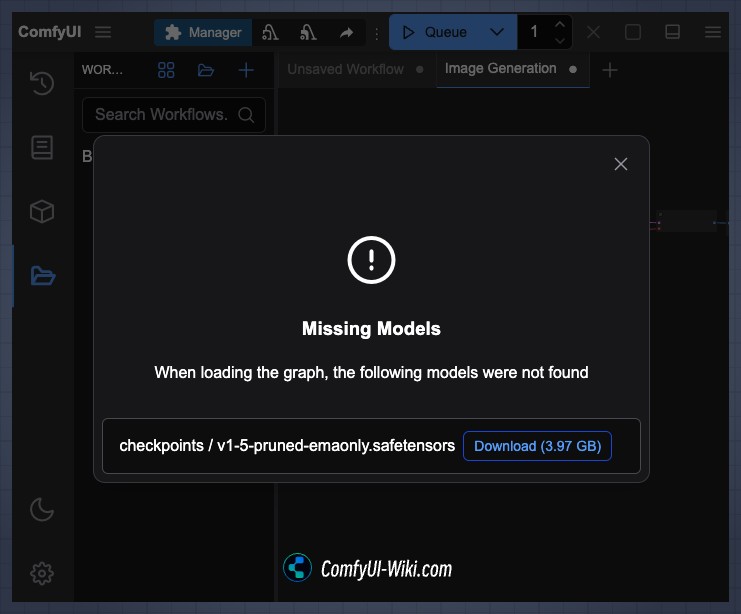
- If you see this popup:
- If you’ve already downloaded and installed the models as suggested, you can ignore and close this popup
- If you haven’t downloaded any model files, you can click
Downloadand ComfyUI will automatically download the corresponding model files to the appropriate folder
Loading Models and Generating Images
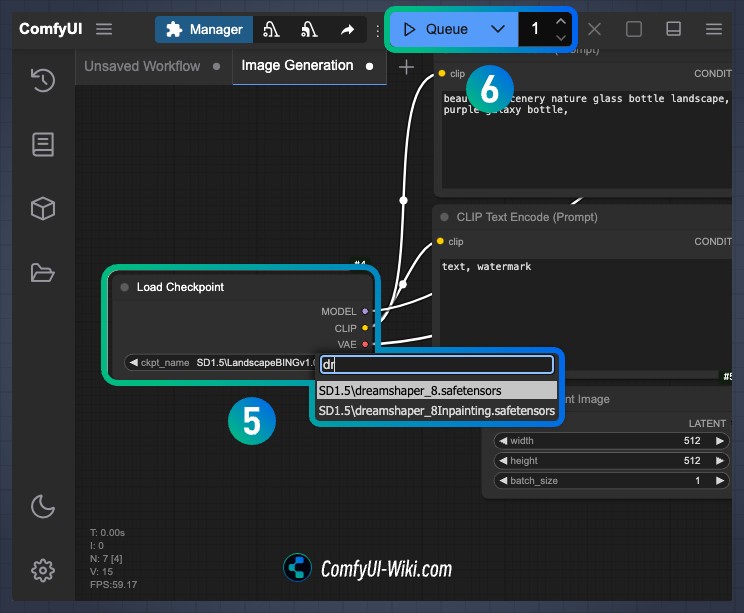
- After the workflow is loaded, move your mouse to the Load checkpoint position, select your desired model file in
ckpt_name. You can use right-click or the node’s arrows to select the model file. - Click
Queueto generate the image
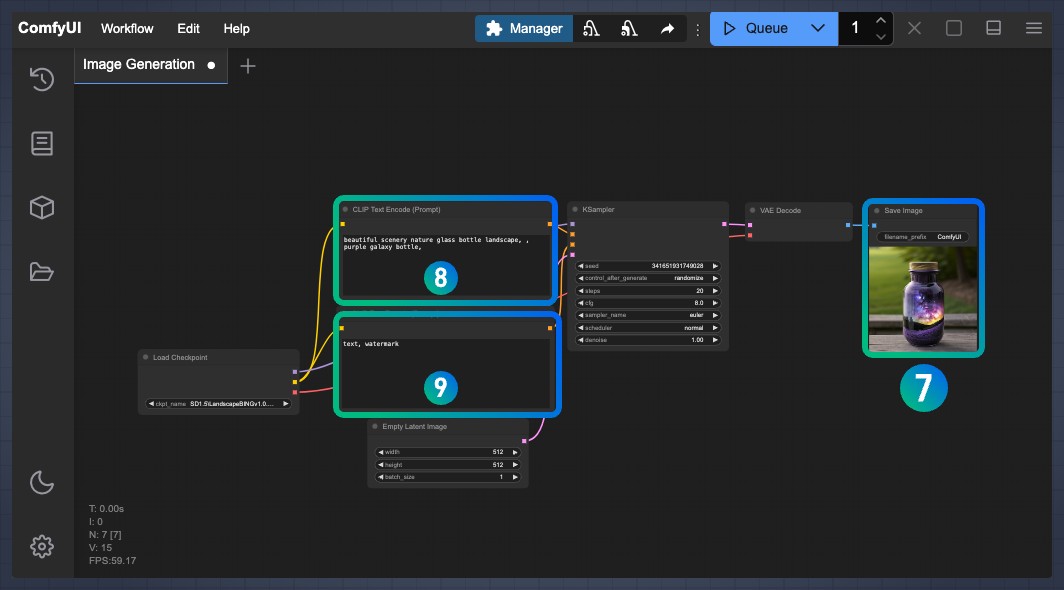
- If everything is correct, you’ll see the generated image in the Save Image node. You can right-click to save the image locally or check the
ComfyUI/outputfolder for other images.
You can continue to experiment by modifying the CLIP Text Encode node to see how different prompts affect the results.
8. Since it’s connected to the positive input of the [Ksampler](/en/comfyui-nodes/sampling/k-sampler) node, the text you enter in this box will be what you want to appear in the image
9. Since it’s connected to the negative input of the [Ksampler](/en/comfyui-nodes/sampling/k-sampler) node, the text you enter in this box will be what you don’t want to appear in the image
Try modifying the content in positions 8 and 9 to experiment with different types of content
For more about prompts, check out: ComfyUI Prompt Basic Syntax Tips