ComfyUI WIKI
💡 A lot of content is still being updated.
The Online ComfyUI Tutorial Documentation for Mastering AIGC
Luma Launches Photon - A Revolutionary AI Image Generation Model with Exceptional Value
12/03/2024
New to ComfyUI? Let's Get Started!
Select the way you would like to run ComfyUI.
ComfyUI Desktop Installation Guide
ComfyUI Official Windows and Mac Version One-click Installer
Read DocsRun ComfyUI On Windows
Install and run ComfyUI on your Windows guide.
Read DocsRun ComfyUI On Linux
Install and run ComfyUI on your Linux guide.
Read DocsRun ComfyUI On Mac
Install and run ComfyUI on your Mac guide.
Read DocsRun ComfyUI On Cloud
Cloud Installation or Platforms to Run ComfyUI for Free
Read DocsInstall Git
Familiarize yourself with Git usage to facilitate downloading and installing plugins and models later.
Read DocsUse Aaaki Launcher to Run ComfyUI
Aaaki Launcher is a ComfyUI assistant developed by Chinese author aaaki, supporting Chinese, Japanese, and English.
Read DocsComfyUI Basic Tutorials
Getting Started with ComfyUI: Essential Concepts and Basic Features
This article introduces how to share Stable Diffusion Models Between ComfyUI and A1111 or Other Stable Diffusion AI image generator WebUI.
ComfyUI Advanced Tutorials
Deep Dive into ComfyUI: Advanced Features and Customization Techniques
ComfyUI Expert Tutorials
Expert Techniques in ComfyUI: Advanced Customization and Optimization
ComfyUI Workflow
ComfyUI Workflow Example
ComfyUI Online Resources
Stable Diffusion AI Model and ComfyUI Resources Directory Navigation
This article compiles model resources from the Stable Diffusion official and third-party sources.
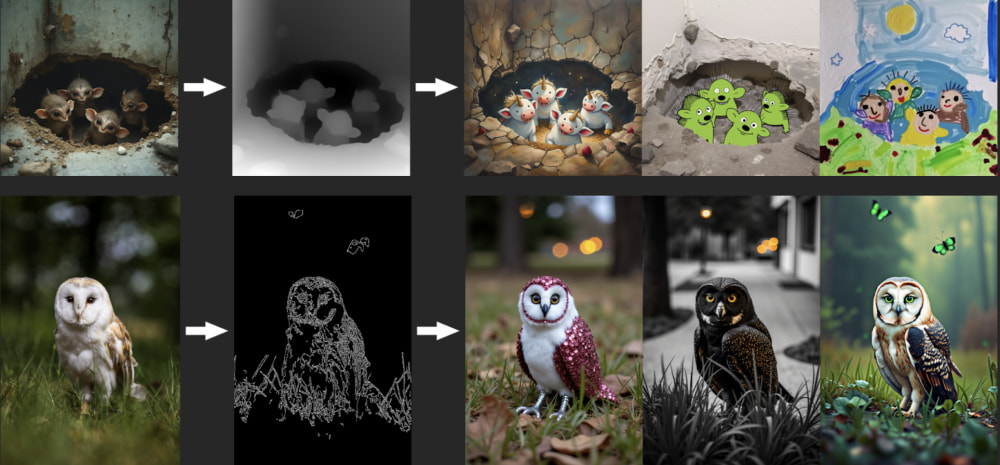
This article compiles ControlNet models available for the Flux ecosystem, including various ControlNet models developed by XLabs-AI, InstantX, and Jasperai, covering multiple control methods such as edge detection, depth maps, and surface normals.
This article compiles ControlNet models available for the Stable Diffusion XL model, including various ControlNet models developed by different authors.
This article compiles different types of ControlNet models that support SD1.5 / 2.0, organized by ComfyUI-WIKI.
This article compiles the initial model resources for ControlNet provided by its original author, lllyasviel.
This article compiles the ControlNet-related model resources that I have organized. You can click to view the model information for different versions.
This article introduces a series of excellent ComfyUI custom node plugins that can greatly enhance the functionality and user experience of ComfyUI.
This article compiles the recommended common negative embeddings for Stable Diffusion models, including SD1.5 and SDXL.
This article compiles the magnification model resources I have collected. You can click to view the model information for different versions.
This article compiles the VAE model resources I have collected. You can click to view the model information for different versions.
This article introduces UNET models and their variants, including commonly used Stable Diffusion UNET model resources and brief explanations of various UNET architectures.
Learn about the ComfyUI official website and resources to get the latest versions, release notes, and official announcements.
ComfyUI Build-in Nodes
ComfyUI Offical Build-in Nodes Documentation
CLIP Text Encode SDXL
Learn about the CLIP Text Encode SDXL node in ComfyUI, which encodes text inputs using CLIP models specifically tailored for the SDXL architecture, converting textual descriptions into a format suitable for image generation or manipulation tasks.
Read DocsCLIP Text Encode SDXL Refiner
Learn about the CLIP Text Encode SDXL Refiner node in ComfyUI, which refines the encoding of text inputs using CLIP models, enhancing the conditioning for generative tasks by incorporating aesthetic scores and dimensions.
Read DocsConditioning Set Timestep Range
Learn about the Conditioning Set Timestep Range node in ComfyUI, which adjusts the temporal aspect of conditioning by setting a specific range of timesteps, allowing for more targeted and efficient generation.
Read DocsConditioning Zero Out
Learn about the Conditioning Zero Out node in ComfyUI, which zeroes out specific elements within the conditioning data structure, effectively neutralizing their influence in subsequent processing steps.
Read DocsCLIPTextEncodeFlux Node for ComfyUI Explained
Discover the functionalities of the CLIPTextEncodeFlux node in ComfyUI for advanced text encoding and conditional image generation.
Read DocsFluxGuidance - ComfyUI Node Functionality Description
Learn about the FluxGuidance node in ComfyUI, which controls the influence of text prompts on image generation.
Read DocsCLIP Loader
Learn about the CLIP Loader node in ComfyUI, which is designed for loading CLIP models, supporting different types such as stable diffusion and stable cascade. It abstracts the complexities of loading and configuring CLIP models for use in various applications, providing a streamlined way to access these models with specific configurations.
Read DocsLoad Checkpoint With Config (DEPRECATED)
Learn about the Load Checkpoint With Config (DEPRECATED) node in ComfyUI, which is designed for loading model checkpoints along with their configurations. It abstracts the complexities of loading and configuring model checkpoints for use in various applications, providing a streamlined way to access these models with specific configurations.
Read DocsDiffusers Loader
Learn about the Diffusers Loader node in ComfyUI, which is designed for loading models from the diffusers library, specifically handling the loading of UNet, CLIP, and VAE models based on provided model paths. It facilitates the integration of these models into the ComfyUI framework, enabling advanced functionalities such as text-to-image generation, image manipulation, and more.
Read DocsDual CLIP Loader - How it work and how to use it.
Learn about the Dual CLIP Loader node in ComfyUI, which is designed for loading two CLIP models simultaneously, facilitating operations that require the integration or comparison of features from both models.
Read DocsUNET Loader Guide | Load Diffusion Model - Documentation & Example
Learn about the UNET Loader node in ComfyUI, which is designed for loading U-Net models by name, facilitating the use of pre-trained U-Net architectures within the system.
Read DocsModel Sampling Continuous EDM
Learn about the Model Sampling Continuous EDM node in ComfyUI, which enhances a model's sampling capabilities by integrating continuous EDM (Energy-based Diffusion Models) sampling techniques. It allows for the dynamic adjustment of the noise levels within the model's sampling process, offering a more refined control over the generation quality and diversity.
Read DocsModel Sampling Discrete
Learn about the Model Sampling Discrete node in ComfyUI, which modifies a model's sampling behavior by applying a discrete sampling strategy. It allows for the selection of different sampling methods, such as epsilon, v_prediction, lcm, or x0, and optionally adjusts the model's noise reduction strategy based on the zero-shot noise ratio (zsnr) setting.
Read DocsRescale CFG
Learn about the Rescale CFG node in ComfyUI, which adjusts the conditioning and unconditioning scales of a model's output based on a specified multiplier, aiming to achieve a more balanced and controlled generation process. It operates by rescaling the model's output to modify the influence of conditioned and unconditioned components, thereby potentially enhancing the model's performance or output quality.
Read DocsCheckpoint Save
Learn about the Checkpoint Save node in ComfyUI, which is designed for saving the state of various model components, including models, CLIP, and VAE, into a checkpoint file. This functionality is crucial for preserving the training progress or configuration of models for later use or sharing.
Read DocsCLIPMerge Simple
Learn about the CLIPMerge Simple node in ComfyUI, which specializes in merging two CLIP models based on a specified ratio, effectively blending their characteristics. It selectively applies patches from one model to another, excluding specific components like position IDs and logit scale, to create a hybrid model that combines features from both source models.
Read DocsCLIP Save
Learn about the CLIPSave node in ComfyUI, which is designed for saving CLIP models along with additional information such as prompts and extra PNG metadata. It encapsulates the functionality to serialize and store the model's state, facilitating the preservation and sharing of model configurations and their associated creative prompts.
Read DocsModel Merge Add
Learn about the ModelMergeAdd node in ComfyUI, which is designed for merging two models by adding key patches from one model to another. This process involves cloning the first model and then applying patches from the second model, allowing for the combination of features or behaviors from both models.
Read DocsModel Merge Blocks
Learn about the ModelMergeBlocks node in ComfyUI, which is designed for advanced model merging operations, allowing for the integration of two models with customizable blending ratios for different parts of the models. This node facilitates the creation of hybrid models by selectively merging components from two source models based on specified parameters.
Read DocsModel Merge Simple
Learn about the ModelMergeSimple node in ComfyUI, which is designed for merging two models by blending their parameters based on a specified ratio. This node facilitates the creation of hybrid models that combine the strengths or characteristics of both input models.
Read DocsModel Merge Subtract
Learn about the ModelMergeSubtract node in ComfyUI, which is designed for advanced model merging operations, specifically to subtract the parameters of one model from another based on a specified multiplier. It enables the customization of model behaviors by adjusting the influence of one model's parameters over another, facilitating the creation of new, hybrid models.
Read DocsVAE Save
Learn about the VAESave node in ComfyUI, which is designed for saving VAE models along with their metadata, including prompts and additional PNG information, to a specified output directory. It encapsulates the functionality to serialize the model state and associated information into a file, facilitating the preservation and sharing of trained models.
Read DocsStable Zero 123 Conditioning
Learn about the StableZero123_Conditioning node in ComfyUI, which is designed for processing conditioning information specifically tailored for the StableZero123 model. It focuses on preparing the input in a specific format that is compatible and optimized for these models.
Read DocsStable Zero 123 Conditioning Batched
Learn about the StableZero123_Conditioning_Batched node in ComfyUI, which is designed for processing conditioning information in a batched manner specifically tailored for the StableZero123 model. It focuses on efficiently handling multiple sets of conditioning data simultaneously, optimizing the workflow for scenarios where batch processing is crucial.
Read DocsCLIP Set Last Layer
Learn about the CLIPSetLastLayer node in ComfyUI, which is designed for modifying the behavior of a CLIP model by setting a specific layer as the last one to be executed. It allows for the customization of the depth of processing within the CLIP model, potentially affecting the model's output by limiting the amount of information processed.
Read DocsCLIP Text Encode (Prompt)
Learn about the CLIPTextEncode node in ComfyUI, which is designed for encoding textual inputs using a CLIP model, transforming text into a form that can be utilized for conditioning in generative tasks. It abstracts the complexity of text tokenization and encoding, providing a streamlined interface for generating text-based conditioning vectors.
Read DocsCLIP Vision Encode
Learn about the CLIPVisionEncode node in ComfyUI, which is designed for encoding images using a CLIP vision model, transforming visual input into a format suitable for further processing or analysis. It abstracts the complexity of image encoding, offering a streamlined interface for converting images into encoded representations.
Read DocsConditioning Average
Learn about the ConditioningAverage node in ComfyUI, which is designed for blending two sets of conditioning data, applying a weighted average based on a specified strength. This process allows for the dynamic adjustment of conditioning influence, facilitating the fine-tuning of generated content or features.
Read DocsConditioning (Combine)
Learn about the Conditioning(Combine) node in ComfyUI, which is designed for merging two sets of conditioning data, effectively combining their information. It provides a straightforward interface for integrating conditioning inputs, allowing for the dynamic adjustment of generated content or features.
Read DocsConditioning (Concat)
Learn about the Conditioning(Concat) node in ComfyUI, which is designed for concatenating conditioning vectors, effectively merging the 'conditioning_from' vector into the 'conditioning_to' vector. It provides a straightforward interface for integrating conditioning inputs, allowing for the dynamic adjustment of generated content or features.
Read DocsConditioning (Set Area)
Learn about the Conditioning(SetArea) node in ComfyUI, which is designed for modifying the conditioning information by setting specific areas within the conditioning context. It allows for the precise spatial manipulation of conditioning elements, enabling targeted adjustments and enhancements based on specified dimensions and strength.
Read DocsConditioning (Set Area with Percentage)
Learn about the Conditioning(SetAreaWithPercentage) node in ComfyUI, which is designed for adjusting the area of influence for conditioning elements based on percentage values. It allows for the specification of the area's dimensions and position as percentages of the total image size, alongside a strength parameter to modulate the intensity of the conditioning effect.
Read DocsConditioning (Set Area Strength)
Learn about the Conditioning(SetAreaStrength) node in ComfyUI, which is designed for adjusting the strength of conditioning elements within a specified area. It allows for the specification of the area's dimensions and position as percentages of the total image size, alongside a strength parameter to modulate the intensity of the conditioning effect.
Read DocsConditioning (Set Mask)
Learn about the Conditioning(SetMask) node in ComfyUI, which is designed for modifying the conditioning information by applying a mask with a specified strength to certain areas. It allows for targeted adjustments within the conditioning, enabling more precise control over the generation process.
Read DocsApply ControlNet
Learn about the ApplyControlNet node in ComfyUI, which is designed for applying control net transformations to conditioning data based on an image and a control net model. It allows for fine-tuned adjustments of the control net's influence over the generated content, enabling more precise and varied modifications to the conditioning.
Read DocsApply ControlNet (Advanced)
Learn about the ApplyControlNet(Advanced) node in ComfyUI, which is designed for applying advanced control net transformations to conditioning data based on an image and a control net model. It allows for fine-tuned adjustments of the control net's influence over the generated content, enabling more precise and varied modifications to the conditioning.
Read DocsGLIGEN Text Box Apply
Learn about the GLIGENTextBoxApply node in ComfyUI, which is designed for integrating text-based conditioning into a generative model's input, specifically by applying text box parameters and encoding them using a CLIP model. This process enriches the conditioning with spatial and textual information, facilitating more precise and context-aware generation.
Read DocsInpaint Model Conditioning
Learn about the InpaintModelConditioning node in ComfyUI, which is designed for facilitating the conditioning process for inpainting models, enabling the integration and manipulation of various conditioning inputs to tailor the inpainting output. It encompasses a broad range of functionalities, from loading specific model checkpoints and applying style or control net models, to encoding and combining conditioning elements, thereby serving as a comprehensive tool for customizing inpainting tasks.
Read DocsApply Style Model
Learn about the StyleModelApply node in ComfyUI, which is designed for applying a style model to a given conditioning, enhancing or altering its style based on the output of a CLIP vision model. It integrates the style model's conditioning into the existing conditioning, allowing for a seamless blend of styles in the generation process.
Read DocsunCLIP Conditioning
Learn about the unCLIPConditioning node in ComfyUI, which is designed for integrating CLIP vision outputs into the conditioning process, adjusting the influence of these outputs based on specified strength and noise augmentation parameters. It enriches the conditioning with visual context, enhancing the generation process.
Read DocsSD_4X Upscale Conditioning
Learn about the SD_4XUpscale_Conditioning node in ComfyUI, which is designed for enhancing the resolution of images through a 4x upscale process, incorporating conditioning elements to refine the output. It leverages diffusion techniques to upscale images while allowing for the adjustment of scale ratio and noise augmentation to fine-tune the enhancement process.
Read DocsSVD img2vid Conditioning
Learn about the SVD_img2vid_Conditioning node in ComfyUI, which is designed for generating conditioning data for video generation tasks, specifically tailored for use with SVD_img2vid models. It takes various inputs including initial images, video parameters, and a VAE model to produce conditioning data that can be used to guide the generation of video frames.
Read DocsSave Animated PNG
Learn about the SaveAnimatedPNG node in ComfyUI, which is designed for creating and saving animated PNG images from a sequence of frames. It handles the assembly of individual image frames into a cohesive animation, allowing for customization of frame duration, looping, and metadata inclusion.
Read DocsSave Animated WEBP
Learn about the SaveAnimatedWEBP node in ComfyUI, which is designed for saving a sequence of images as an animated WEBP file. It handles the aggregation of individual frames into a cohesive animation, applying specified metadata, and optimizing the output based on quality and compression settings.
Read DocsImage From Batch
Learn about the ImageFromBatch node in ComfyUI, which is designed for extracting a specific segment of images from a batch based on the provided index and length. It allows for more granular control over the batched images, enabling operations on individual or subsets of images within a larger batch.
Read DocsRebatch Images
Learn about the RebatchImages node in ComfyUI, which is designed for reorganizing a batch of images into a new batch configuration, adjusting the batch size as specified. This process is essential for managing and optimizing the processing of image data in batch operations, ensuring that images are grouped according to the desired batch size for efficient handling.
Read DocsRepeat Image Batch
Learn about the RepeatImageBatch node in ComfyUI, which is designed for replicating a given image a specified number of times, creating a batch of identical images. This functionality is useful for operations that require multiple instances of the same image, such as batch processing or data augmentation.
Read DocsEmpty Image
Learn about the EmptyImage node in ComfyUI, which is designed for generating blank images of specified dimensions and color. It allows for the creation of uniform color images that can serve as backgrounds or placeholders in various image processing tasks.
Read DocsImage Batch
Learn about the ImageBatch node in ComfyUI, which is designed for combining two images into a single batch. If the dimensions of the images do not match, it automatically rescales the second image to match the first one's dimensions before combining them.
Read DocsImage Composite Masked
Learn about the ImageCompositeMasked node in ComfyUI, which is designed for compositing images, allowing for the overlay of a source image onto a destination image at specified coordinates, with optional resizing and masking.
Read DocsInvert Image
Learn about the ImageInvert node in ComfyUI, which is designed for inverting the colors of an image, effectively transforming each pixel's color value to its complementary color on the color wheel. This operation is useful for creating negative images or for visual effects that require color inversion.
Read DocsImage Pad For Outpainting
Learn about the ImagePadForOutpaint node in ComfyUI, which is designed for preparing images for the outpainting process by adding padding around them. It adjusts the image dimensions to ensure compatibility with outpainting algorithms, facilitating the generation of extended image areas beyond the original boundaries.
Read DocsLoad Image
Learn about the LoadImage node in ComfyUI, which is designed to load and preprocess images from a specified path. It handles image formats with multiple frames, applies necessary transformations such as rotation based on EXIF data, normalizes pixel values, and optionally generates a mask for images with an alpha channel. This node is essential for preparing images for further processing or analysis within a pipeline.
Read DocsImage Blend
Learn about the ImageBlend node in ComfyUI, which is designed for blending two images together based on a specified blending mode and blend factor. It supports various blending modes such as normal, multiply, screen, overlay, soft light, and difference, allowing for versatile image manipulation and compositing techniques. This node is essential for creating composite images by adjusting the visual interaction between two image layers.
Read DocsImage Blur
Learn about the ImageBlur node in ComfyUI, which is designed for applying a Gaussian blur to an image, softening edges and reducing detail and noise. It provides control over the intensity and spread of the blur through parameters.
Read DocsImage Quantize
Learn about the ImageQuantize node in ComfyUI, which is designed for reducing the number of colors in an image to a specified number, optionally applying dithering techniques to maintain visual quality. This process is useful for creating palette-based images or reducing the color complexity for certain applications.
Read DocsImage Sharpen
Learn about the ImageSharpen node in ComfyUI, which is designed for enhancing the clarity of an image by accentuating its edges and details. It applies a sharpening filter to the image, which can be adjusted in intensity and radius, thereby making the image appear more defined and crisp.
Read DocsCanny Node
Learn about the Canny node in ComfyUI, which is designed for edge detection in images, utilizing the Canny algorithm to identify and highlight the edges. This process involves applying a series of filters to the input image to detect areas of high gradient, which correspond to edges, thereby enhancing the image's structural details.
Read DocsPreview Image
Learn about the PreviewImage node in ComfyUI, which is designed for creating temporary preview images. It automatically generates a unique temporary file name for each image, compresses the image to a specified level, and saves it to a temporary directory. This functionality is particularly useful for generating previews of images during processing without affecting the original files.
Read DocsSave Image
Learn about the SaveImage node in ComfyUI, which is designed for saving images to disk. It handles the process of converting image data from tensors to a suitable image format, applying optional metadata, and writing the images to specified locations with configurable compression levels.
Read DocsImage Crop
Learn about the ImageCrop node in ComfyUI, which is designed for cropping images to a specified width and height starting from a given x and y coordinate. This functionality is essential for focusing on specific regions of an image or for adjusting the image size to meet certain requirements.
Read DocsImage Scale
Learn about the ImageScale node in ComfyUI, which is designed for resizing images to specific dimensions, offering a selection of upscale methods and the ability to crop the resized image. It abstracts the complexity of image upscaling and cropping, providing a straightforward interface for modifying image dimensions according to user-defined parameters.
Read DocsImage Scale By Node
Learn about the ImageScaleBy node in ComfyUI, which is designed for upscaling images by a specified scale factor using various interpolation methods. It allows for the adjustment of the image size in a flexible manner, catering to different upscaling needs.
Read DocsImage Scale To Total Pixels
Learn about the ImageScaleToTotalPixels node in ComfyUI, which is designed for resizing images to a specified total number of pixels while maintaining the aspect ratio. It provides various methods for upscaling the image to achieve the desired pixel count.
Read DocsImage Upscale With Model
Discover the ImageUpscaleWithModel node in ComfyUI, designed for upscaling images using a specified upscale model. It efficiently manages the upscaling process by adjusting the image to the appropriate device, optimizing memory usage, and applying the upscale model in a tiled manner to prevent potential out-of-memory errors.
Read DocsLatent Upscale
Learn about the LatentUpscale node in ComfyUI, which is designed to upscale latent representations of images. It allows for the adjustment of the output image's dimensions and the method of upscaling, providing flexibility in enhancing the resolution of latent images.
Read DocsEmpty Latent Image
Learn about the EmptyLatentImage node in ComfyUI, which is designed to generate a blank latent space representation with specified dimensions and batch size. This node serves as a foundational step in generating or manipulating images in latent space, providing a starting point for further image synthesis or modification processes.
Read DocsLatent Upscale By
Learn about the LatentUpscaleBy node in ComfyUI, which is designed to upscale latent representations of images by a specified scale factor. This node allows for the adjustment of the scale factor and the method of upscaling, providing flexibility in enhancing the resolution of latent samples.
Read DocsLatent Composite
Learn about the LatentComposite node in ComfyUI, which is designed to blend or merge two latent representations into a single output. This process is essential for creating composite images or features by combining the characteristics of the input latents in a controlled manner.
Read DocsVAE Decode
Learn about the VAEDecode node in ComfyUI, which is designed to decode latent representations into images using a specified Variational Autoencoder (VAE). It serves the purpose of generating images from compressed data representations, facilitating the reconstruction of images from their latent space encodings.
Read DocsVAE Encode
Learn about the VAEEncode node in ComfyUI, which is designed to encode images into a latent space representation using a specified Variational Autoencoder (VAE). It abstracts the complexity of the encoding process, providing a straightforward way to transform images into their latent representations.
Read DocsLatent Composite Masked
Learn about the LatentCompositeMasked node in ComfyUI, which is designed to blend two latent representations together at specified coordinates, optionally using a mask for more controlled compositing. This node enables the creation of complex latent images by overlaying parts of one image onto another, with the ability to resize the source image for a perfect fit.
Read DocsLatent Add
Learn about the LatentAdd node in ComfyUI, which is designed for the addition of two latent representations. It facilitates the combination of features or characteristics encoded in these representations by performing element-wise addition.
Read DocsLatent Batch Seed Behavior
Learn about the LatentBatchSeedBehavior node in ComfyUI, which is designed to modify the seed behavior of a batch of latent samples. It allows for either randomizing or fixing the seed across the batch, thereby influencing the generation process by either introducing variability or maintaining consistency in the generated outputs.
Read DocsLatent Interpolate
Learn about the LatentInterpolate node in ComfyUI, which is designed to perform interpolation between two sets of latent samples based on a specified ratio, blending the characteristics of both sets to produce a new, intermediate set of latent samples.
Read DocsLatent Multiply
Learn about the LatentMultiply node in ComfyUI, which is designed to scale the latent representation of samples by a specified multiplier, allowing for fine-tuning of generated content or the exploration of variations within a given latent direction.
Read DocsLatent Subtract
Learn about the LatentSubtract node in ComfyUI, which is designed for subtracting one latent representation from another. This operation can be used to manipulate or modify the characteristics of generative models' outputs by effectively removing features or attributes represented in one latent space from another.
Read DocsLatent Batch
Learn about the LatentBatch node in ComfyUI, which is designed to merge two sets of latent samples into a single batch, potentially resizing one set to match the dimensions of the other before concatenation. This operation facilitates the combination of different latent representations for further processing or generation tasks.
Read DocsLatent From Batch
Learn about the LatentFromBatch node in ComfyUI, which is designed to extract a specific subset of latent samples from a given batch based on the specified batch index and length. It allows for selective processing of latent samples, facilitating operations on smaller segments of the batch for efficiency or targeted manipulation.
Read DocsRebatch Latents
Learn about the RebatchLatents node in ComfyUI, which is designed to reorganize a batch of latent representations into a new batch configuration, based on a specified batch size. It ensures that the latent samples are grouped appropriately, handling variations in dimensions and sizes, to facilitate further processing or model inference.
Read DocsRepeat Latent Batch
Learn about the RepeatLatentBatch node in ComfyUI, which is designed to replicate a given batch of latent representations a specified number of times, potentially including additional data like noise masks and batch indices. This functionality is crucial for operations that require multiple instances of the same latent data, such as data augmentation or specific generative tasks.
Read DocsSet Latent Noise Mask
Learn about the SetLatentNoiseMask node in ComfyUI, which is designed to apply a noise mask to a set of latent samples. It modifies the input samples by integrating a specified mask, thereby altering their noise characteristics.
Read DocsVAE Encode (for Inpainting)
Learn about the VAEEncodeForInpaint node in ComfyUI, which is designed for encoding images into a latent representation suitable for inpainting tasks, incorporating additional preprocessing steps to adjust the input image and mask for optimal encoding by the VAE model.
Read DocsCrop Latent
Learn about the LatentCrop node in ComfyUI, which is designed to perform cropping operations on latent representations of images. It allows for the specification of the crop dimensions and position, enabling targeted modifications of the latent space.
Read DocsFlip Latent
Learn about the LatentFlip node in ComfyUI, which is designed to manipulate latent representations by flipping them either vertically or horizontally. This operation allows for the transformation of the latent space, potentially uncovering new variations or perspectives within the data.
Read DocsRotate Latent
Learn about the LatentRotate node in ComfyUI, which is designed to rotate latent representations of images by specified angles. It abstracts the complexity of manipulating latent space to achieve rotation effects, enabling users to easily transform images in a generative model's latent space.
Read DocsCheckpoint Loader (Simple)
Learn about the CheckpointLoaderSimple node in ComfyUI, which is designed to load model checkpoints without the need for specifying a configuration. It simplifies the process of checkpoint loading by requiring only the checkpoint name, making it more accessible for users who may not be familiar with the configuration details.
Read DocsCLIP Vision Loader
Learn about the CLIPVisionLoader node in ComfyUI, which is designed to load CLIP Vision models from specified paths. It abstracts the complexities of locating and initializing CLIP Vision models, making them readily available for further processing or inference tasks.
Read DocsControlNet Loader
Learn about the ControlNetLoader node in ComfyUI, which is designed to load ControlNet models from specified paths. It abstracts the complexities of locating and initializing ControlNet models, making them readily available for further processing or inference tasks.
Read DocsDiff ControlNet Loader
Learn about the DiffControlNetLoader node in ComfyUI, which is designed to load differential control nets from specified paths. It abstracts the complexities of locating and initializing differential control nets, making them readily available for further processing or inference tasks.
Read DocsGLIGEN Loader
Learn about the GLIGENLoader node in ComfyUI, which is designed to load GLIGEN models from specified paths. It abstracts the complexities of locating and initializing GLIGEN models, making them readily available for further processing or inference tasks.
Read DocsHypernetwork Loader
Learn about the HypernetworkLoader node in ComfyUI, which is designed to load hypernetworks from specified paths. It abstracts the complexities of locating and initializing hypernetworks, making them readily available for further processing or inference tasks.
Read DocsLora Loader
Learn about the LoraLoader node in ComfyUI, which is designed to dynamically load and apply LoRA (Low-Rank Adaptation) adjustments to models and CLIP instances based on specified strengths and LoRA file names. It facilitates the customization of pre-trained models by applying fine-tuned adjustments without altering the original model weights directly, enabling more flexible and targeted model behavior modifications.
Read DocsLora Loader Model Only
Learn about the LoraLoaderModelOnly node in ComfyUI, which is designed to load LoRA models without requiring a CLIP model, focusing on enhancing or modifying a given model based on LoRA parameters. It allows for the dynamic adjustment of the model's strength through LoRA parameters, facilitating fine-tuned control over the model's behavior.
Read DocsStyle Model Loader
Learn about the StyleModelLoader node in ComfyUI, which is designed to load style models from specified paths. It abstracts the complexities of locating and initializing style models, making them readily available for further processing or inference tasks.
Read DocsunCLIP Checkpoint Loader
Learn about the unCLIPCheckpointLoader node in ComfyUI, which is designed to load checkpoints specifically tailored for unCLIP models. It facilitates the retrieval and initialization of models, CLIP vision modules, and VAEs from a specified checkpoint, streamlining the setup process for further operations or analyses.
Read DocsUpscale Model Loader
Learn about the UpscaleModelLoader node in ComfyUI, which is designed to load upscale models from specified paths. It abstracts the complexities of locating and initializing upscale models, making them readily available for further processing or inference tasks.
Read DocsVAE Loader
Learn about the VAELoader node in ComfyUI, which is designed to load Variational Autoencoder (VAE) models, specifically tailored to handle both standard and approximate VAEs. It supports loading VAEs by name, including specialized handling for 'taesd' and 'taesdxl' models, and dynamically adjusts based on the VAE's specific configuration.
Read DocsImage Only Checkpoint Loader (img2vid model)
Learn about the ImageOnlyCheckpointLoader node in ComfyUI, which is designed to load checkpoints specifically for image-based models within video generation workflows. It efficiently retrieves and configures the necessary components from a given checkpoint, focusing on image-related aspects of the model.
Read DocsJoin Image with Alpha
Read DocsPorter-Duff Image Composite
The PorterDuffImageComposite node is designed to perform image compositing using the Porter-Duff compositing operators. It allows for the combination of source and destination images according to various blending modes, enabling the creation of complex visual effects by manipulating image transparency and overlaying images in creative ways.
Read DocsSplit Image with Alpha
The SplitImageWithAlpha node is designed to separate the color and alpha components of an image. It processes an input image tensor, extracting the RGB channels as the color component and the alpha channel as the transparency component, facilitating operations that require manipulation of these distinct image aspects.
Read DocsCrop Mask
The CropMask node is designed to crop a specified area from a given mask. It allows users to define the region of interest by specifying coordinates and dimensions, effectively extracting a portion of the mask for further processing or analysis.
Read DocsFeather Mask
The FeatherMask node is designed to apply a feathering effect to the edges of a given mask, smoothly transitioning the mask's edges by adjusting their opacity based on specified distances from each edge. This creates a softer, more blended edge effect.
Read DocsGrow Mask
The GrowMask node is designed to modify the size of a given mask, either expanding or contracting it, while optionally applying a tapered effect to the corners. This functionality is crucial for dynamically adjusting mask boundaries in image processing tasks, allowing for more flexible and precise control over the area of interest.
Read DocsImage Color To Mask
The ImageColorToMask node is designed to convert a specified color in an image to a mask. It processes an image and a target color, generating a mask where the specified color is highlighted, facilitating operations like color-based segmentation or object isolation.
Read DocsImage To Mask
The ImageToMask node is designed to convert an image into a mask based on a specified color channel. It allows for the extraction of mask layers corresponding to the red, green, blue, or alpha channels of an image, facilitating operations that require channel-specific masking or processing.
Read DocsInvert Mask
The InvertMask node is designed to invert the values of a given mask, effectively flipping the masked and unmasked areas. This operation is fundamental in image processing tasks where the focus of interest needs to be switched between the foreground and the background.
Read DocsLoad Image (as Mask)
The LoadImageMask node is designed to load images and their associated masks from a specified path, processing them to ensure compatibility with further image manipulation or analysis tasks. It focuses on handling various image formats and conditions, such as presence of an alpha channel for masks, and prepares the images and masks for downstream processing by converting them to a standardized format.
Read DocsMask Composite
The MaskComposite node is designed to combine two mask inputs through a variety of operations such as addition, subtraction, and logical operations, to produce a new, modified mask. It abstractly handles the manipulation of mask data to achieve complex masking effects, serving as a crucial component in mask-based image editing and processing workflows.
Read DocsMask To Image
The MaskToImage node is designed to convert a mask into an image format. This transformation allows for the visualization and further processing of masks as images, facilitating a bridge between mask-based operations and image-based applications.
Read DocsSolid Mask
The SolidMask node generates a uniform mask with a specified value across its entire area. It's designed to create masks of specific dimensions and intensity, useful in various image processing and masking tasks.
Read DocsSamplerCustom
The SamplerCustom node is designed to provide a flexible and customizable sampling mechanism for various applications. It enables users to select and configure different sampling strategies tailored to their specific needs, enhancing the adaptability and efficiency of the sampling process.
Read DocsKSampler Select
The KSamplerSelect node is designed to select a specific sampler based on the provided sampler name. It abstracts the complexity of sampler selection, allowing users to easily switch between different sampling strategies for their tasks.
Read DocsSampler DPMPP_2M_SDE
The SamplerDPMPP_2M_SDE node is designed to generate a sampler for the DPMPP_2M_SDE model, allowing for the creation of samples based on specified solver types, noise levels, and computational device preferences. It abstracts the complexities of sampler configuration, providing a streamlined interface for generating samples with customized settings.
Read DocsSampler DPMPP_SDE
The SamplerDPMPP_SDE node is designed to generate a sampler for the DPMPP_SDE model, allowing for the creation of samples based on specified solver types, noise levels, and computational device preferences. It abstracts the complexities of sampler configuration, providing a streamlined interface for generating samples with customized settings.
Read DocsBasic Scheduler
The BasicScheduler node is designed to compute a sequence of sigma values for diffusion models based on the provided scheduler, model, and denoising parameters. It dynamically adjusts the total number of steps based on the denoise factor to fine-tune the diffusion process.
Read DocsExponential Scheduler
The ExponentialScheduler node is designed to generate a sequence of sigma values following an exponential schedule for diffusion sampling processes. It provides a customizable approach to control the noise levels applied at each step of the diffusion process, allowing for fine-tuning of the sampling behavior.
Read DocsKarras Scheduler
The KarrasScheduler node is designed to generate a sequence of noise levels (sigmas) based on the Karras et al. (2022) noise schedule. This scheduler is useful for controlling the diffusion process in generative models, allowing for fine-tuned adjustments to the noise levels applied at each step of the generation process.
Read DocsPolyexponential Scheduler
The PolyexponentialScheduler node is designed to generate a sequence of noise levels (sigmas) based on a polyexponential noise schedule. This schedule is a polynomial function in the logarithm of sigma, allowing for a flexible and customizable progression of noise levels throughout the diffusion process.
Read DocsSD Turbo Scheduler
The SDTurboScheduler node is designed to generate a sequence of sigma values for image sampling, adjusting the sequence based on the denoise level and the number of steps specified. It leverages a specific model's sampling capabilities to produce these sigma values, which are crucial for controlling the denoising process during image generation.
Read DocsVP Scheduler
The VPScheduler node is designed to generate a sequence of noise levels (sigmas) based on the Variance Preserving (VP) scheduling method. This sequence is crucial for guiding the denoising process in diffusion models, allowing for controlled generation of images or other data types.
Read DocsFlip Sigmas
The FlipSigmas node is designed to manipulate the sequence of sigma values used in diffusion models by reversing their order and ensuring the first value is non-zero if originally zero. This operation is crucial for adapting the noise levels in reverse order, facilitating the generation process in models that operate by gradually reducing noise from data.
Read DocsSplit Sigmas
The SplitSigmas node is designed to divide a sequence of sigma values into two parts based on a specified step. This functionality is crucial for operations that require different handling or processing of the initial and subsequent parts of the sigma sequence, enabling more flexible and targeted manipulation of these values.
Read DocsKSampler
The KSampler node is designed to provide a basic sampling mechanism for various applications. It enables users to select and configure different sampling strategies tailored to their specific needs, enhancing the adaptability and efficiency of the sampling process.
Read DocsKSampler (Advanced)
The KSamplerAdvanced node is designed to enhance the sampling process by providing advanced configurations and techniques. It aims to offer more sophisticated options for generating samples from a model, improving upon the basic KSampler functionalities.
Read DocsSampler
The Sampler node is designed to provide a basic sampling mechanism for various applications. It enables users to select and configure different sampling strategies tailored to their specific needs, enhancing the adaptability and efficiency of the sampling process.
Read DocsVideo Linear CFG Guidance
The VideoLinearCFGGuidance node applies a linear conditioning guidance scale to a video model, adjusting the influence of conditioned and unconditioned components over a specified range. This enables dynamic control over the generation process, allowing for fine-tuning of the model's output based on the desired level of conditioning.
Read DocsNote
The Note node is designed to provide a basic sampling mechanism for various applications. It enables users to select and configure different sampling strategies tailored to their specific needs, enhancing the adaptability and efficiency of the sampling process.
Read DocsPrimitive
The Primitive node can recognize the type of input connected to it and provide input data accordingly. When this node is connected to different input types, it will change to different input states. It can be used to use a unified parameter among multiple different nodes, such as using the same seed in multiple Ksampler.
Read DocsReroute
The Reroute node is designed to provide a basic sampling mechanism for various applications. It enables users to select and configure different sampling strategies tailored to their specific needs, enhancing the adaptability and efficiency of the sampling process.
Read DocsTerminal Log (Manager)
The Terminal Log (Manager) node is primarily used to display the running information of ComfyUI in the terminal within the ComfyUI interface. To use it, you need to set the `mode` to **logging** mode. This will allow it to record corresponding log information during the image generation task. If the `mode` is set to **stop** mode, it will not record log information. When you access and use ComfyUI via remote connections or local area network connections, Terminal Log (Manager) node becomes particularly useful. It allows you to directly view error messages from the CMD within the ComfyUI interface, making it easier to understand the current status of ComfyUI's operation.
Read DocsFrequently Asked Questions
Common questions and answers about ComfyUI
ComfyUI Fast Groups Alternatives and Usage Guide
Exploring alternatives to Fast Groups Muter in ComfyUI and tips for better node group management in workflows.
How to Change Font Size in ComfyUI: Step-by-Step Guide
A detailed guide on adjusting font sizes in different areas of ComfyUI
How to Change ComfyUI Output Folder Location
A comprehensive guide on changing the default output folder location in ComfyUI
How to Enable New Menu in ComfyUI
A guide on enabling the new menu interface in ComfyUI v0.2.0 and above
Why Do ComfyUI and A1111 Generate Different Images with the Same Seed?
Detailed explanation of the differences between ComfyUI and Automatic1111 WebUI in image generation, including noise generation and prompt weight handling
