ComfyUI User Interface
This section is a guide to the ComfyUI user interface, including basic operations, menu settings, node operations, and other common user interface options.
Interface Description
The image below is a screenshot of the ComfyUI interface.
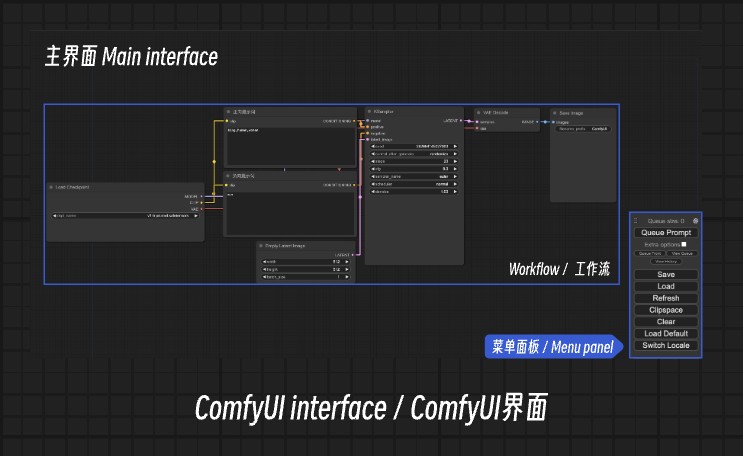
The ComfyUI interface includes:
- The main operation interface
- Workflow node information
- Menu panel
If you see additional panel information in other videos/tutorials, it is likely that the user has installed additional plugins.
Menu Panel Feature Description
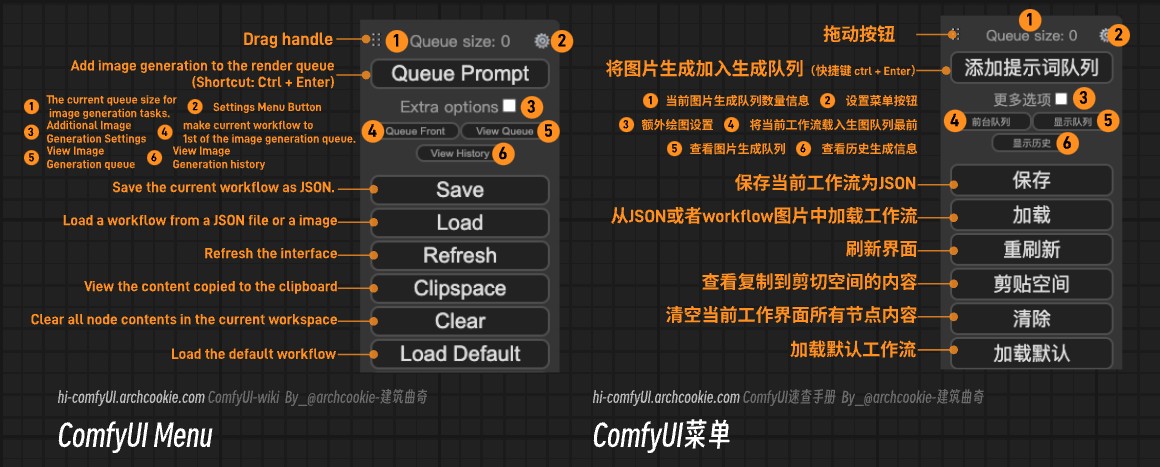
As annotated in the above image, the corresponding feature descriptions are as follows:
- Drag Button: After clicking, you can drag the menu panel to move its position.
- Queue Size: The current number of image generation tasks.
- Settings Button: After clicking, it opens the ComfyUI settings panel.
- Add Prompt Word Queue: Adds the current workflow to the image generation queue (at the end), with the shortcut key
Ctrl+Enter. - Additional Options: Image generation-related options, such as the number of images generated at a time, automatically executing the image generation task when parameters change, etc.

Batch Size: The number of images generated at one time. Auto Queue (Automatic Queue): Automatically adds the current workflow to the image generation queue based on set conditions.
- instant - Real-time: Generates in real-time.
- change - When there is a change: Executes the image generation when there is a parameter change in the workflow.
- Front Queue: Adds the current workflow to the image generation queue and makes it the highest priority queue.
- View Queue: Displays the current list of image generation tasks.
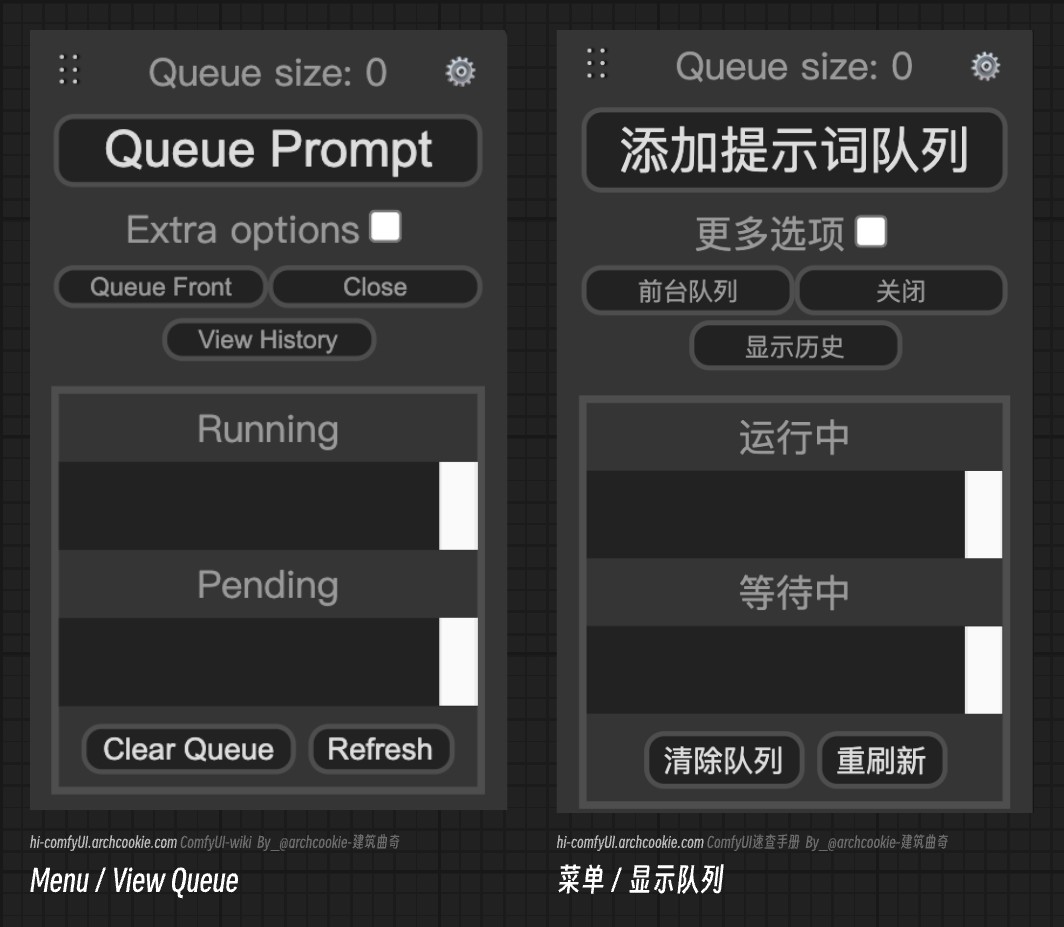
- Running: The queue currently generating images.
- Waiting: The queue currently waiting to generate images.
- Clear Queue: Deletes the image generation queue information.
- Refresh: Refreshes the queue information.
- View History: Displays the history and information of image generation.
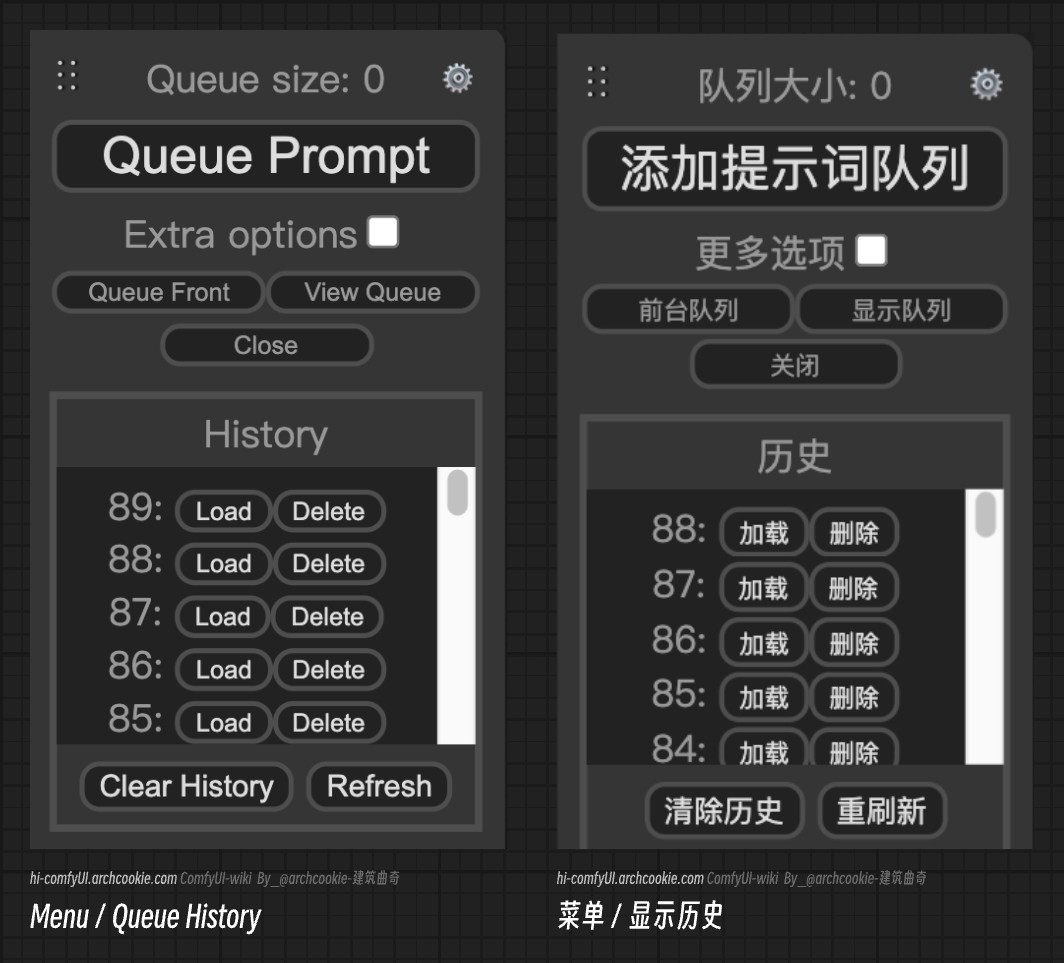
History List: The history of image generation, clicking Load can load the corresponding image generation parameters into the workflow, and clicking Delete will delete the corresponding image generation record information. Clear History: Deletes the image generation history. Refresh: Refreshes the history records.
- Save: Saves the current workflow as a JSON file.
- Load: Loads the workflow from a JSON file or from an image generated by ComfyUI.
- Refresh: Refreshes the current interface.
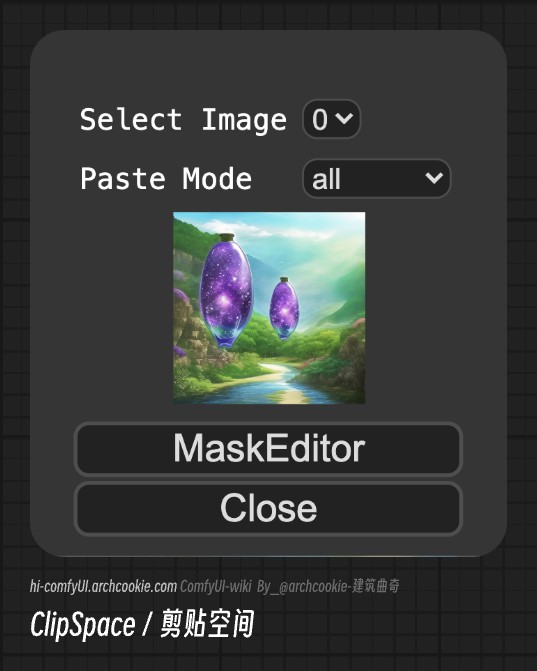
- Clip Space: Displays the content copied to the clipboard space.
After you complete the image generation, you can right-click on the preview/save image node to copy the corresponding image. At this point, clicking on the clipboard space will display the currently copied image, and you can load the image into nodes that support pasting (such as: Load Image node).
- Clear: Clears all node content in the current workspace.
- Load Default: Loads the ComfyUI default workflow.
Save Workflow
How to save the workflow I have set up in ComfyUI?
You can save the workflow file you have created in the following ways:
- Save the image generation as a PNG file (ComfyUI will write the prompt information and workflow settings during the generation process into the Exif information of the PNG).
- By clicking on
Savein the Menu Panel, you can save the current workflow as a JSON format.

Import Workflow
In the right-side menu panel of ComfyUI, click on Load to load the ComfyUI workflow file in the following two ways:
- Load the workflow from a workflow JSON file.
- Load from a PNG image generated by ComfyUI.