Comfy Cloud Runs Your Own Nodes With Custom Builds
Custom Builds package your custom nodes, models, LoRAs and dependencies into one setup, so Comfy Cloud opens workflows the standard node list cannot run.
Comfy Cloud used to open only the nodes and models on its own list. A Custom Build packages your custom nodes, models, LoRAs and Python dependencies into one setup, and the editor runs your workflow on that setup instead of the standard list.
Anyone in the workspace picks the same Build, so a workflow built around a niche node pack opens in the browser the way it opens on your own machine.
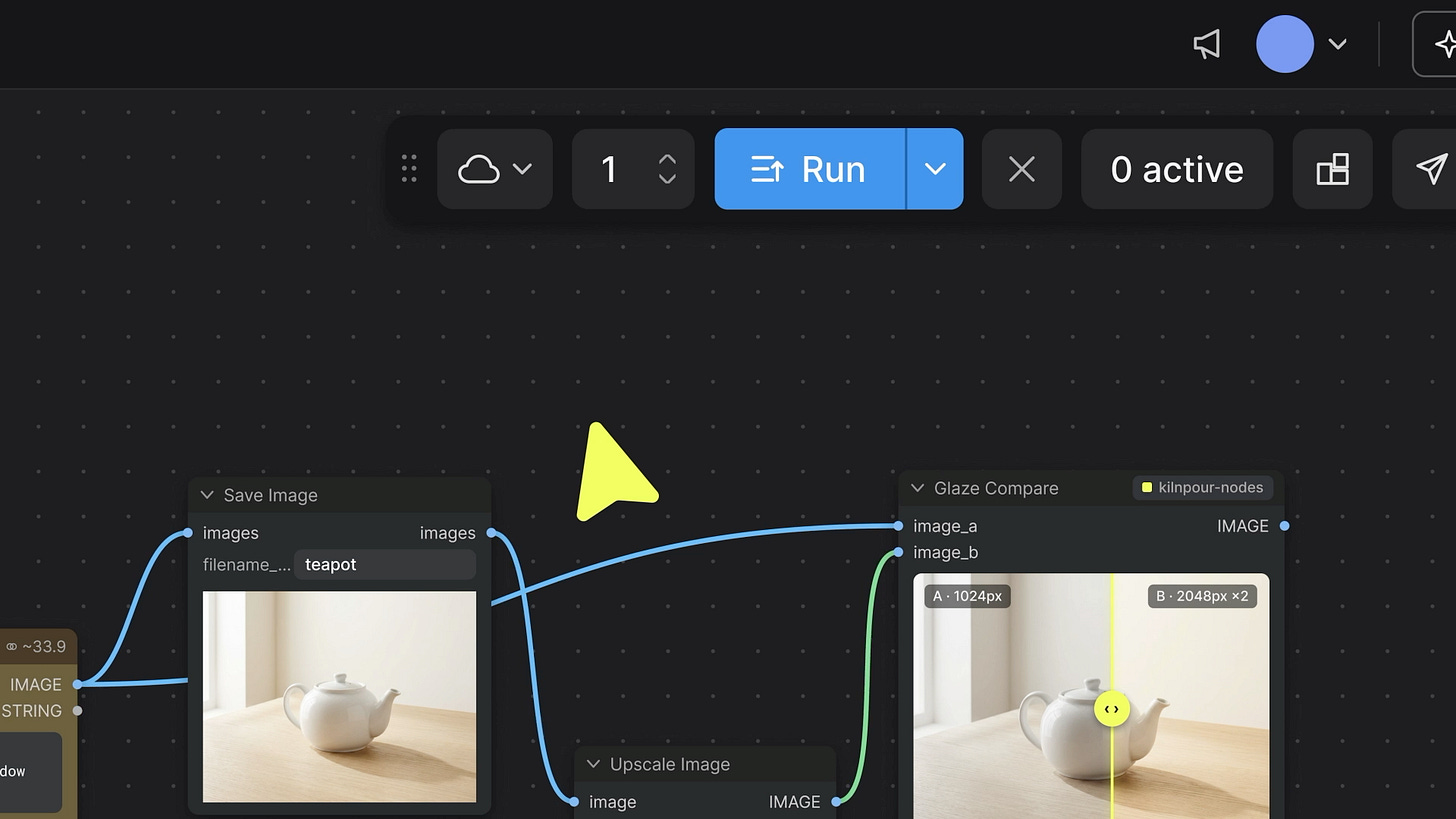
A Build is selected in the editor, and the whole team works on it in the normal ComfyUI canvas.
What a Build holds
| Part | What happens |
|---|---|
| Custom nodes | Taken from your workflow. Private and internal packs are allowed; check the supported nodes list first, since complex packs can need troubleshooting. |
| Models and LoRAs | Included in the Build, or left out and downloaded the first time a job uses them. |
| Python dependencies | Resolved by the builder, which flags conflicts before you publish. |
Publishing turns the Build into a numbered version, and the serverless build usually finishes in 10 to 15 minutes.
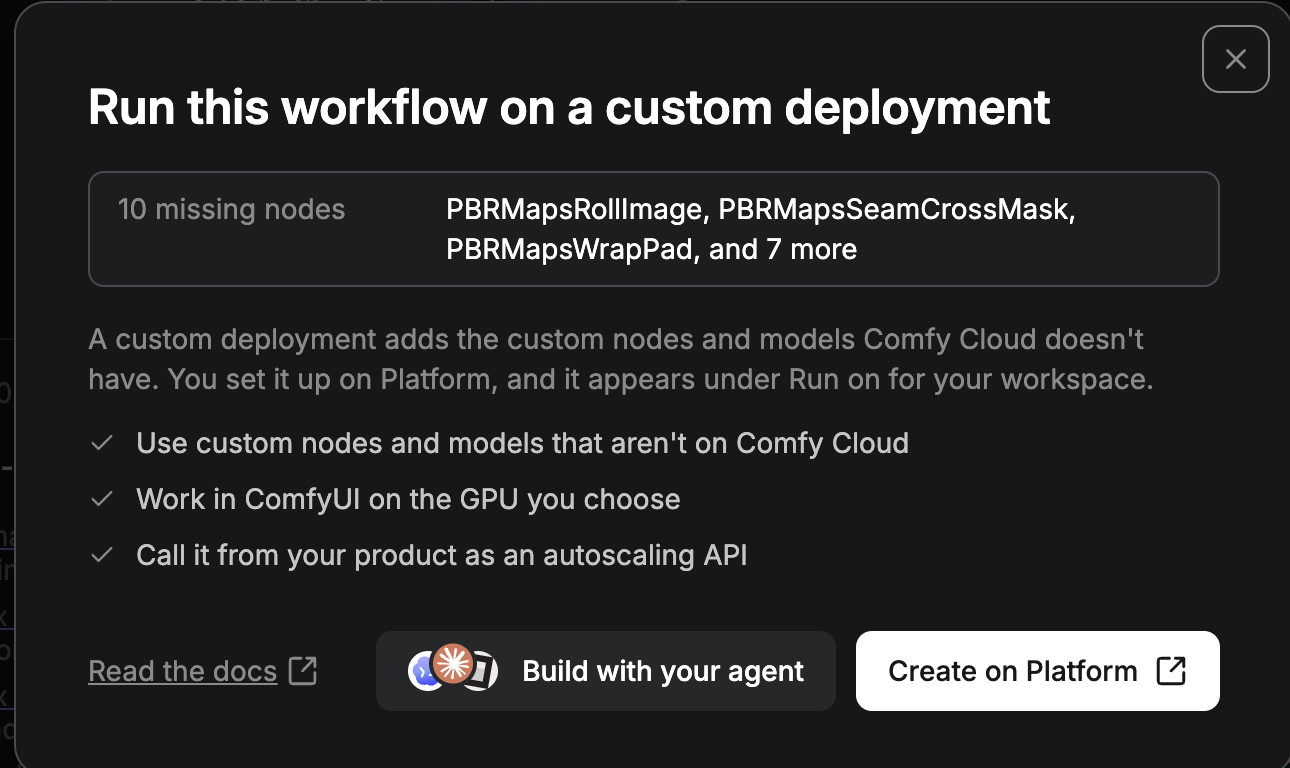
When a workflow needs packs Comfy Cloud does not have, the editor lists them and links to the Build flow.
Set it up once
.json or a .png made with it. Use Build with defaults, or customise which nodes and models ship inside.
3. Click Publish and wait for the serverless build to finish.
4. Click Deploy, pick a GPU after checking the per-hour price in the dialog, then Create deployment.
5. In the editor, open the cloud menu next to Run and select the deployment. It stays selected for that browser until you switch back to Comfy Cloud.
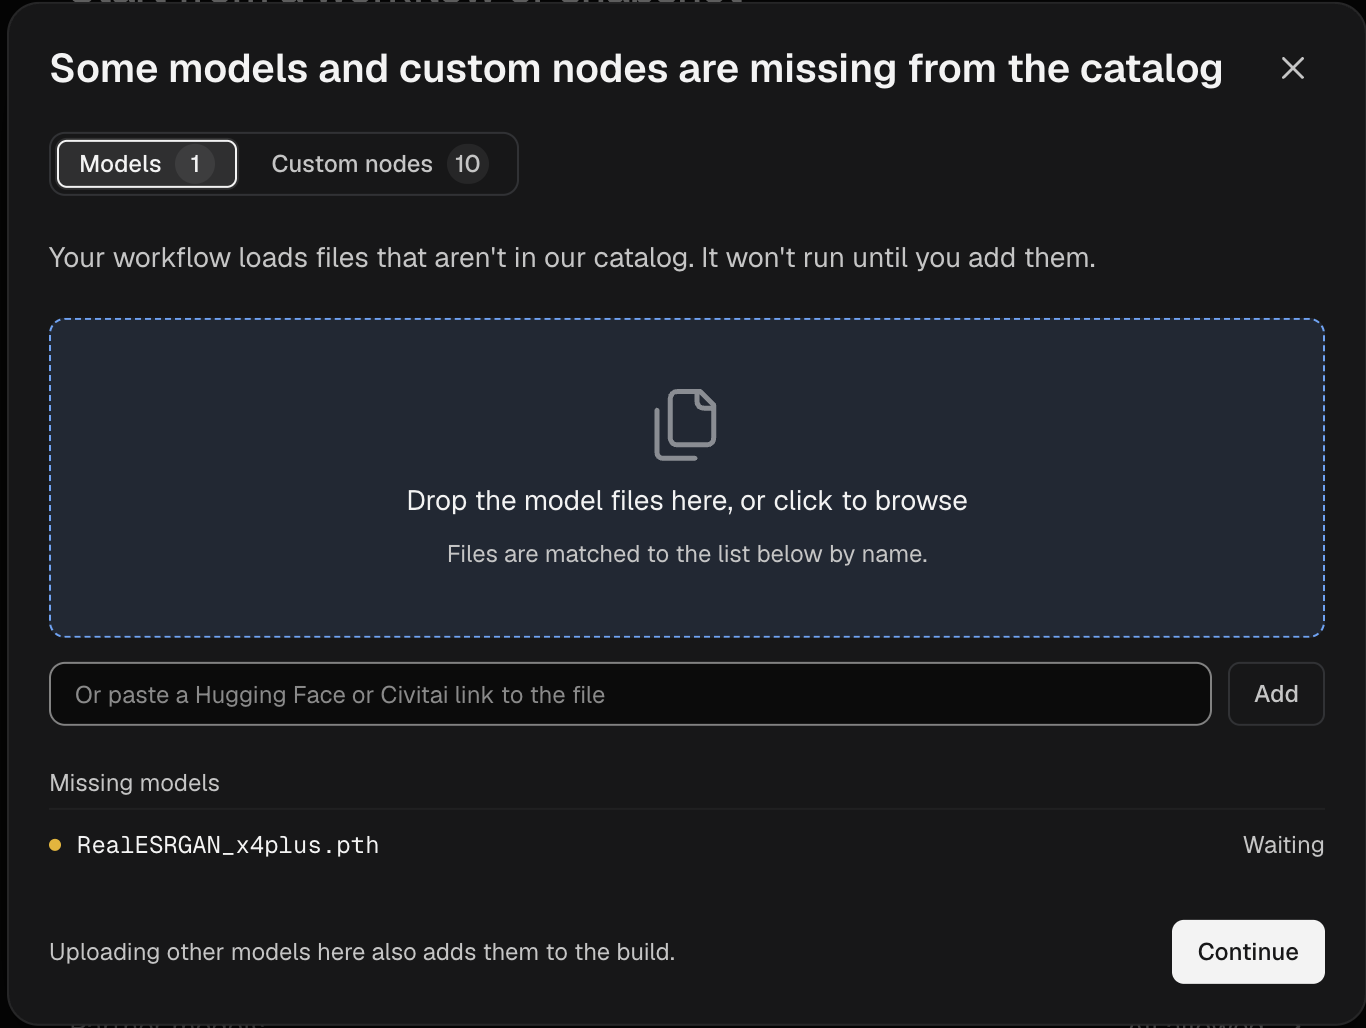
The builder reads the workflow and preselects the custom nodes it needs.
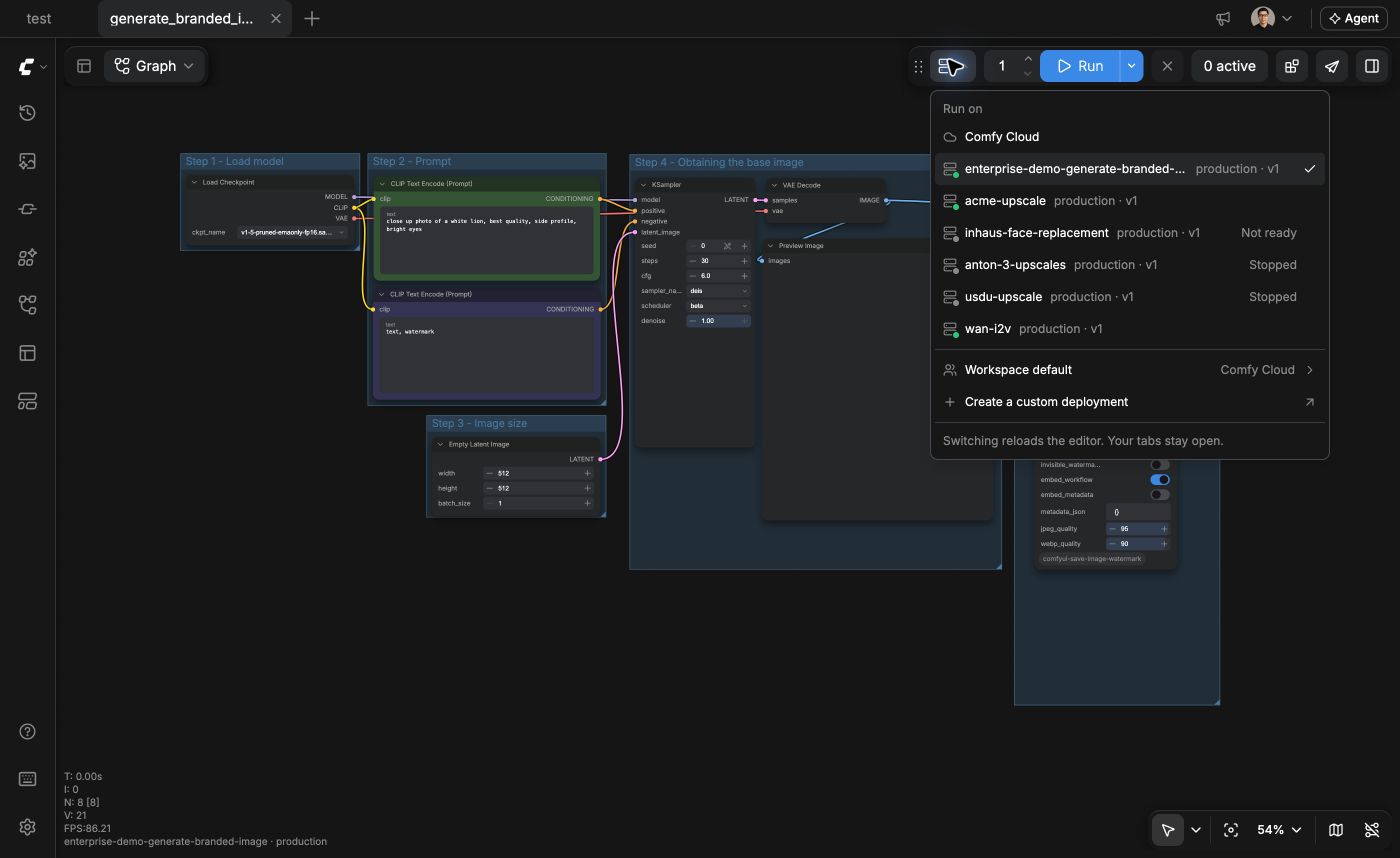
Once the deployment is ready, the Run menu switches the tab between Comfy Cloud and your Build.
Cost and the LoRA shortcut
Creating, publishing and keeping a Build costs nothing. A deployment bills GPU time while its workers are on, plus storage for as long as the deployment exists. Keep-alive is 3 minutes after the last job by default and is billed at the GPU rate, so delete the deployment when the work is done.
If the workflow only needs your own LoRA or a single model and Comfy Cloud already has the loader node, you do not need a Build: upload the .safetensors file (2 GB or less) to the Model Library and pick it in lora_name. That upload needs a Pro, Creator, Team or Enterprise plan, and larger base models belong in the Build. Deployments created before the Model Library existed cannot load these uploads, so make a new deployment for them.
Availability
Custom Builds work on every paid plan from launch. The standard Comfy Cloud setup stays one click away in the same editor.
Comments
Sign in with GitHub to join the discussion.