MiniMax H3 X2 Detail VAE: A 2-in-1 Upscale and Detail Release
An experimental 2-in-1 release for MiniMax H3: a 2X video VAE plus a reference detail-enhancement node, with a tested ComfyUI workflow and a negative-result writeup.
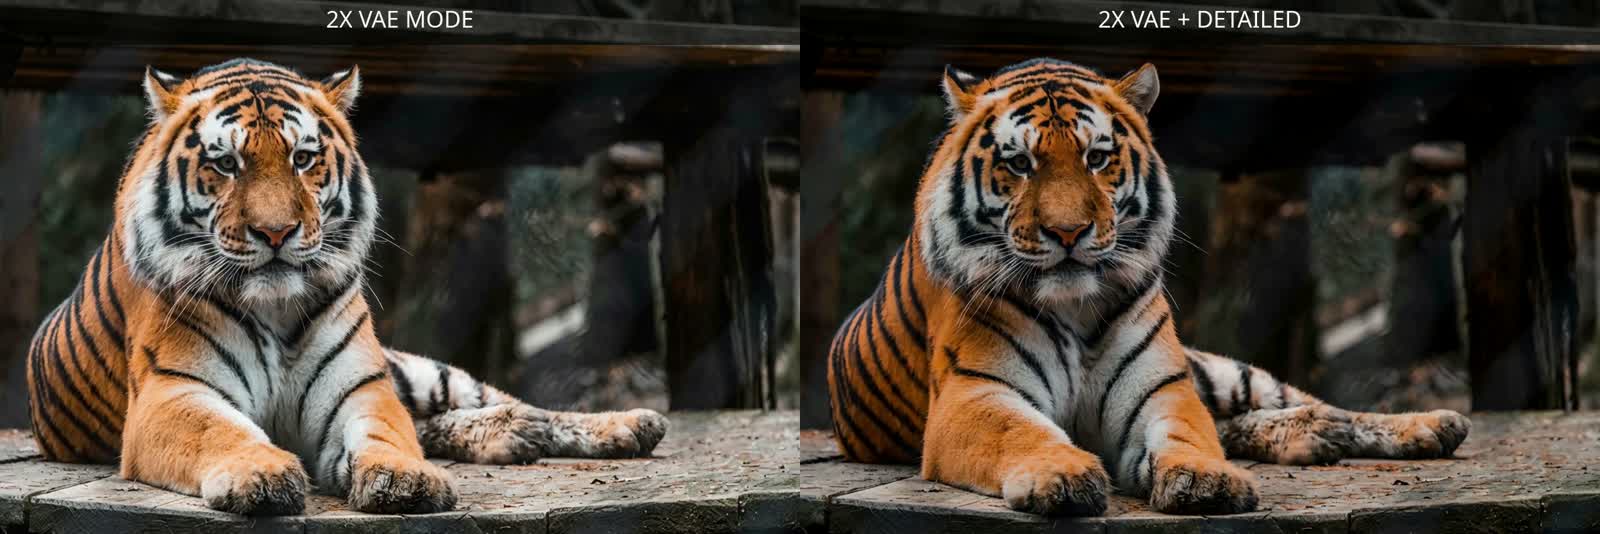
Frames from the release's comparison clip: plain 2X VAE decode on one side, the same latent with the detail-enhancement path on the other.
Two tools in one file
Most H3 VAE work on the wiki has been about making decode faster. This release goes the other way and asks whether decode can be made sharper, and it ships whatever survived that search. The same checkpoint, MiniMax-H3-X2-Detail-v1.safetensors, is used in two separate ways:
| Mode | Input | What it does | Needs the custom node |
|---|---|---|---|
| 2X VAE | H3 video latent | Decodes at twice the spatial resolution through a packed 12-channel output plus PixelShuffle | Yes, for the fast decode node only |
| Detail enhancer | RGB reference image | Rebuilds extra spatial structure from an early encoder tap before reference-to-video | Yes, included with the release |
The two modes are not interchangeable. The 2X path works on a generated latent and needs no reference image. The detail path needs an existing RGB image, because the extra information it uses is pulled from the H3 encoder before the normal latent bottleneck.
Mode 1: 2X VAE decode
Put the checkpoint in ComfyUI/models/vae/ and select it in the standard Load VAE node. For the actual decode, replace ComfyUI's normal VAE Decode node with MiniMax H3 VAE Decode (fast) from TripleHeadedMonkey/ComfyUI-MiniMaxH3_LatentUpscaler, which is what turns the packed output into full-resolution RGB.
H3 video latent
   ↓
MiniMax H3 VAE Decode (fast)   ← MiniMax-H3-X2-Detail-v1
   ↓
packed 12-channel X2 decode
   ↓
PixelShuffle ×2
   ↓
2X RGB / video frames
The workflow ships with a validated starting configuration: tiling = true, tile_size = 256, tile_overlap = 64, output_device = cpu, temporal_tiling = false.
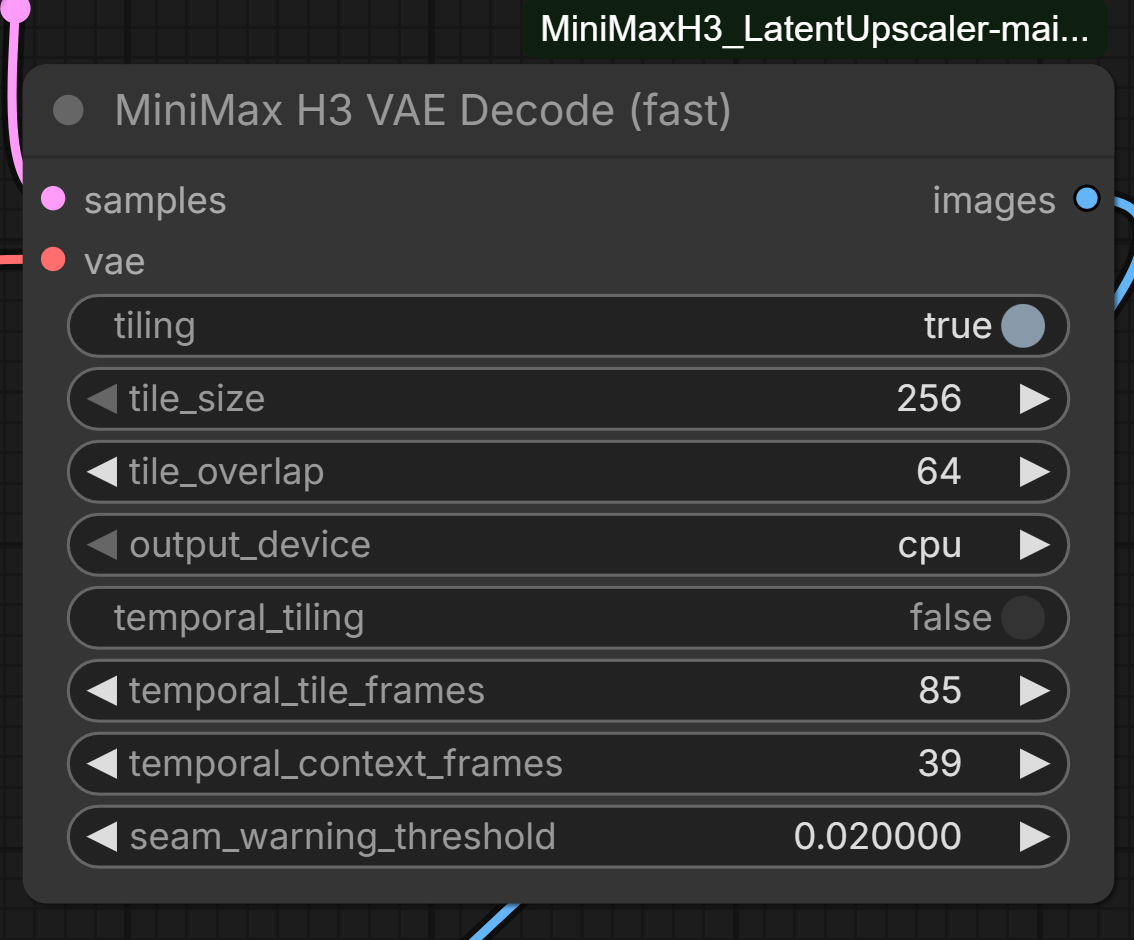
The required MiniMax H3 VAE Decode (fast) node, shown in the release's README.
Mode 2: reference detail enhancement
For image-reference workflows the same checkpoint is loaded a second time inside MiniMax H3 VAE 2X (Detailed Upscale), a small custom node bundled as ComfyUI-H3-X2-Detailed.zip. It sits between the source image and MiniMax H3 Reference to Video, and detail_strength = 1.0 is the tested baseline. Final video decode still runs through MiniMax H3 VAE Decode (fast) with the same X2 VAE.
The example workflow
The release includes a 2-in-1 graph that demonstrates both roles at once: the detail node enhances the RGB reference before reference-to-video, and the generated H3 latent is decoded through MiniMax H3 VAE Decode (fast) at the end.
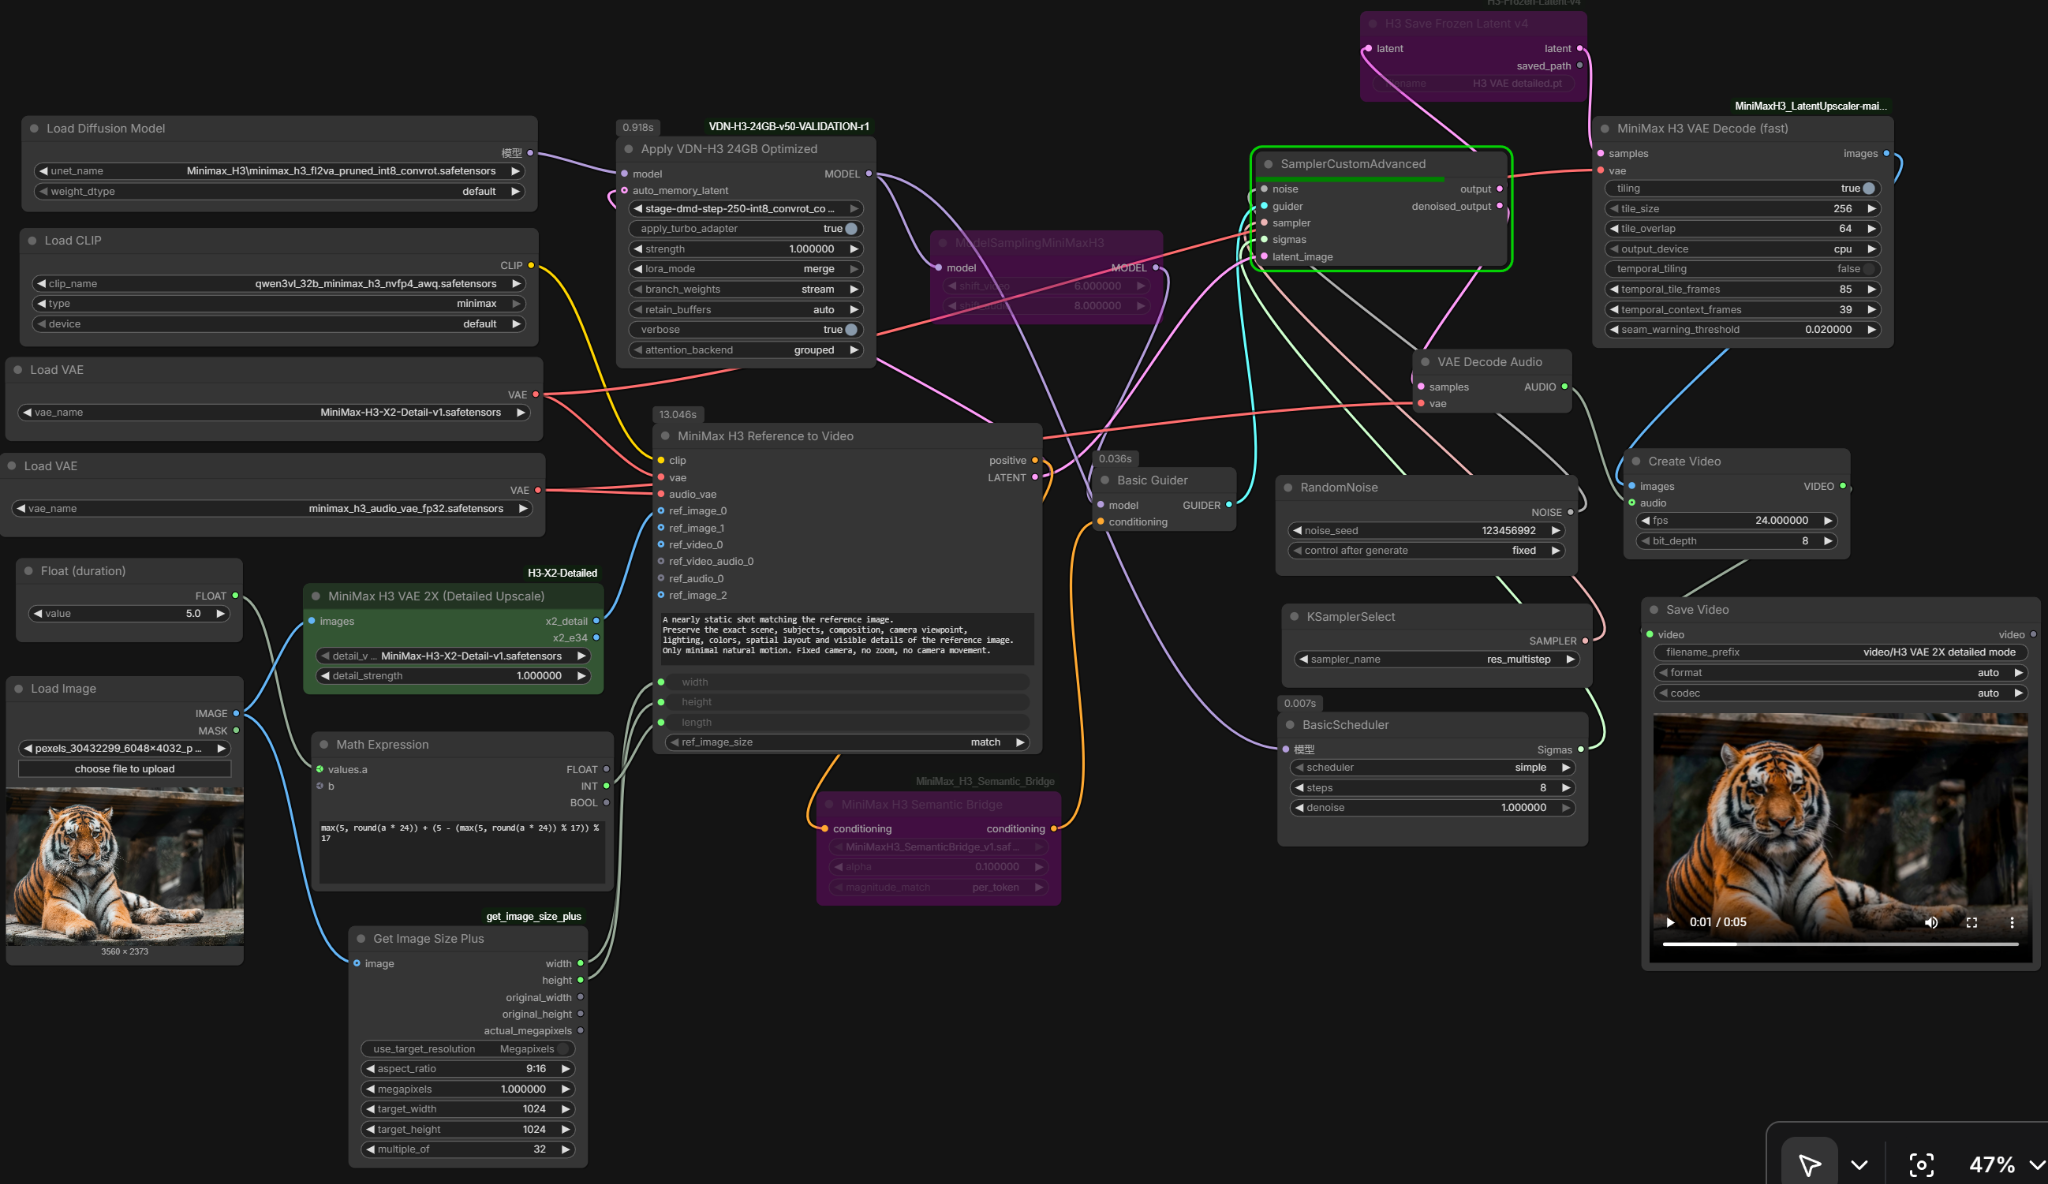
The complete 2-in-1 workflow screenshot from the model card.
Head to head
Both of the clips below run the same model in its two released modes with matched generation settings: the left side is the 2X VAE on its own, the right side is 2X VAE plus the detailed path, where the reference is first processed through the B32 detail branch.
Comparison 01: 2X VAE decode versus 2X VAE with the detail-enhancement path.
Comparison 02: the same two modes on a second clip.
Why there is no "HQ VAE"
The writeup is unusually blunt about the result. The starting point was an already working H3 2X VAE whose larger output did not carry proportionally more real detail, so the project set out to make the extra pixels mean something. Decoder-side blocks, detail-target losses, latent "detail directions" and stronger progressive decoders all failed, and several of them improved a numeric loss while producing edge halos, engraving-like structure or nothing visible at all.
The one branch that clearly worked pulled a compact 32-channel representation from down.1.block.1 of the frozen H3 encoder, and it improved RMSE, HP3 and gradient metrics on all ten holdout frames. It also came from the original RGB image before the latent bottleneck, which is exactly the information that does not exist when H3 generates a fresh latent during text-to-video. The author's conclusion is narrow and stated plainly: the detail gain cannot be reproduced from the standard generated H3 latent alone, so it could not become the drop-in latent-only VAE the project was aiming for. What is left is an experimental 2-in-1 tool, not a solved bottleneck.
Requirements and files
MiniMax-H3-X2-Detail-v1.safetensors, the 5.2 GB checkpoint, goes inComfyUI/models/vae/.- ComfyUI-MiniMaxH3_LatentUpscaler provides
MiniMax H3 VAE Decode (fast)and is required for the 2X workflow. ComfyUI-H3-X2-Detailed.zipadds the optionalMiniMax H3 VAE 2X (Detailed Upscale)node for the reference path.H3_VAE_Detailed_and_2X_VAE_2in1.jsonis the example workflow.
Availability
Weights and assets: speach1sdef178/MiniMax-H3-X2-Detail-VAE
ComfyUI file: MiniMax-H3-X2-Detail-v1.safetensors in models/vae/
Required node pack: TripleHeadedMonkey/ComfyUI-MiniMaxH3_LatentUpscaler
Base model: MiniMaxAI/MiniMax-H3
Comments
Sign in with GitHub to join the discussion.